X-Rite i1iO 1st & 2nd gen.
i1iO 1st gen.
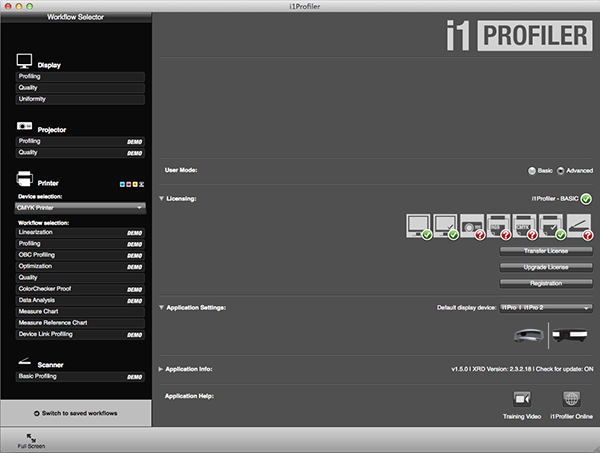
![]() Launch X-Rite™ i1Profiler software. This software can be used in demo mode for data capture.
Launch X-Rite™ i1Profiler software. This software can be used in demo mode for data capture.
Download this software free from X-Rite web site: www.xrite.com
Switch software from Basic to Advanced mode.
![]() Connect your instrument to the computer.
Connect your instrument to the computer.
![]() In Workflow Selector menu select "Measure Chart" in CMYK Printer section.
In Workflow Selector menu select "Measure Chart" in CMYK Printer section.
![]() Select your instrument (Device setup)
Select your instrument (Device setup)
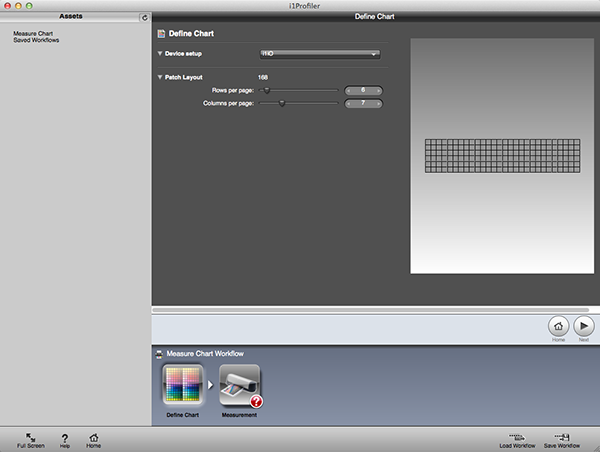
![]() Define Patch Layout as follows:
Define Patch Layout as follows:
Rows per page: 6
Columns per page: 7
.png)
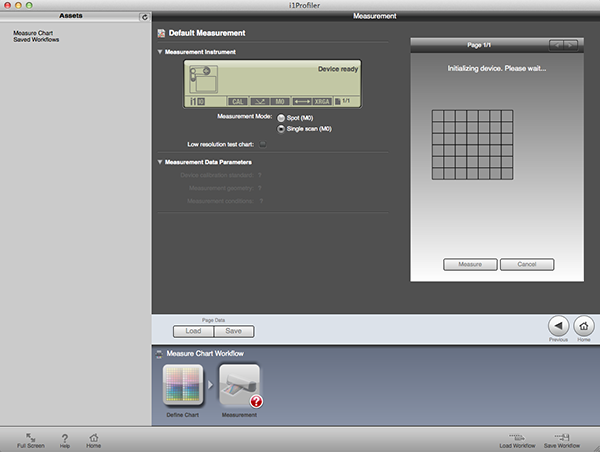
![]() Set measurement Mode to single scan
Set measurement Mode to single scan
![]() Position the Target on the electrostatic surface, such that that does not exceed the black markings. Be sure that height adjustment of the arm is correct.
Position the Target on the electrostatic surface, such that that does not exceed the black markings. Be sure that height adjustment of the arm is correct.
![]() The alignment of the Target on the i1iO table is irrelevant, as any position is compensated by the software.
The alignment of the Target on the i1iO table is irrelevant, as any position is compensated by the software.
![]() Mount instrument on the base plate of i1iO, next press "Measure" button).
Mount instrument on the base plate of i1iO, next press "Measure" button).
![]() Remember to clean white reference (integrated with i1iO table) before measurements. Be sure that instrument is not very cold or hot (store it in its recommended temperature). Check if optical patch is free of artefacts and dust. Carefully clean glass if necessary. Proper calibration process has very strong influence on measurement results.
Remember to clean white reference (integrated with i1iO table) before measurements. Be sure that instrument is not very cold or hot (store it in its recommended temperature). Check if optical patch is free of artefacts and dust. Carefully clean glass if necessary. Proper calibration process has very strong influence on measurement results.
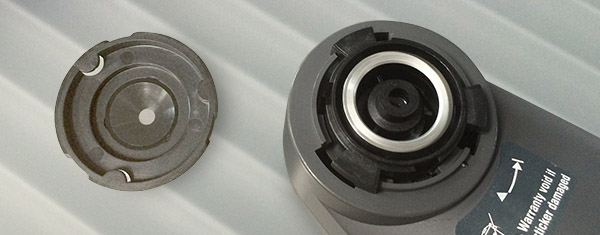
![]() Check also glider ring - it must be replaced periodically. Make sure that the glider ring touches the Target all times during the scan.
Check also glider ring - it must be replaced periodically. Make sure that the glider ring touches the Target all times during the scan.
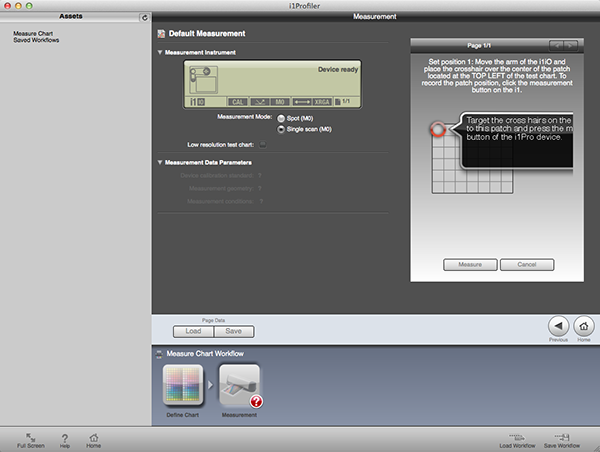
![]() Set position of three Target's corners:
Set position of three Target's corners:
position 1 – B
position 2 – G
position 3 – R 
a. Place the crosshair over the center oth the BLUE patch, next click measurements button on i1 Pro to record position 1.
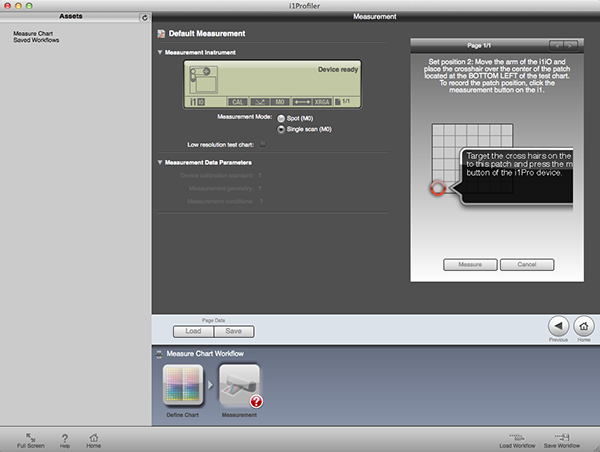
b. Place the crosshair over the center oth the GREEN patch, next click measurements button on i1 Pro to record position 2.
C. Place the crosshair over the center oth the RED patch, next click measurements button on i1 Pro to record position 3.
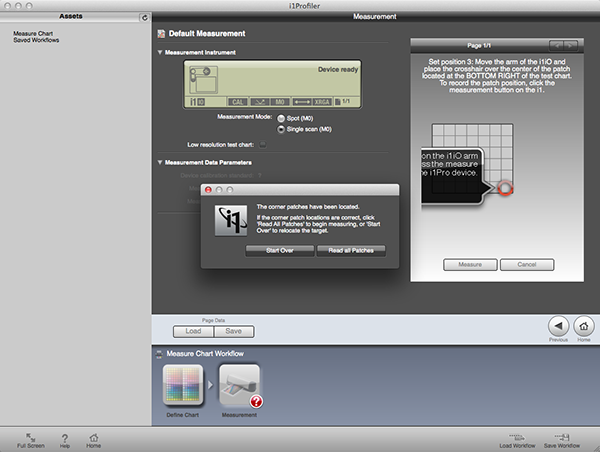
Next click: "Read all Patches"

Displayed on screen patch layout shows ChromaChecker Target rotated 90° clockwise.
![]() Watch the video to learn how fast is positioning and scanning procedure (single scan mode).
Watch the video to learn how fast is positioning and scanning procedure (single scan mode).
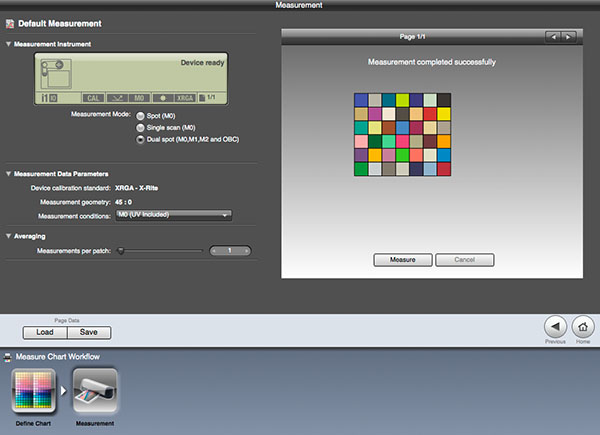
![]() When measurement completed successfully save CxF file on your hard drive. Your data are ready for upload. Use naming convention with target serial number.
When measurement completed successfully save CxF file on your hard drive. Your data are ready for upload. Use naming convention with target serial number.
.png)
![]() Upload data to your ChromaChecker account.
Upload data to your ChromaChecker account.
![]() TIPS:
TIPS:
- We recommend warming-up instrument before – simply first time do measurement without saving data.
- For a Baseline creation with the first generation of i1iO we recommend single scan mode - repeating this e.g. 10 times we can observe the difference between consecutive measurements. However, for routine instrument examination spot mode with averaging option set to 4 or 5 can be more convenient. It is true that this option requires a significantly longer operation time, but the operator does not have to keep an eye on the device.
i1iO 2nd gen.
Whole procedure for 2nd generation of i1iO is quite similar to 1st one.
However working with i1Pro 2 makes possible to capture data with M0, M1and M2 measurement condition. This feature is available only in Dual Spot mode and is strongly recommended for this device. CxF file format is capable to contain all captured data in a single file.
Select Dual spot (M0,M1,M2 and OBC) mode (Measurement Data Parameters menu)
![]() Watch the video to learn how time consuming is positioning and scanning procedure in the Dual Spot scan mode with Averaging set to 5 (i1iO 2nd gen.)
Watch the video to learn how time consuming is positioning and scanning procedure in the Dual Spot scan mode with Averaging set to 5 (i1iO 2nd gen.)
![]() TIP for i1iO 2nd gen only:
TIP for i1iO 2nd gen only:
For a Baseline creation we recommend Dual Spot mode with 1 measurement per patch. Repeating this e.g. 10 times we can observe the difference between consecutive measurements. For routine instrument examination spot mode with averaging option set to 4 or 5 will be more convenient.
Instrument Inspector Manual
To use Instrument Inspector one of ChromaChecker™ Instrument Inspector
Targets is required. To buy visit to IDEAlliance
![]()
Instrument Inspector – How does it work?
Why use Instrument Inspector?
Instrument Inspector Target
Baselines and data averaging
How to start-up?
Instrument Inspector menus - how to navigate?
Easy mode / Expert mode
Data sharing
Instrument's comparison
Instrument’s compatibility list
General rules
FAQ
Tricks and Tips
![]()
Supported Instruments – manuals
X-Rite i1 Pro 1
X-Ritei1 Pro 2
X-Rite i1iO
X-Rite iSis
X-Rite DTP-70
X-Rite Intelitrax
X-Rite eXact – manual mode
X-Rite eXact – scan mode
X-Rite 530
X-Rite 939
X-Rite SpectroEye & other from X-Rite
Techkon Instruments
Barbieri instruments
