How to create CXF-X4 Color Library (predict tints and overprints for any spot colors)
1. Create CXF-X4 print reference sample on selected substrate
When characterizing your spot colors, you will want to image the color on the desired substrate to understand the color reproduction characteristics. This can be done by asking your ink vendor to use an IGT Tester to print your spot configured CXF file, or by imaging the CXF file on the press using the desired ink and substrate combination in multiple locations on page ideally inter mixed with live work.
Depending on your needs you may create Solid-only References or Halftone CxF advanced color definition (use the halftone CxF file if tints and overprint color values are important).
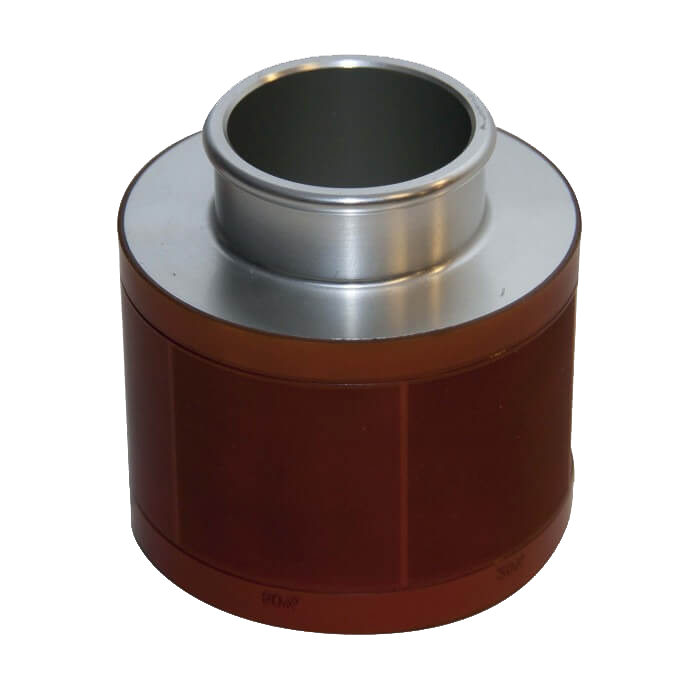
Halftone Printing Discs - a key to controlled spot tints.
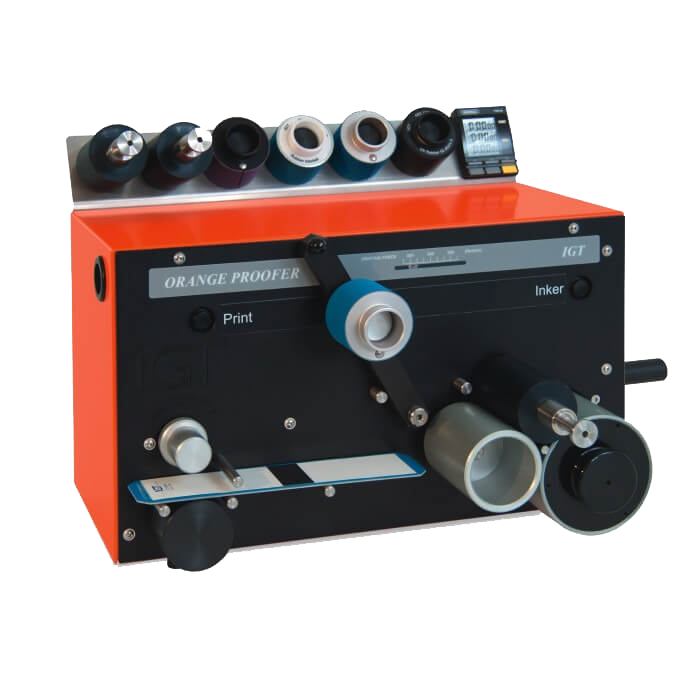
To print halftones, there is a wide choice in special discs with a screened photopolymer 40-70 l/cm. These discs can be used on all types of C1, Orange Proofer, AIC2-5T2000, Global Standard tester 2 and 3H, and on all Amsterdam testers. Printing width: 35 for C1 testers or 50 mm for the other testers as mentioned above.
Common disks:
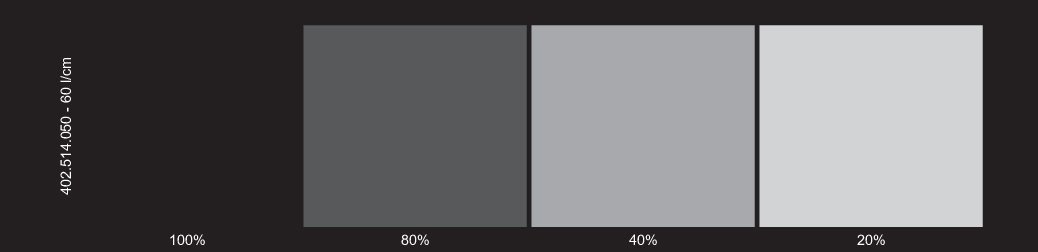
- 402.514 — 60 l/cm 20, 40 , 80, 100% fields, 50 mm
- 402.515 — 70 l/cm 20, 40 , 80, 100% fields, 50 mm
- ...
- 402.524 — 60 l/cm 25, 50 , 75, 100% fields, 50 mm
- 402.525 — 70 l/cm 25, 50 , 75, 100% fields, 50 mm
CxF/X-4 fully compatible discs
IGT offers a few CxF compatible disks with 0-10-20-30-40-50-60-70-80-90-100 halftone patches
Compatible testers: Amsterdam 1, Amsterdam 2, Amsterdam 2-Basic, Amsterdam 5, Amsterdam 6, Amsterdam H, Amsterdam H-Basic, Amsterdam P, Amsterdam P-Basic, Amsterdam W, Amsterdam W-Basic, C1, C1-5, GST-2, GST-3H, OP
Available options:
- 402.543 — 54 l/cm 2x11 fields, 50 mm
- 402.544 — 60 l/cm 2x11 fields, 50 mm
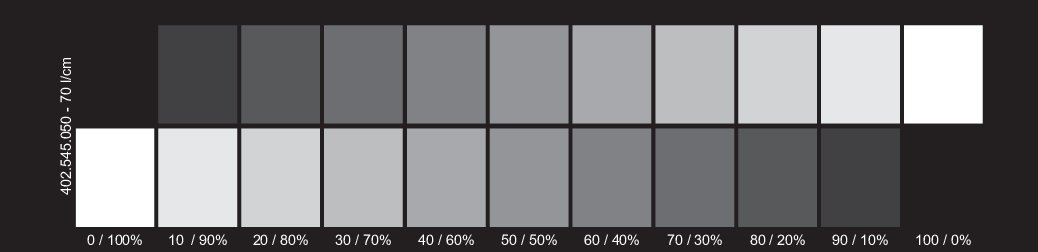
- 402.545 — 70 l/cm 2x11 fields, 50 mm
2. Visually examine your sample:
Be sure to check potential metamerism issues, check samples visually in all-important lighting conditions. Be sure that your Customer approves the samples. If you plan to use different substrates, image the CxF file on all of them. Image multiple times and learn about the colorants stability over time. Light fastening will change the physical printout - therefore spectral definition should be created as soon after printing as possible.
Note:
Different types of instruments can read samples differently. The best option is to create a parallel definition (measure with each instrument) for each type of instrument that can be involved in the production/QC chain.
3. Launch CC Capture, go to Color Inspector.
- Select the proper template in Color Inspector that corresponds to the IGT disc used.
- Be sure to use CC Measurement Backer that is important for all non 100% opaque substrates.
- Verify your Instrument with Instrument Inspector before measuring.
- Avoid touching colors on print, keep it clean.
In the following example CxF/x-4 full 11+11 template is selected:

The first row is for samples printed on the paper directly, the second row is for overprint on process black.
Contact ChromaChecker Support
Additional information and Support Form is available for logged users.