Chart Generator - How to generate CC84
Goal
This tutorial shows how to create a custom chart for LFP or any other Barbieri Electronic Instrument.
In this example, CC-84 3R will be used, but any custom CMYK-based control-strip can be used in the same way. Currently, Barbieri software doesn't allow to use of multi-space control strips (spots, RGB, Lab, and special patches mixed). This limitation is a subject of cooperation and in the future, we are planning to have full support.
Preparatory activities.
It is recommended to visit: https://www.barbierielectronic.com and download the most recent version of the Gateway Software. Barbieri supports both Mac and PC platforms. The application can be launched without an Instrument connected. Software is free.
In this guide, we assume that the user is able to use ready-made or create their own control strips.
Custom Chart
1. Export any existing CMYK-based control strip from Capture Inspector to CGATS file - in this case, it is the 3-row horizontal version of CC-84
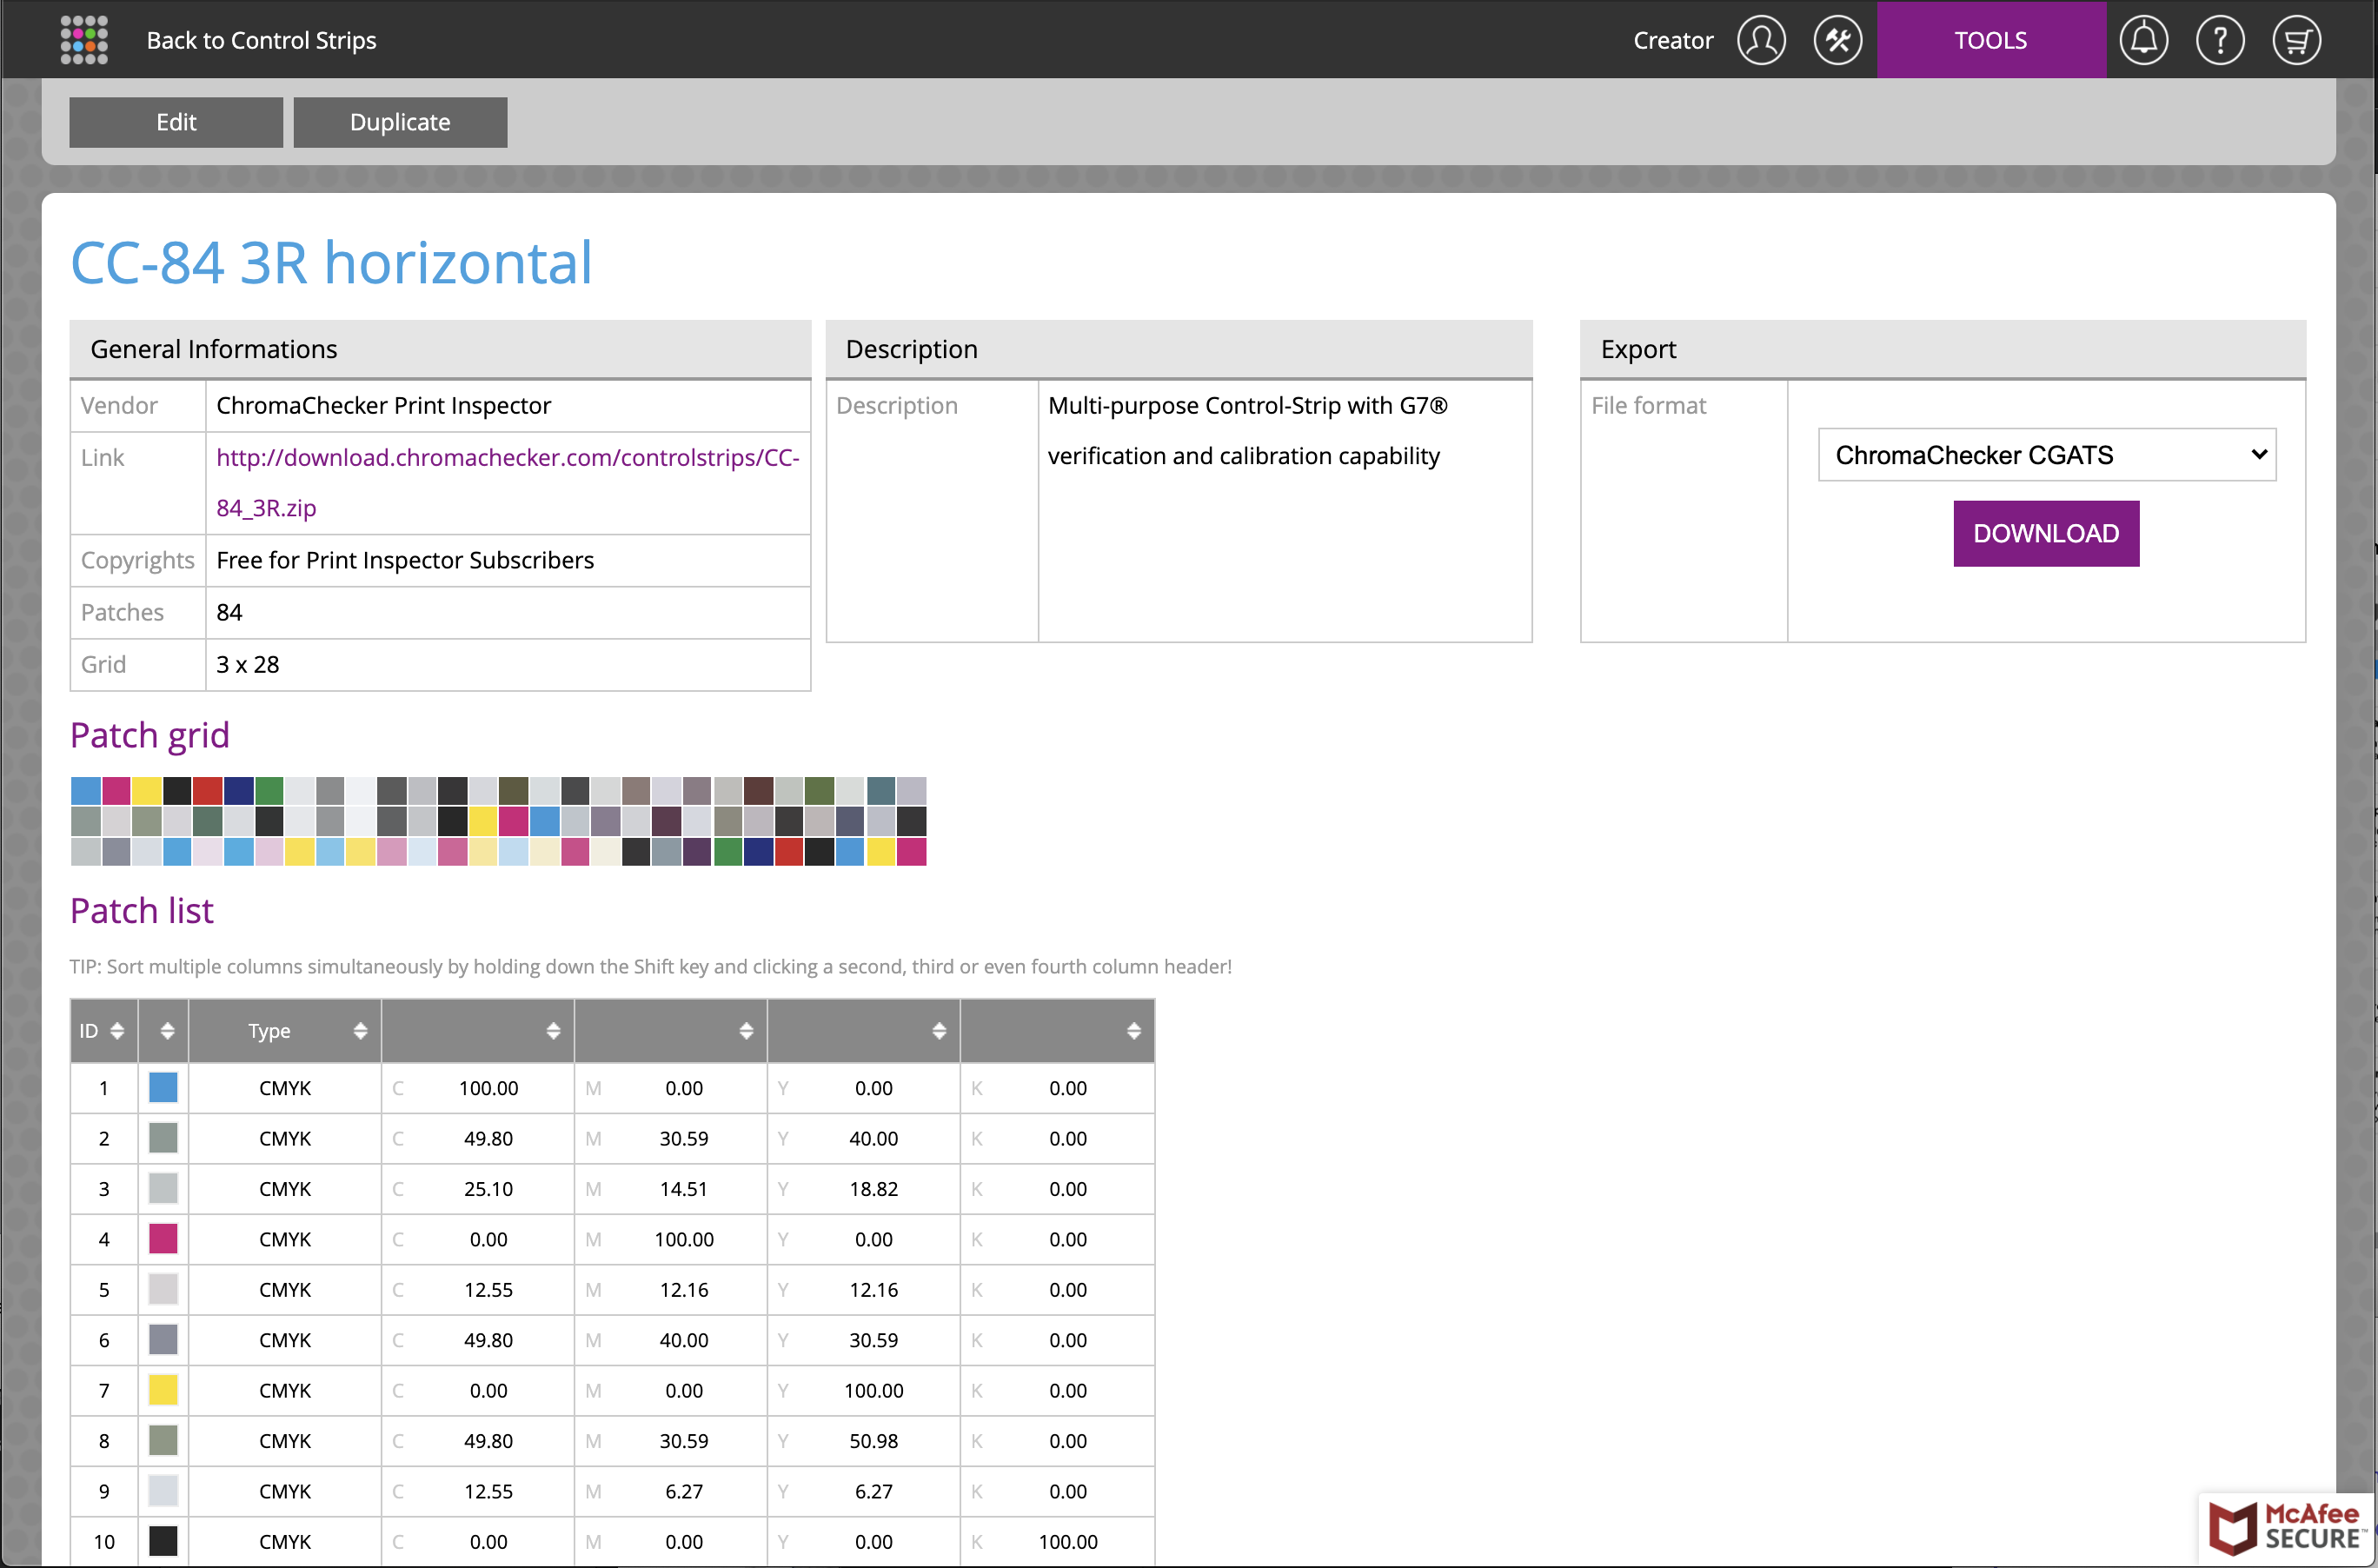
be sure to select a proper export format. Download file.
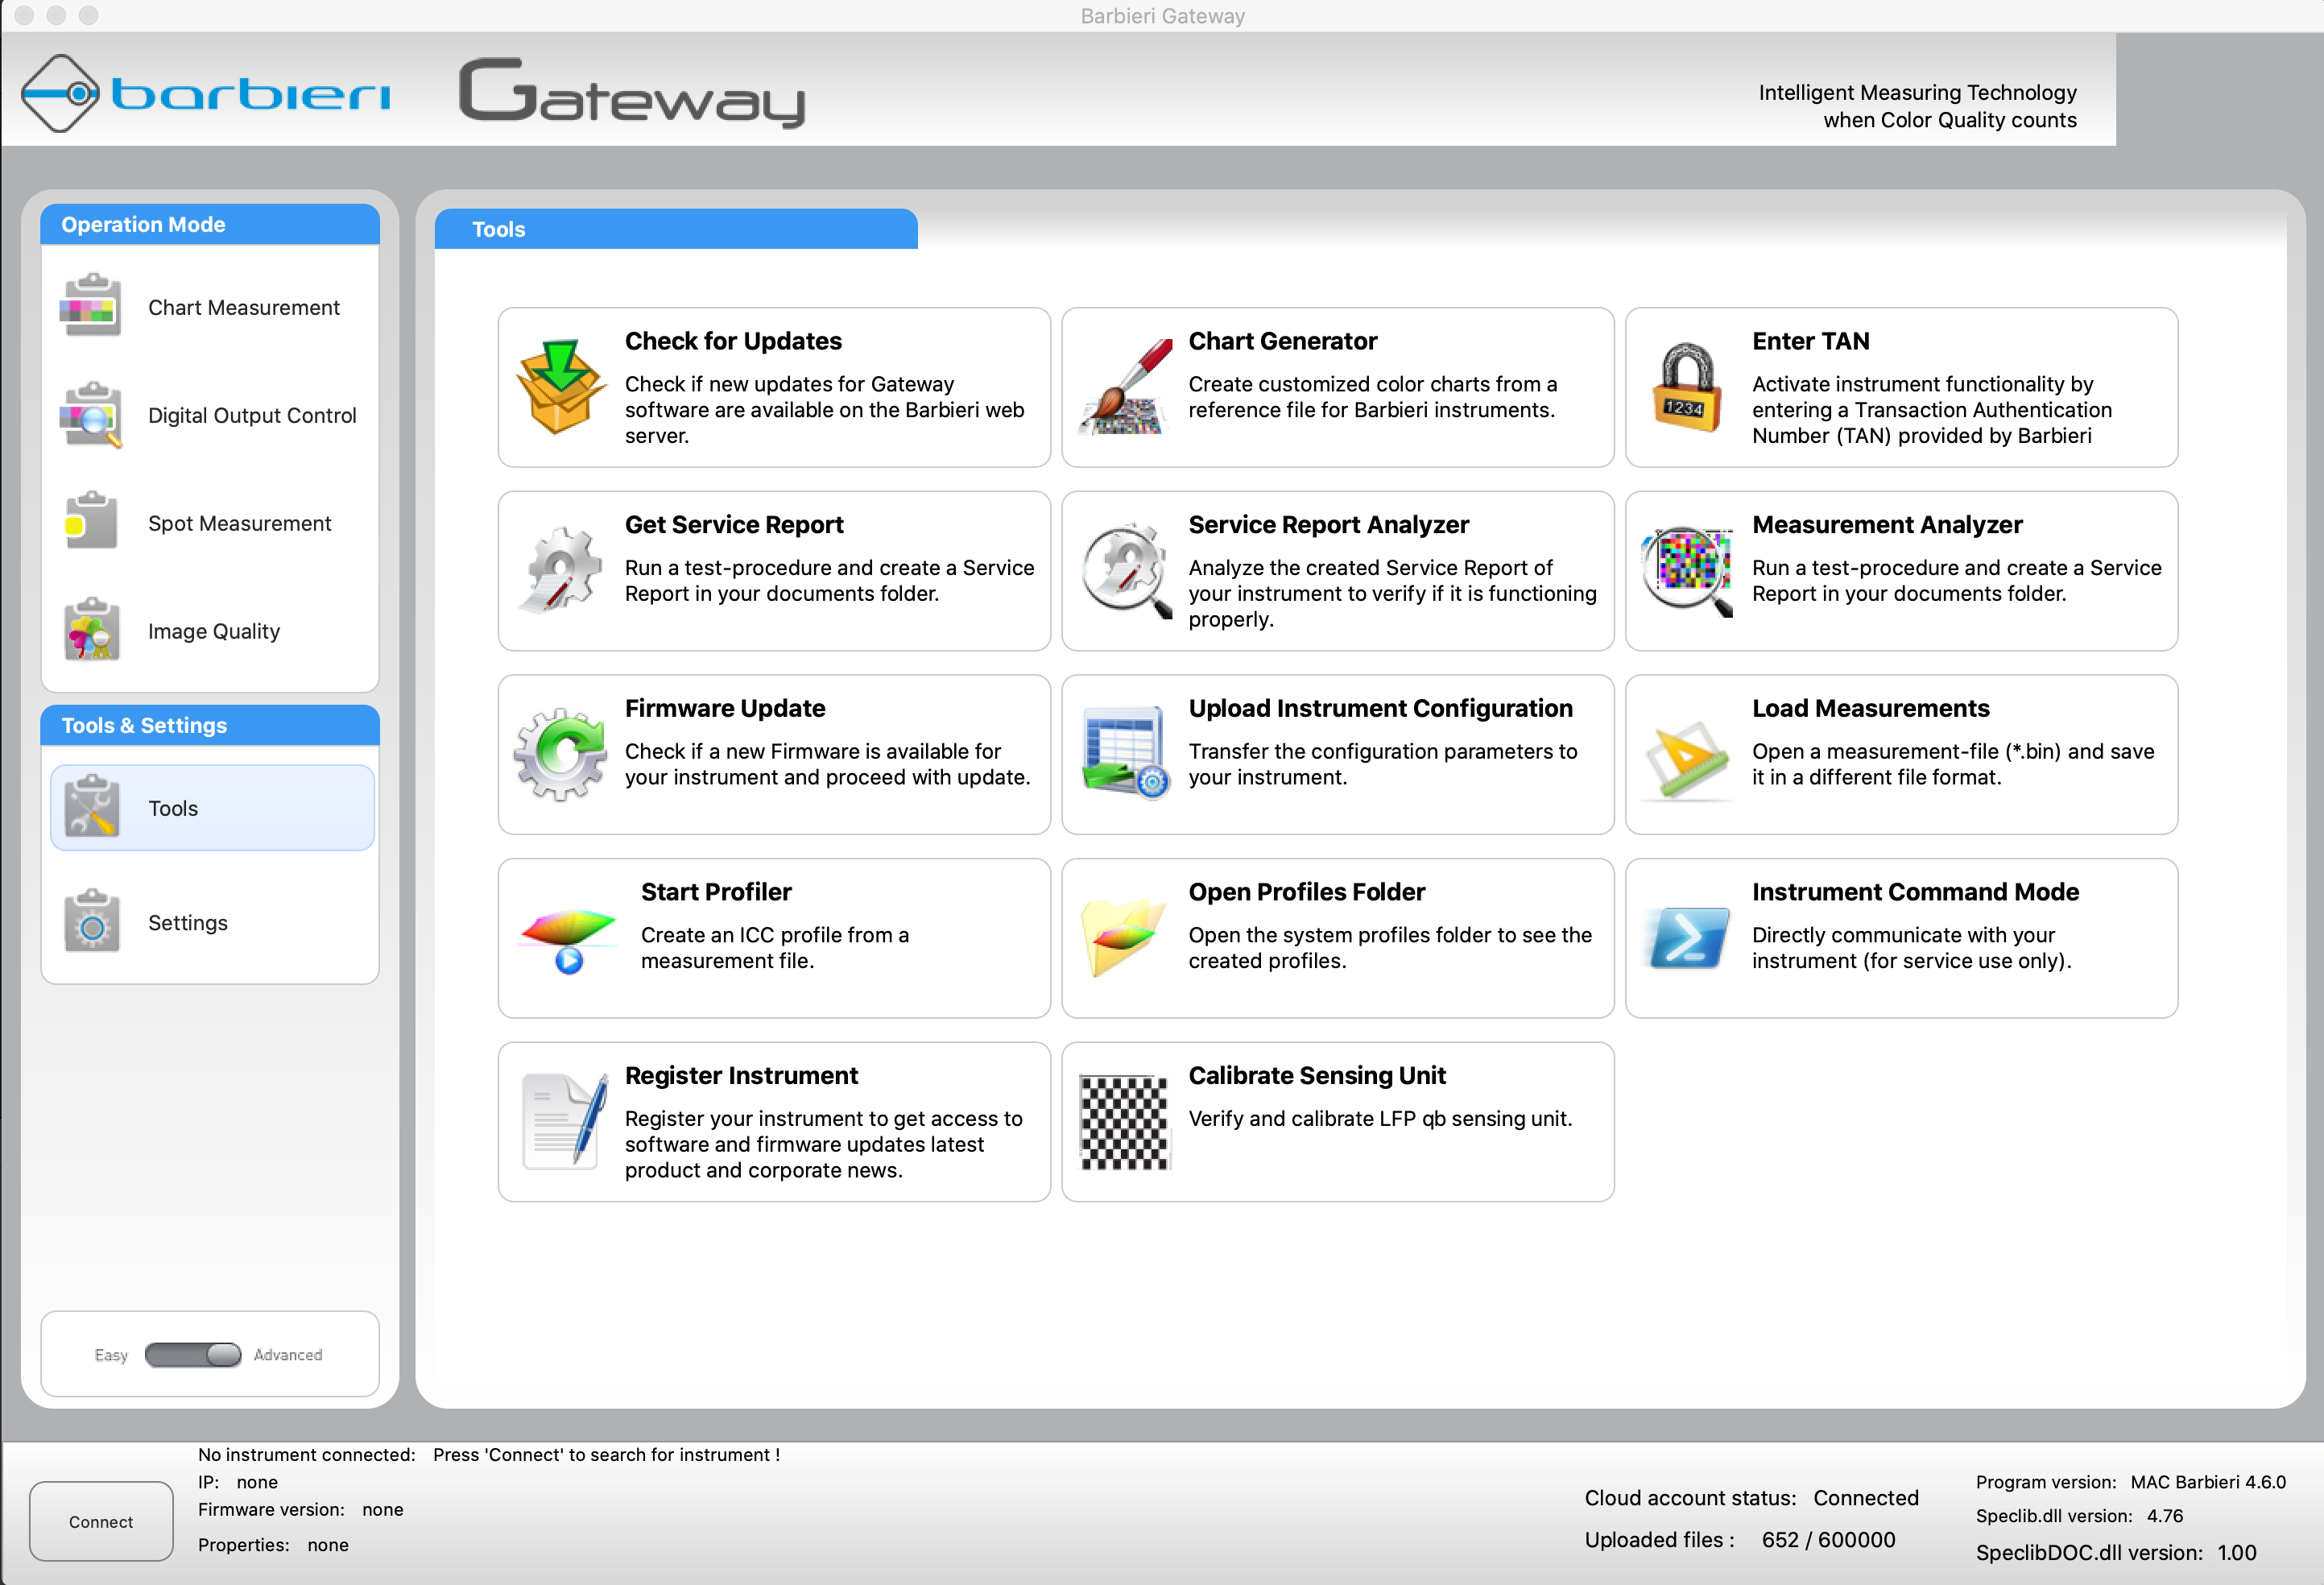
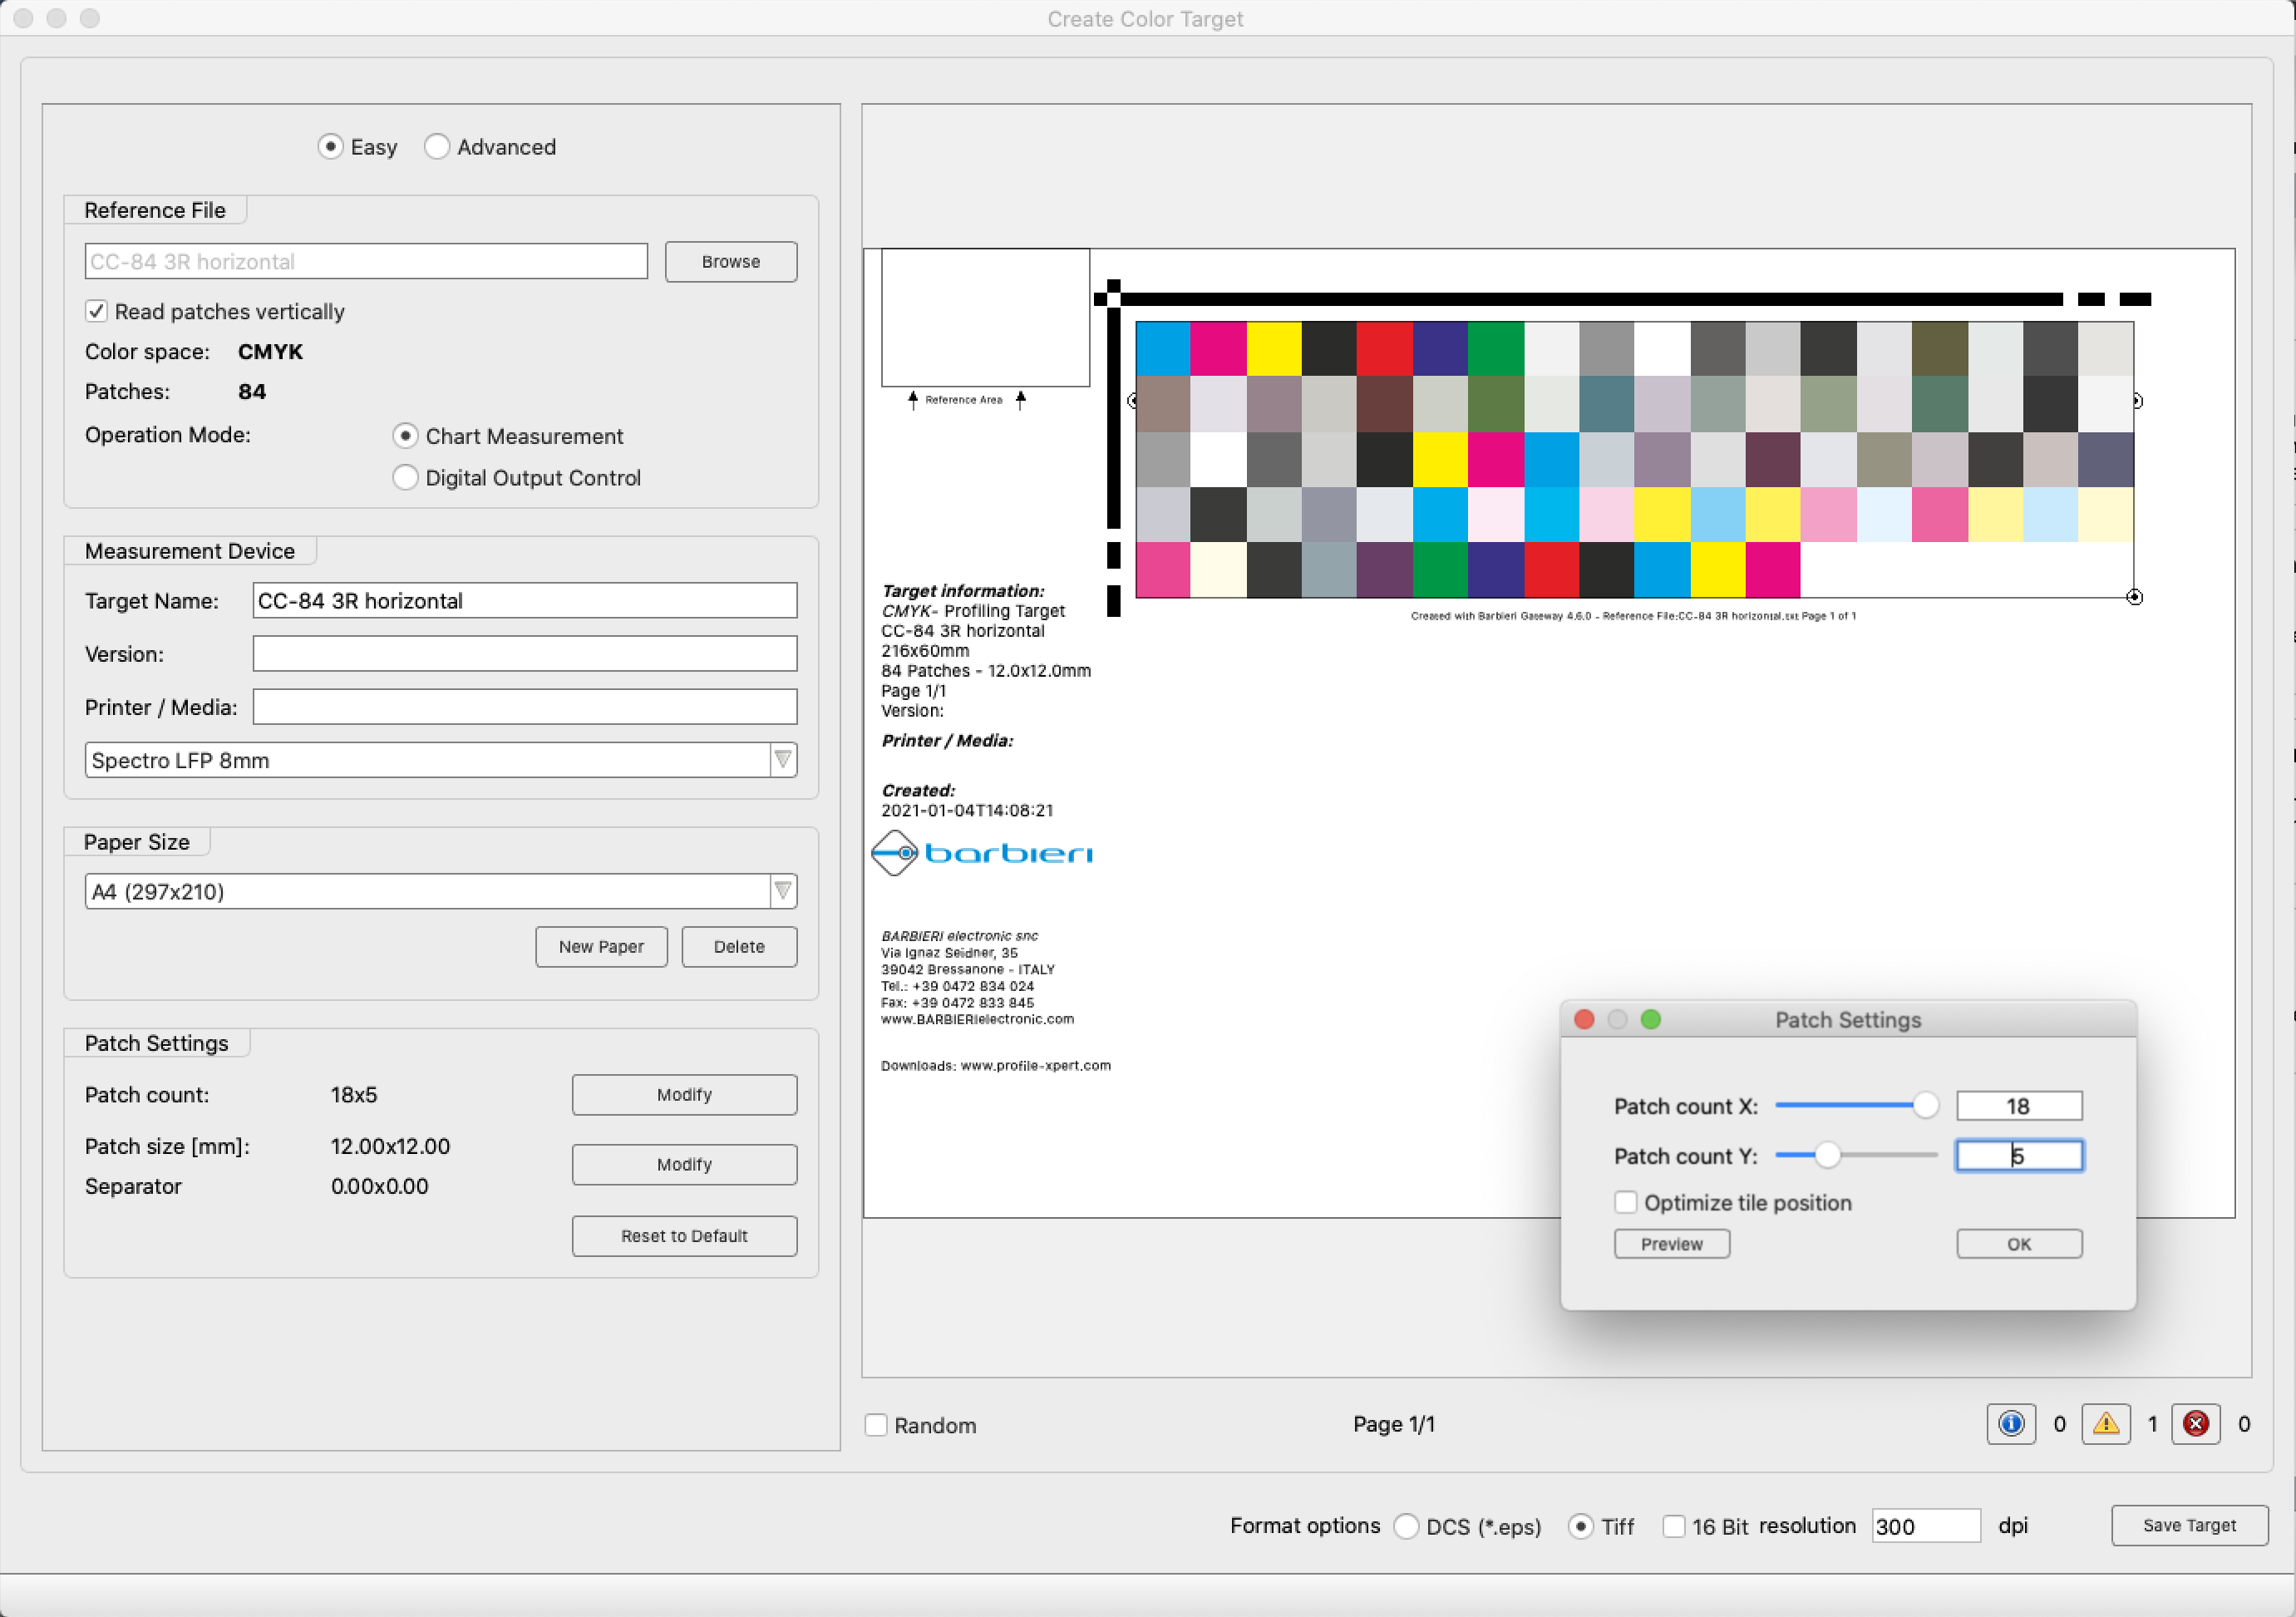
2. Launch Barbieri Gateway, select Tool / Chart Generator
3. In Chart Generator select CGATS file downloaded from ChromaChecker server.
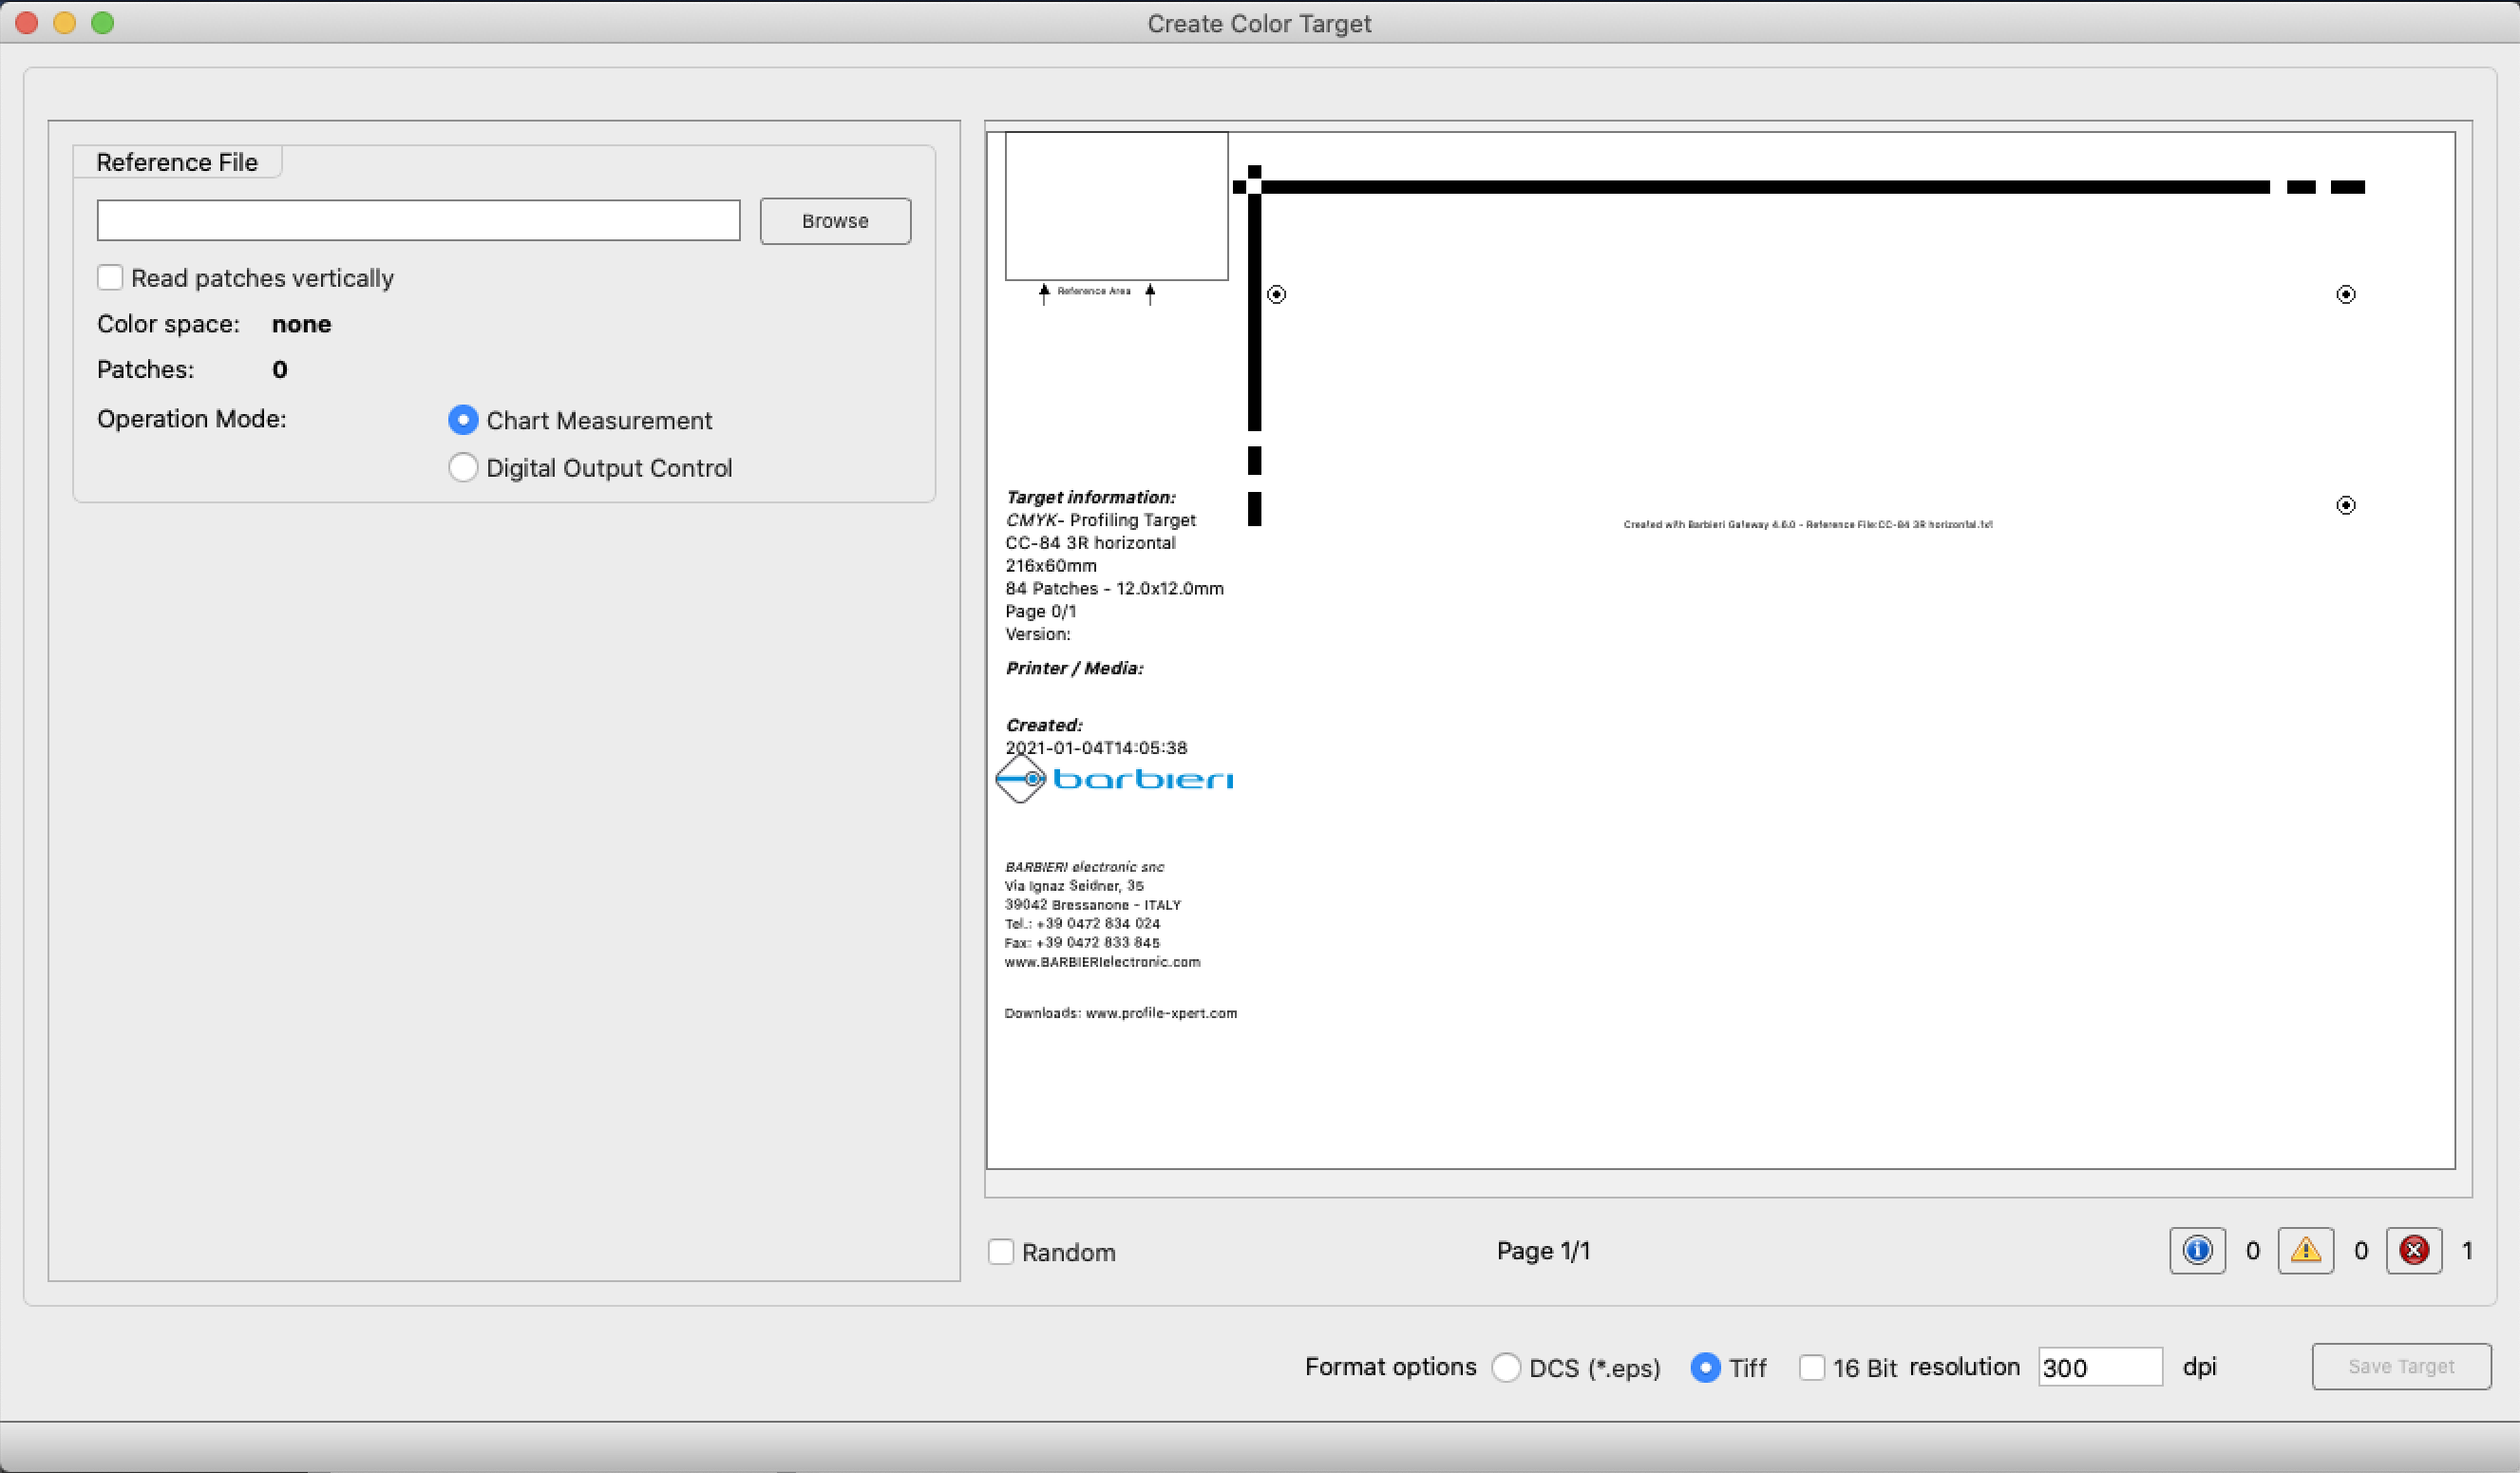
If you want to keep the same layout - check option "Read patches vertically"
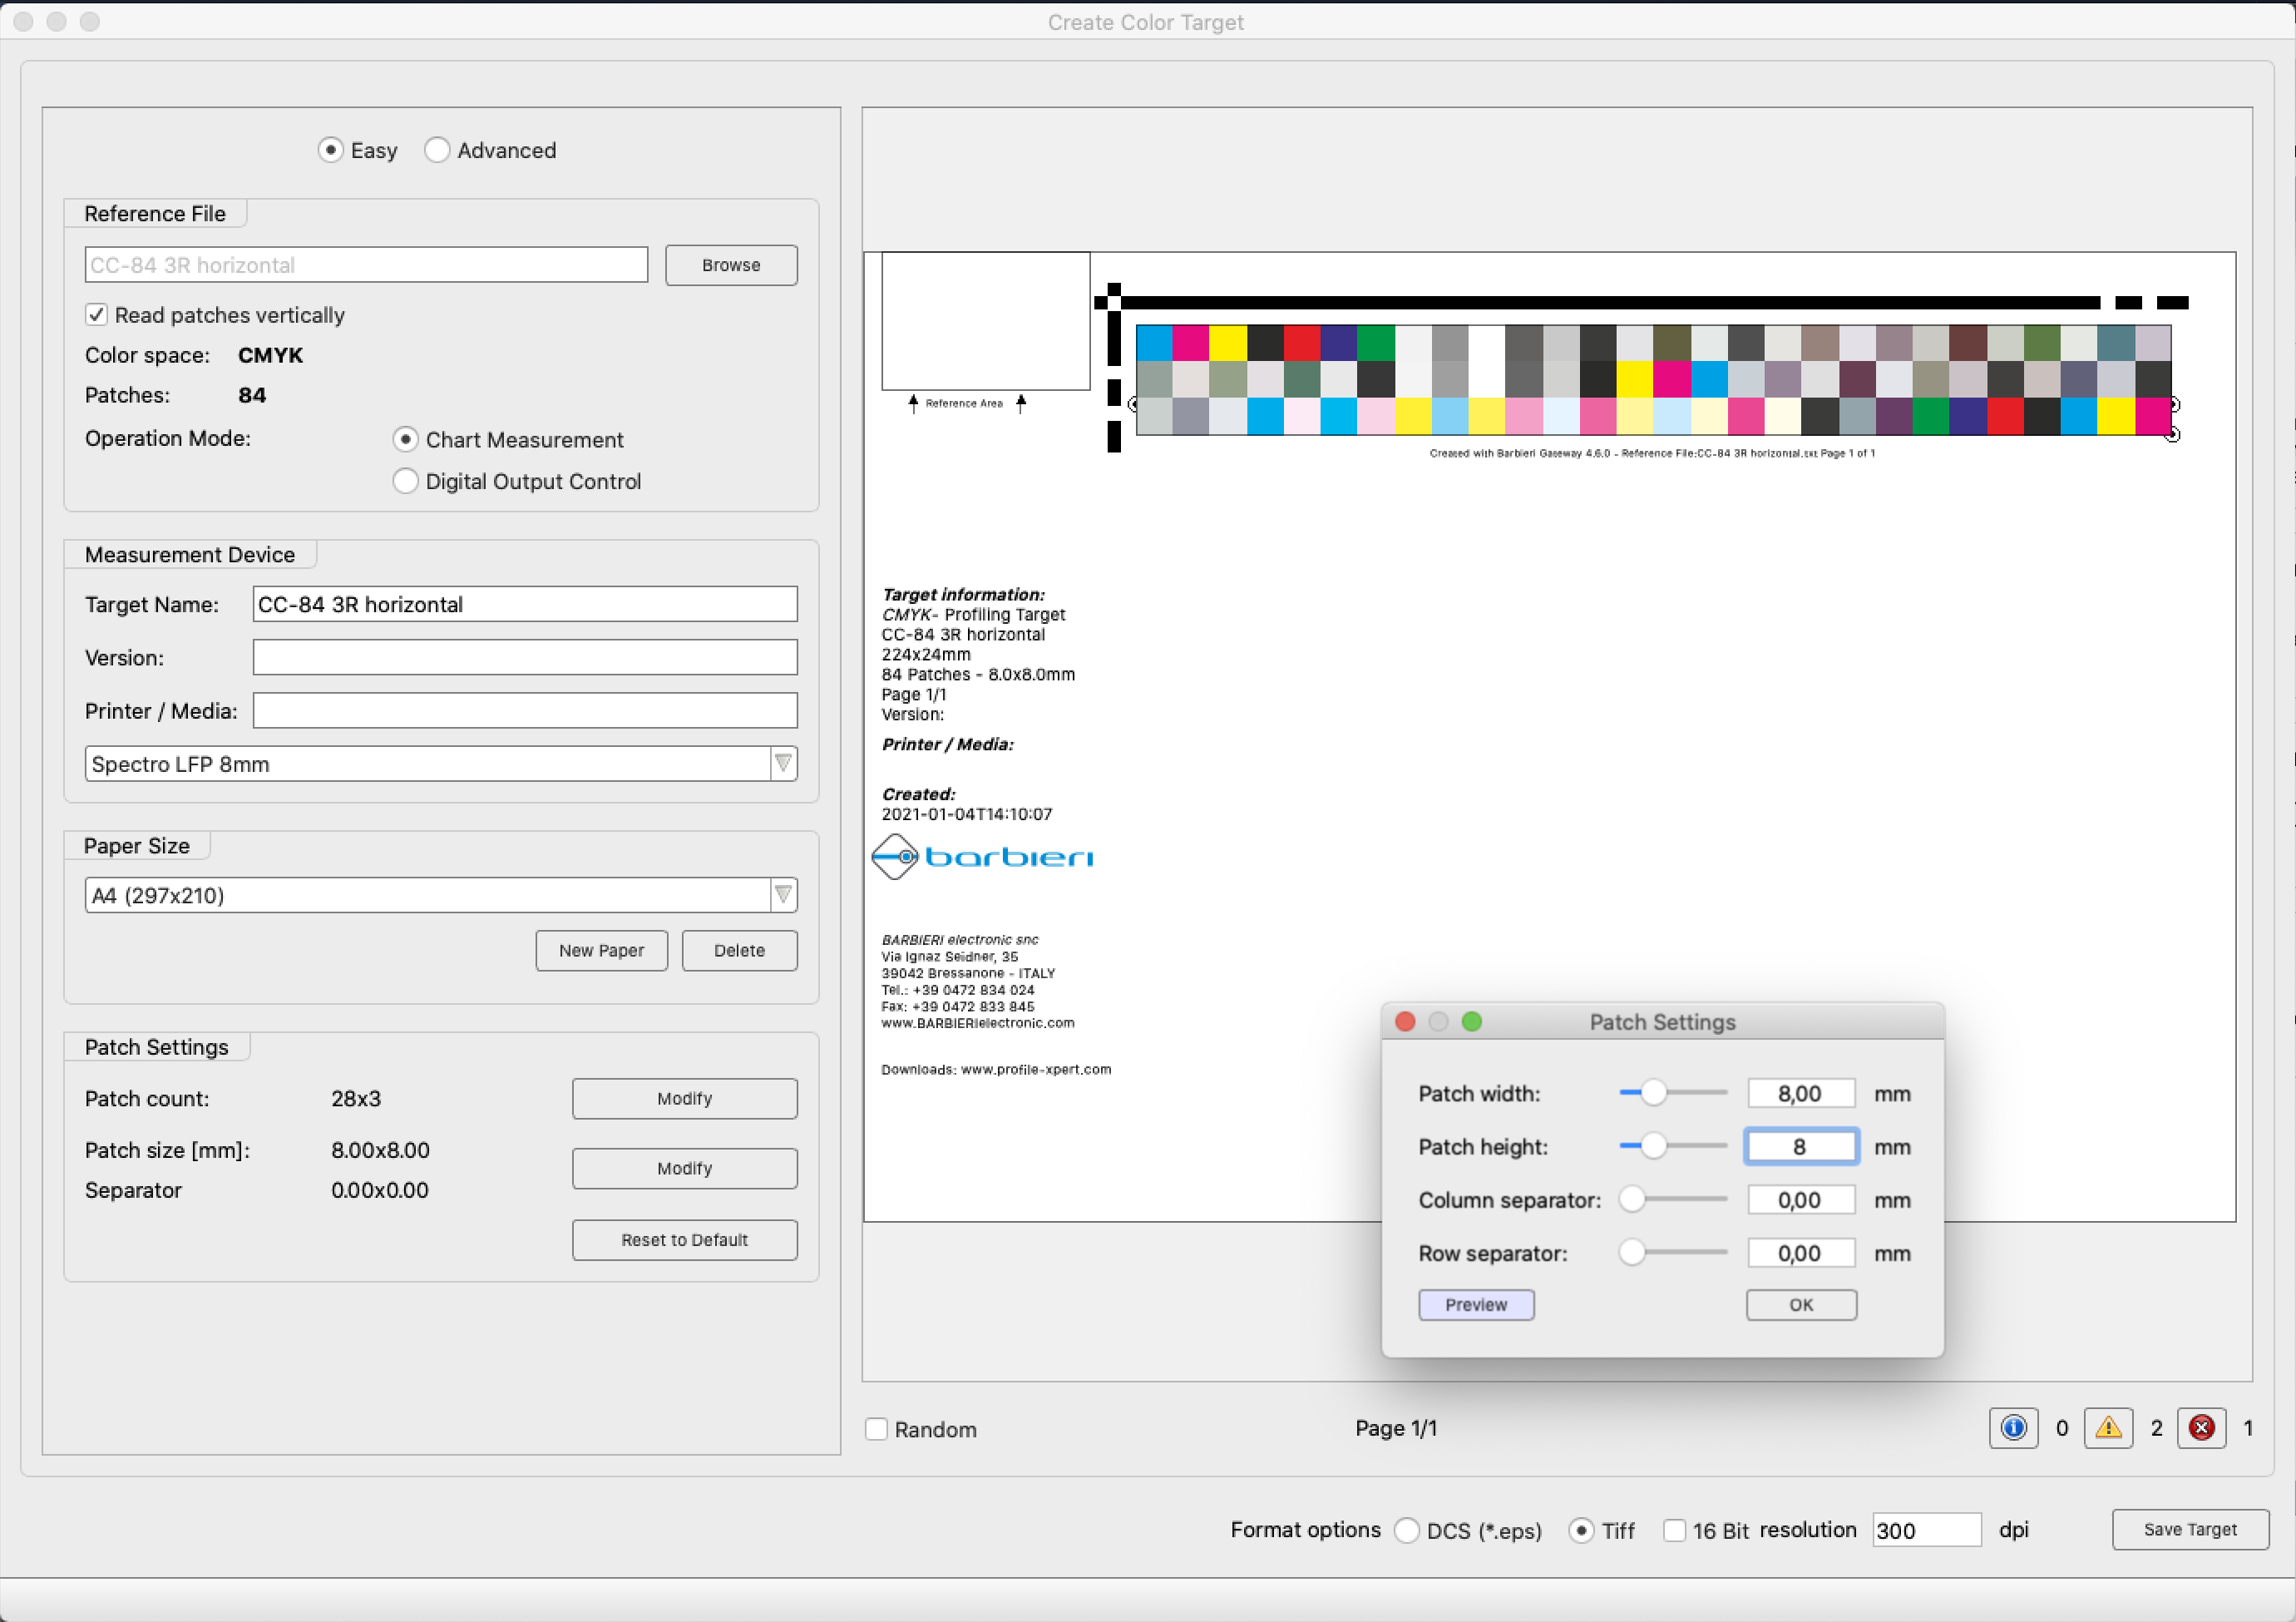
Define Patch settings
if required modify the layout according to expectations.
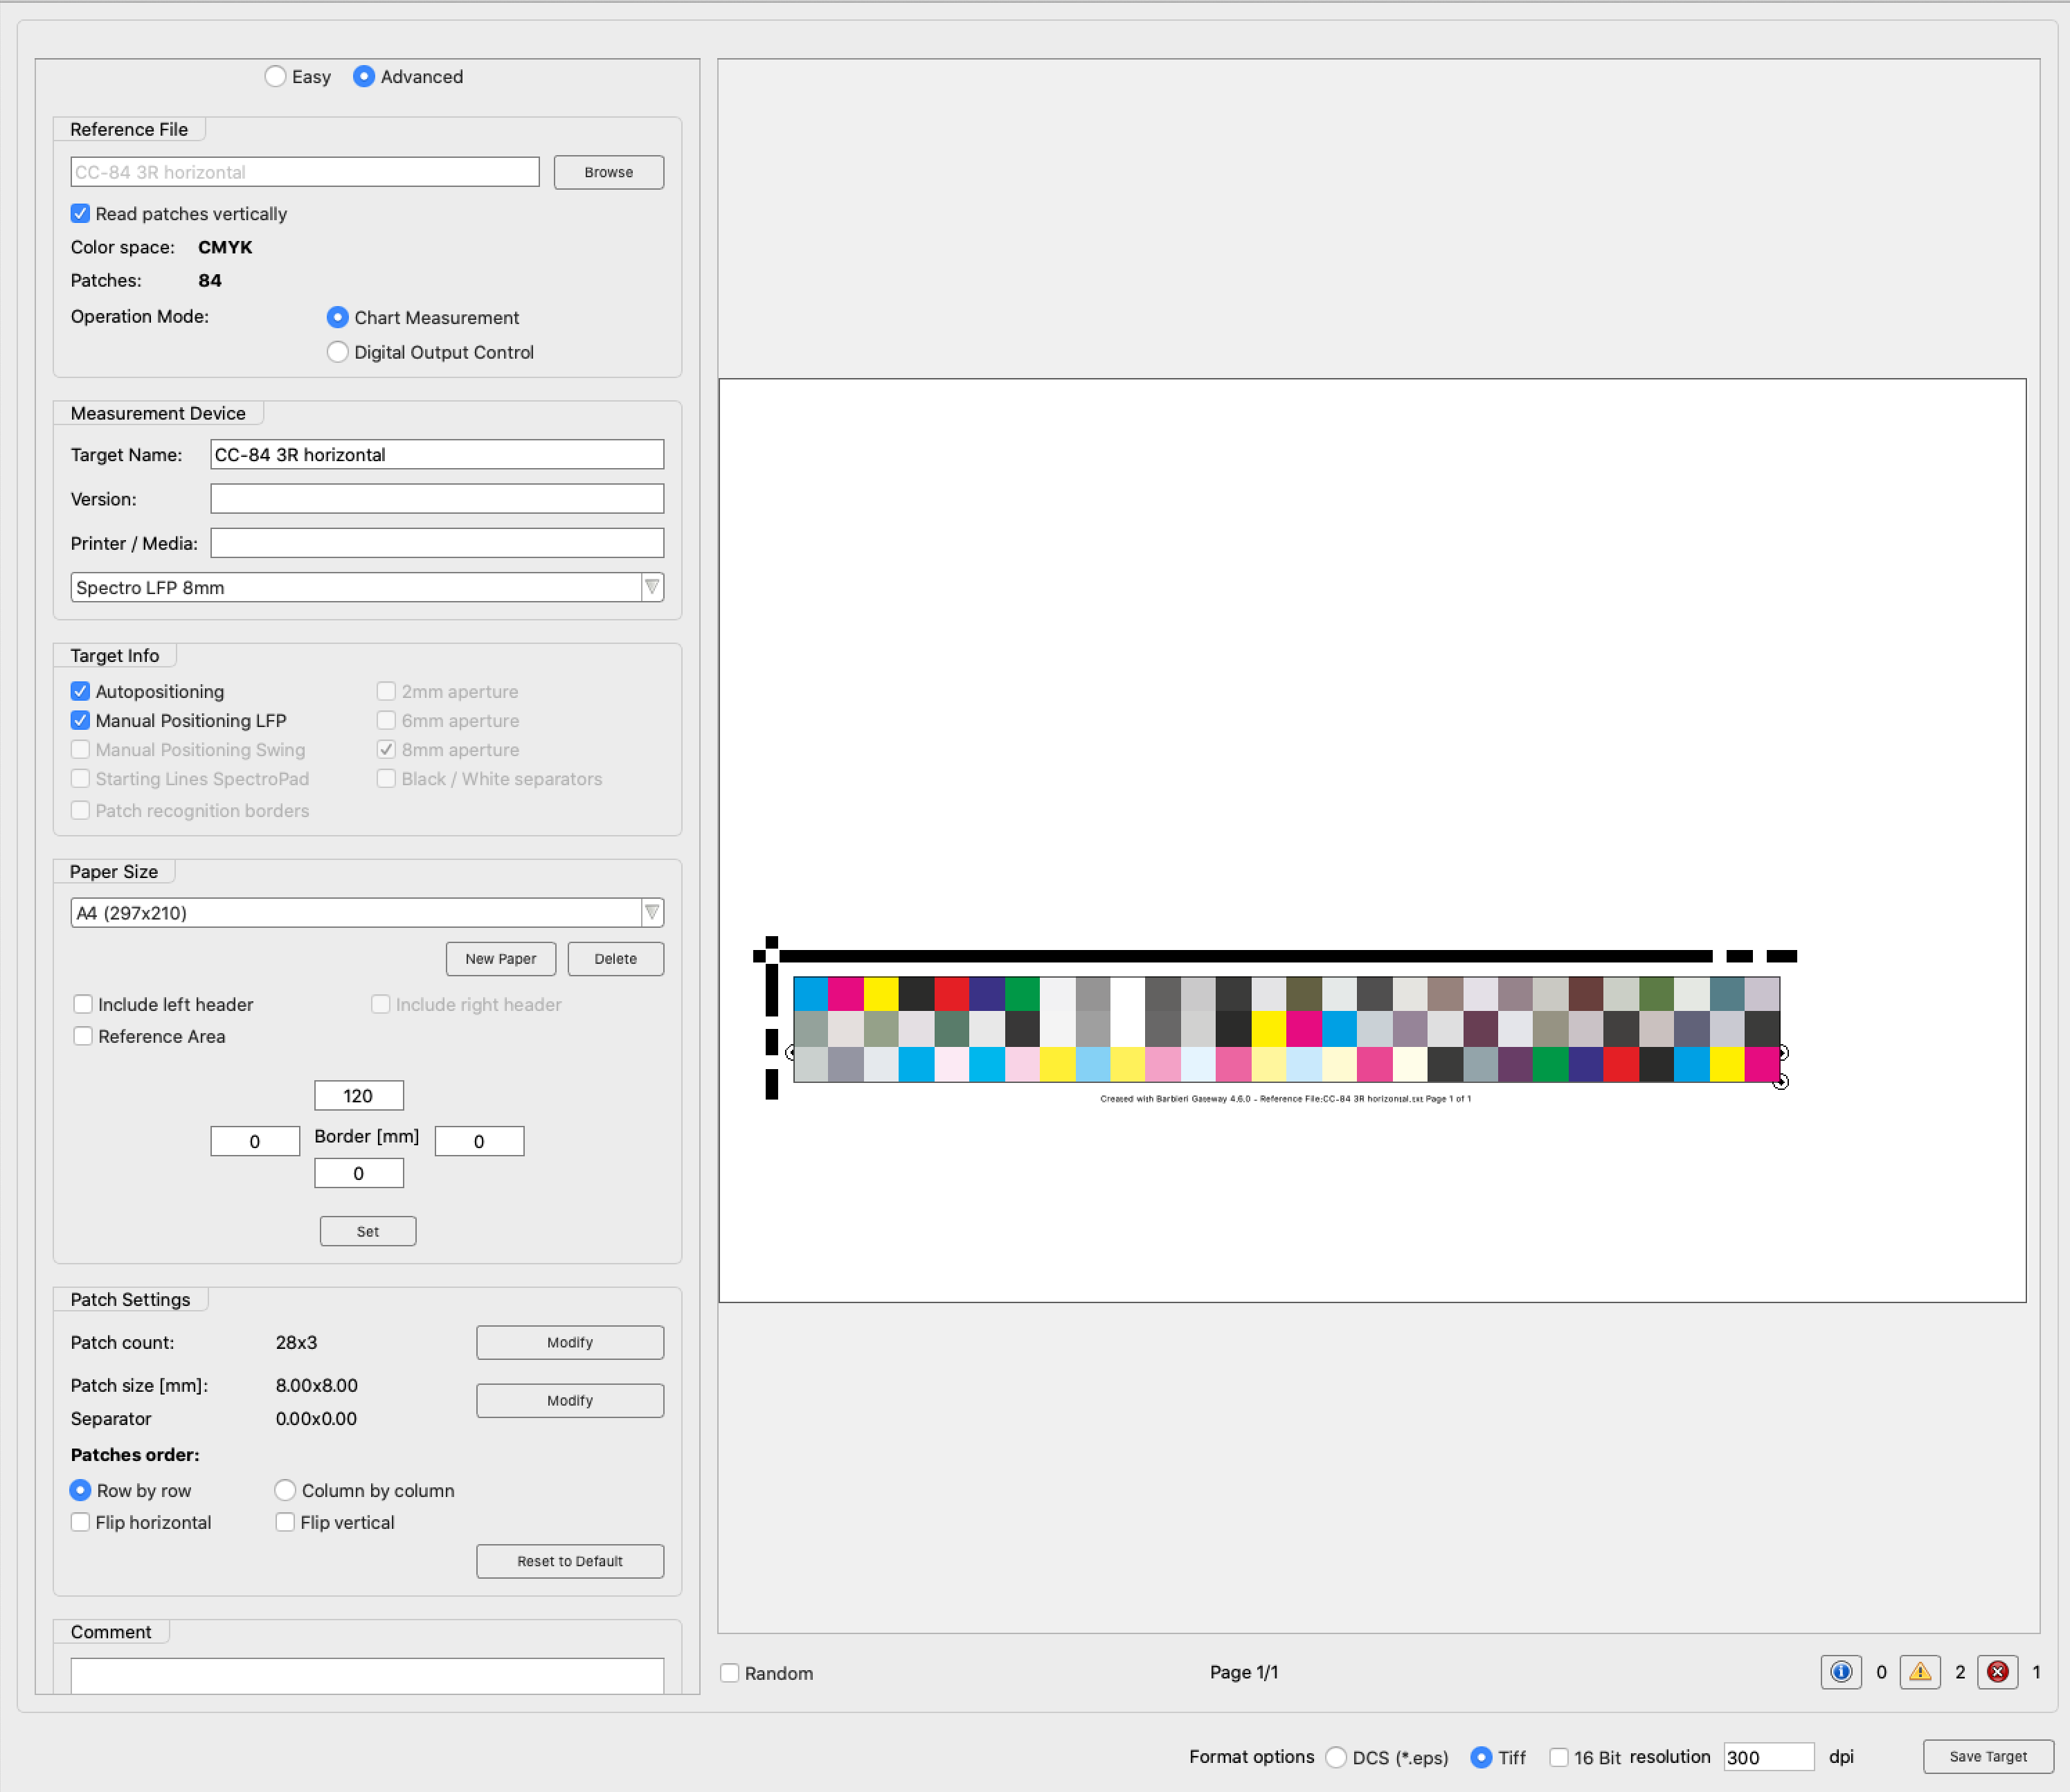
You may unselect "Left Header" and "Reference Area". Margins (Border Option) makes it possible to relocate the control strip to a specific location on the page (in this example 120 mm margin from the top).
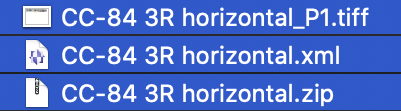
When all settings are selected according to needs Click on the "Save Target" button.
The application will create a set of files required for creating a template for a new Job.
Contact ChromaChecker Support
Additional information and Support Form is available for logged users.