Assets — Create New Palette
Preparatory activities
- Connect your instrument and launch CC Capture (be sure that Instrument is verified)
- Select Color Inspector
- Prepare your samples - inspect them visually
- On the flat surface place Measurement Backer (required for non-100% opaque samples).
The first step — select an existing palette or create a new one.
It is fast and easy to create Color Palette using CC Capture. If you have palettes already created a list is displayed on the left side.
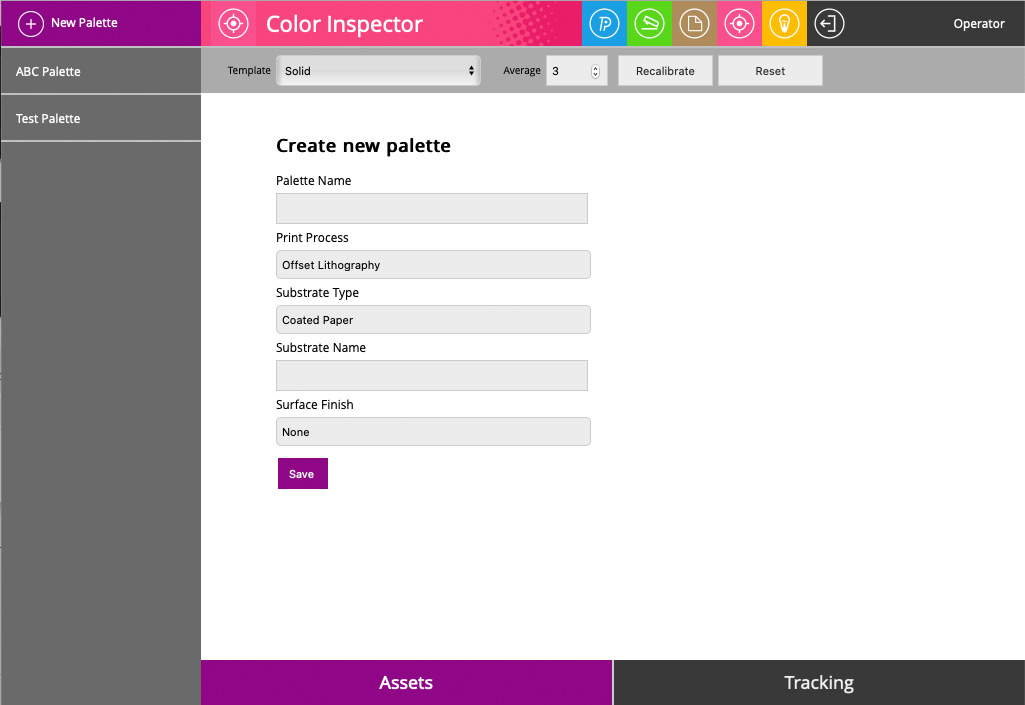
- Select Assets (bottom-left)

- Click the "New Palette +" button on the left-top

- Enter a unique name for a new palette, specify the basic characteristic
(Print Process, Substrate Type, Substrate Name, Surface Finish)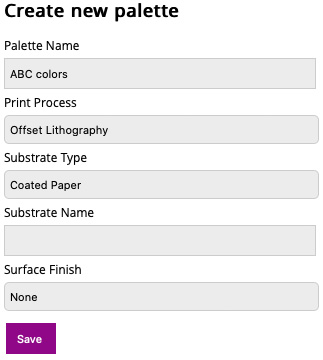
- Save palette
A color Palette is a space where you can collect color samples. If your samples are printed we strongly recommend creating a separate palette for every substrate type you want to print on.
Do not mix samples printed on coated and uncoated stock.
Important Information!
At this stage, there are a couple of ways to continue:
The Operator may continue in Color Inspector but we have developed a new tool QuickCghecker which offers more control and flexibility to create Color References. This method we recommend if the halftone spot color ramp is printed and the goal is to create CxF
The second step — measure and save samples to the palette.
In this stage, we have to specify the number of samples for averaging. The application is set to basic mode. An advanced mode can be selected to perform an extended measurement procedure. More information about the advanced mode is available here. In most cases, the default basic mode is covering the user's needs.
- Select Palette - in this example it is "ABC Palette"
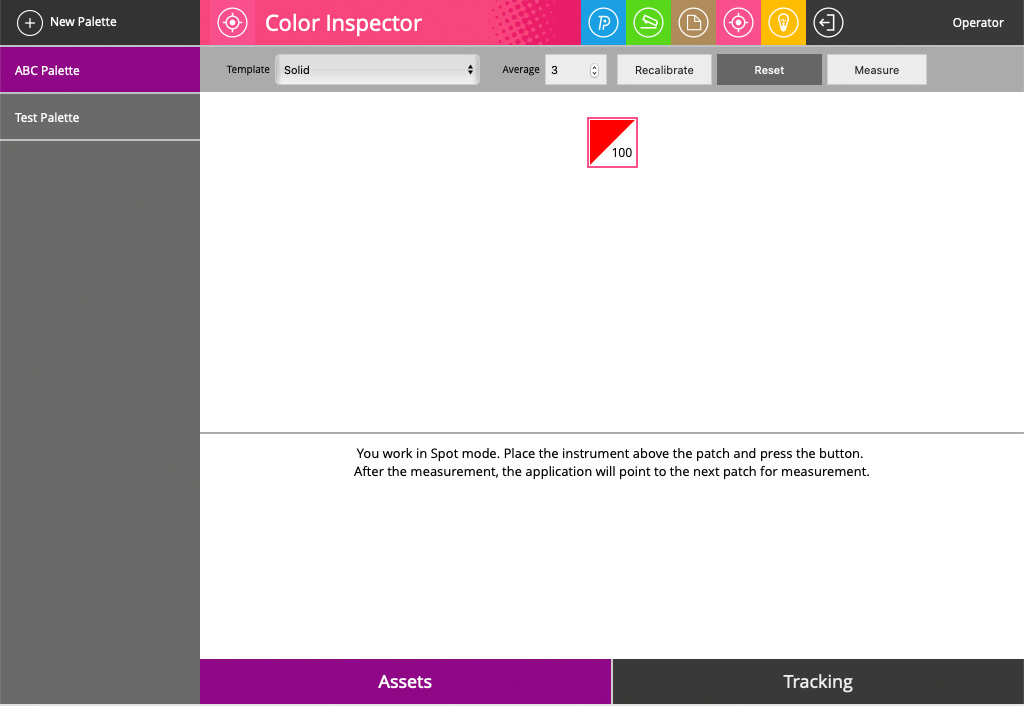
- Trigger measurements with the instrument button
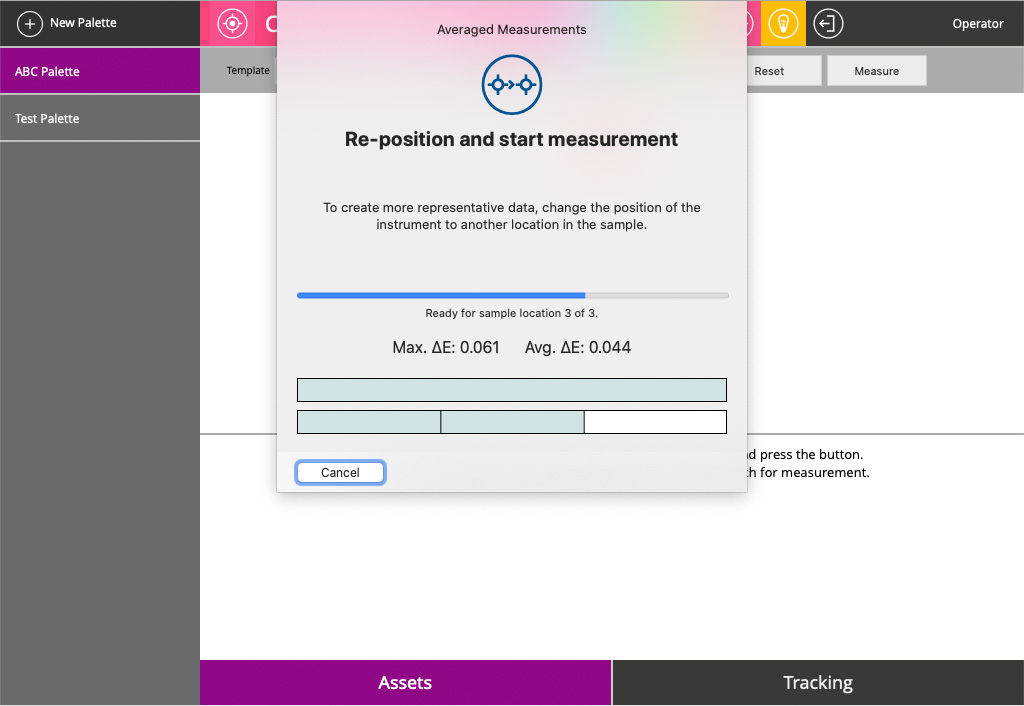
The application will guide you - in this case, Averaging parameter is in default value = 3
During measurements Consistency parameters: Max. ∆E error and Avg. ∆E errors show dynamically uniformity of the sample. When completed a report shows the results.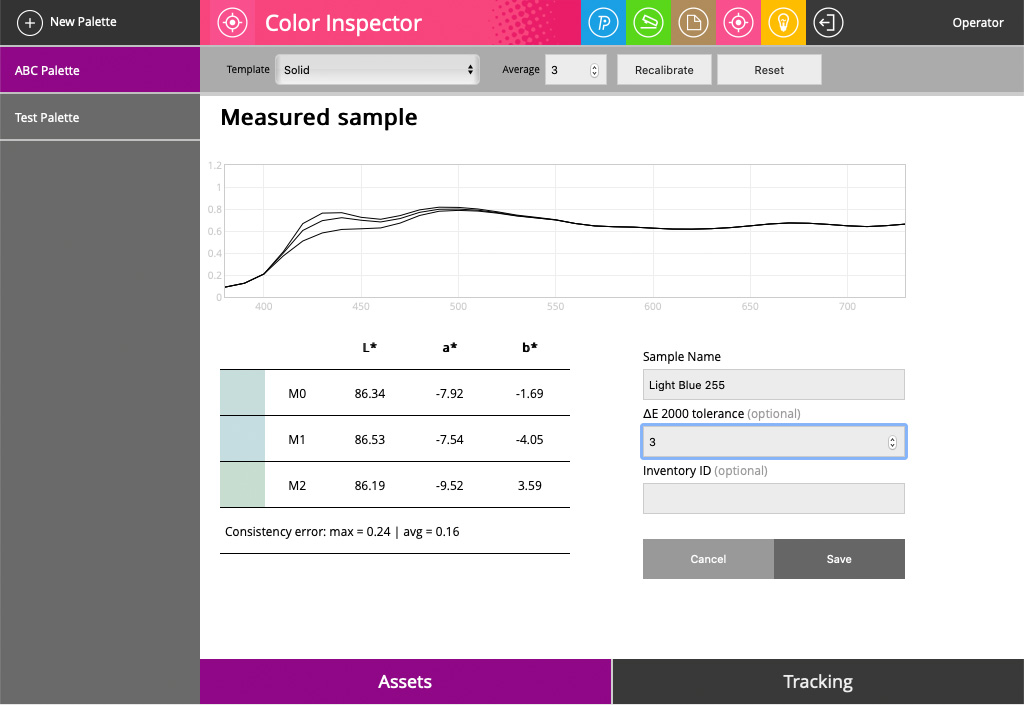
Some objects are sensitive to UV light - which produces different spectral curves and finally different colorimetric coordinates. In this case, the measured sample is printed on a substrate that contains a moderate amount of OBA's. That explains why different M-conditions bring additional value to proper color reference. -
Evaluate averaging data (Consistency error). Take into account that sample uniformity should be visible lower than tolerance.
- Enter sample name (mandatory). At this moment it is possible to optionally set individual sample tolerance (∆E2000) and Inventory ID (tracing purpose). Hit the "Save" button to store samples.
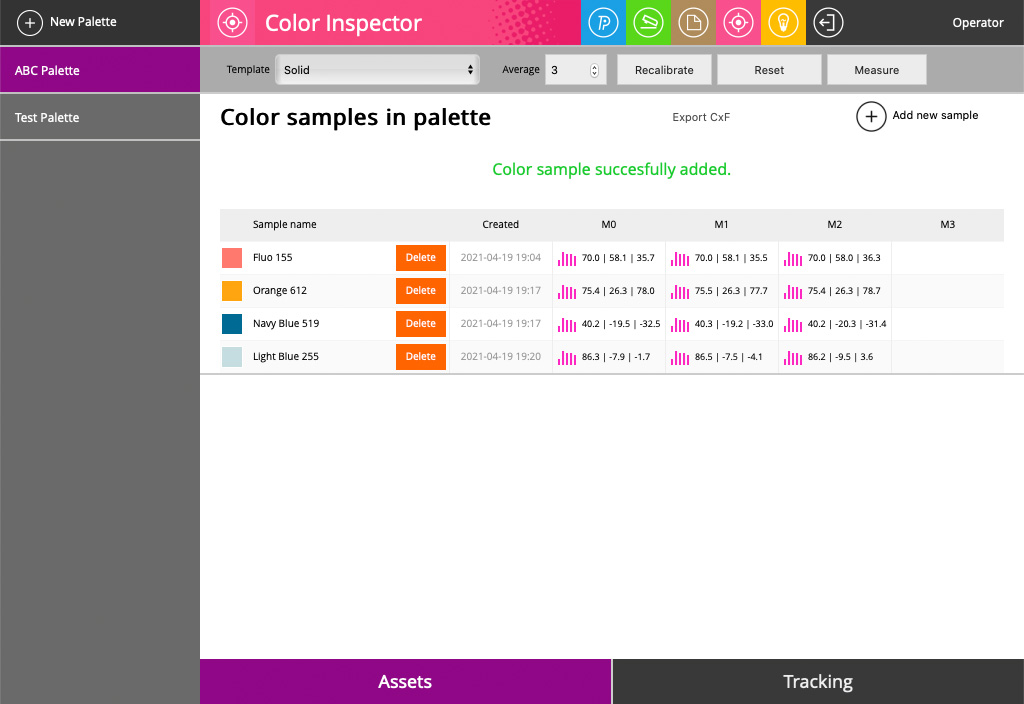
At this moment it is possible to add another sample to the Palette.
Any time you may hit the "Reset" button. This will show the list of samples created
Deleting samples
The operator has limited time then it is possible to delete a sample. It enables self-correction, but the time is limited to two hours.
Exporting CxF
From this window, it is also possible to export CxF that contains the entire Palette.
Related Topics
Contact ChromaChecker Support
Additional information and Support Form is available for logged users.