File Parser
The parser is used to define how the measurement file name can be split into metadata to easily track the data once in ChromaChecker. This feature is built to accommodate measurement software that does NOT support metadata, such as customer name, job name, job iD, and other important details that need to be tracked and managed.
Steps to implement
- Define name convention - be sure that the number of segments (representing different metadata) is consistent.
- Create at least one Parser that reflects the naming convention.
- Assign specific Parser to all tracks that are potential destinations for measurement files
- Setup CC Uploader or other software that uses CC SOAP API to upload data to the above-defined tracks.
1. Define name convention
This might be a part of your existing workflow. Depending on the manufacturer creating the file, it might look different but in most cases, the user may customize the naming convention.
Example 1: Heidelberg Naming Convention - Rules for File and Folder Names
The names of output files resulting from automated measurement software can be generated automatically according to particular rules. Certain data related to the respective print job, for example, can be included in the file name.
You can manage and create new rules in the: "Resources > Rules for File and Folder Names"
Example: 2 Kodak Prinergy: About custom file naming
When creating Rules for file names in your workflow be sure that each segment number corresponds to the correct metadata field. Use only alphanumerical characters for description and "_" or "-" as a delimiter. For one parser only one delimiter can be used.
2. Create Parser
Go to Print Inspector and click on "File Parser" on the top menu
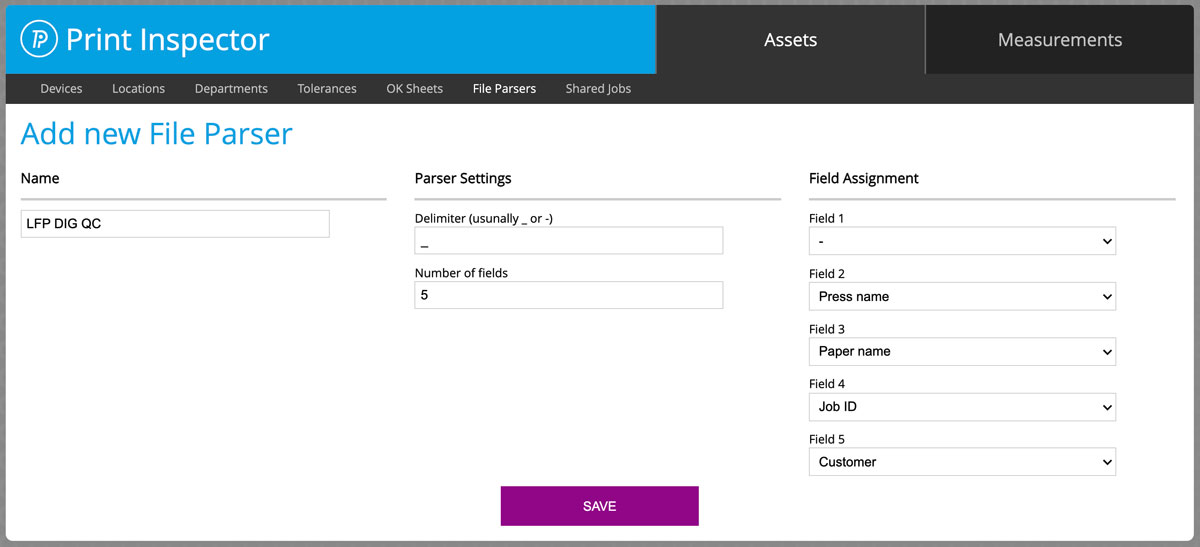
In this example, the first segment is the name of the chart - no important information, can be skipped, then we have Press name, Paper name (track), Job Id, and finally Customer name.
DigitalQC_EPSON_canvas185_21-17-4423327_OceanVisions.cxf
where:
DigitalQC - chart name - ignored
EPSON - Press Name
canvas185 - Paper (track) Name
21-17-4423327 - Job ID
OceanVisions - Customer
.cxf - file extension
3. Assign Parser to all Tracks that are intended to accept this data
In Print Inspector, open track preferences and go to the Autorecognition section

In this example, we have selected a defined Parser called: "Prinect"
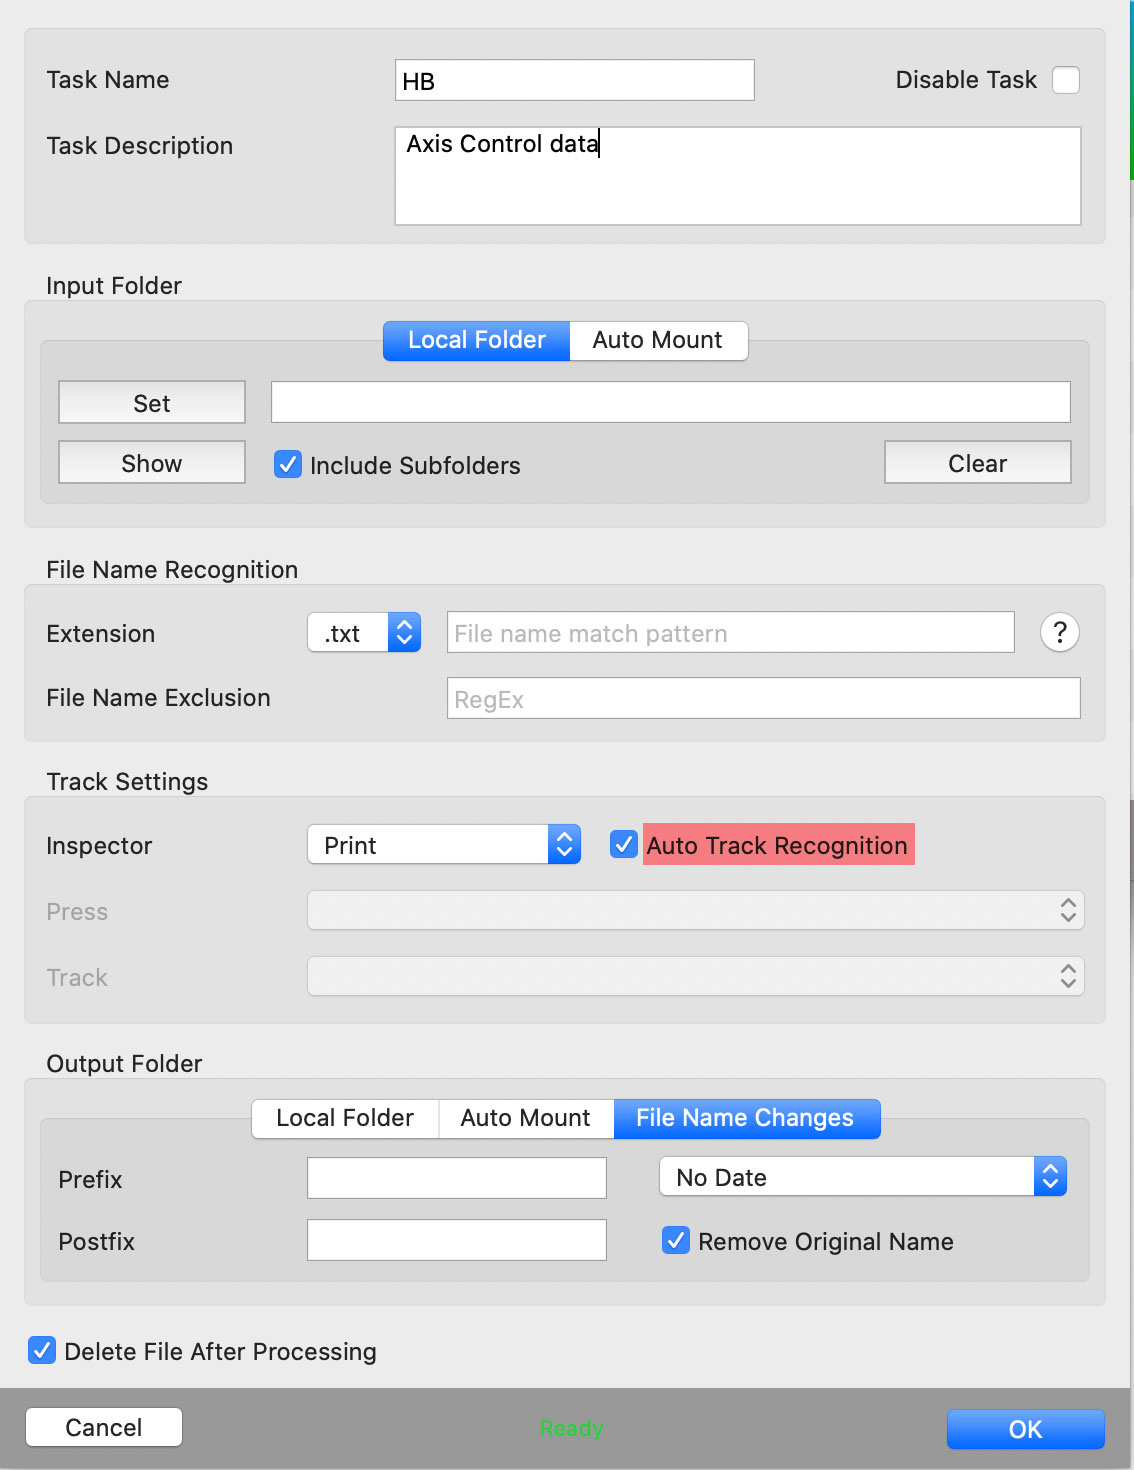
4. Set up CC Uploader or your 3rd-party software.
You can select the Auto Track recognition feature and Press and Track can be handled by Parser
or you may use Parser to extract Customer and/or Job ID and Name data only.
Related Topics
Contact ChromaChecker Support
Additional information and Support Form is available for logged users.