T-42 Instrument Target — LFP
Before you start
Be sure to download the newest firmware for your Instrument and the most recent version of the Gateway software.
As of July 15, 2022, firmware ver. 6.89 allows for simultaneous M-condition measurements (Gateway 4.6.12). The instrument used: LFP qb TEX.
Within ChromaChecker Expert Interface on your ChromaChecker account:
Open Instrument Inspector and register your instrument and the T42 Target:
- Barbieri LFP (Add New Instruments)
- T-42 Target (Add New Target)
Step 1 - download the Target definition here.

Step 2 - Within Gateway Software, create a new Job.
Create Job based on the downloaded Target definition. Follow our general Instructions on how to create a Job in Gateway here.
Be sure to set up the following critical parameters according to the following specifications:
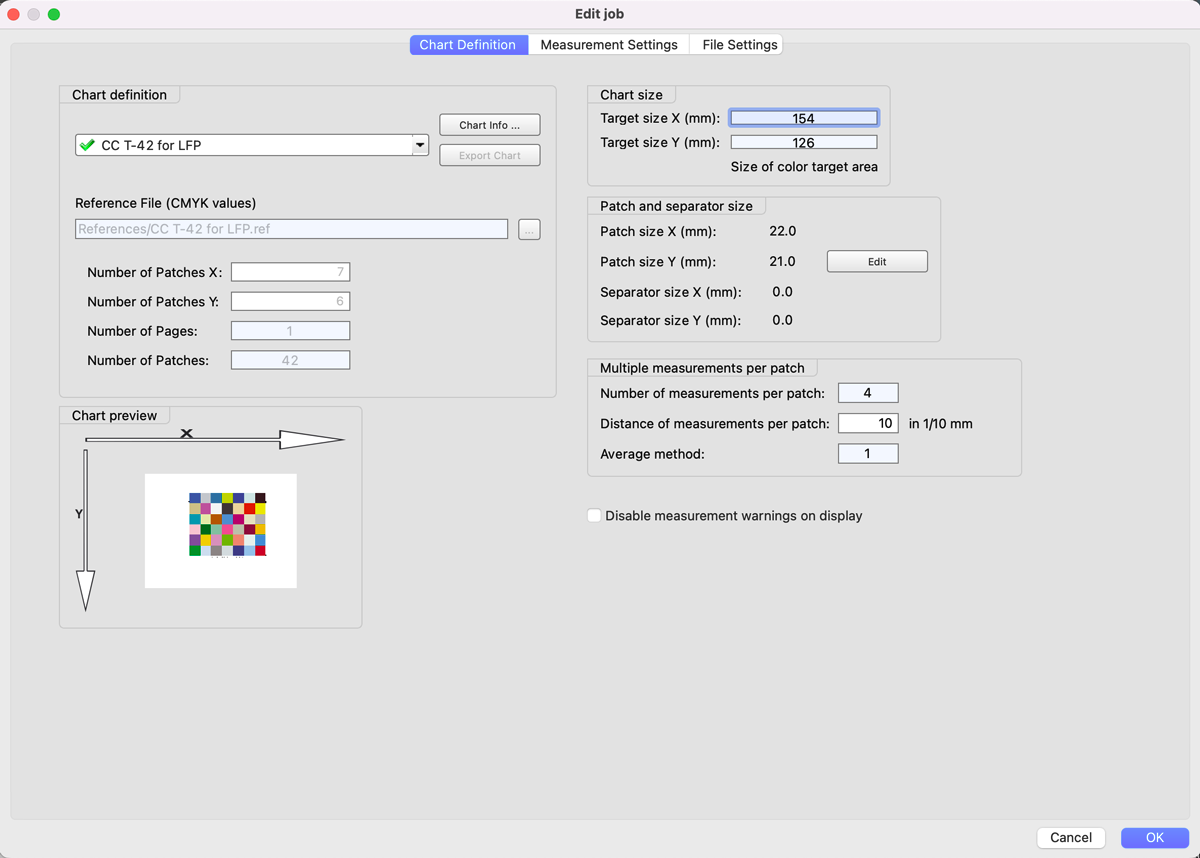
A. Chart Definition
- Reference Chart: CC T-42 for LFP
- Set patch sizes to 22 x 21 mm
- Set Layout to 7 x 6 patches
- Multiple measurements per patch - 4, Distance 20 units 1/10 mm (for precision purposes, it is required to measure each patch multiple times). In order to compare multiple Instruments to one another, it is important to measure the target in the same way.
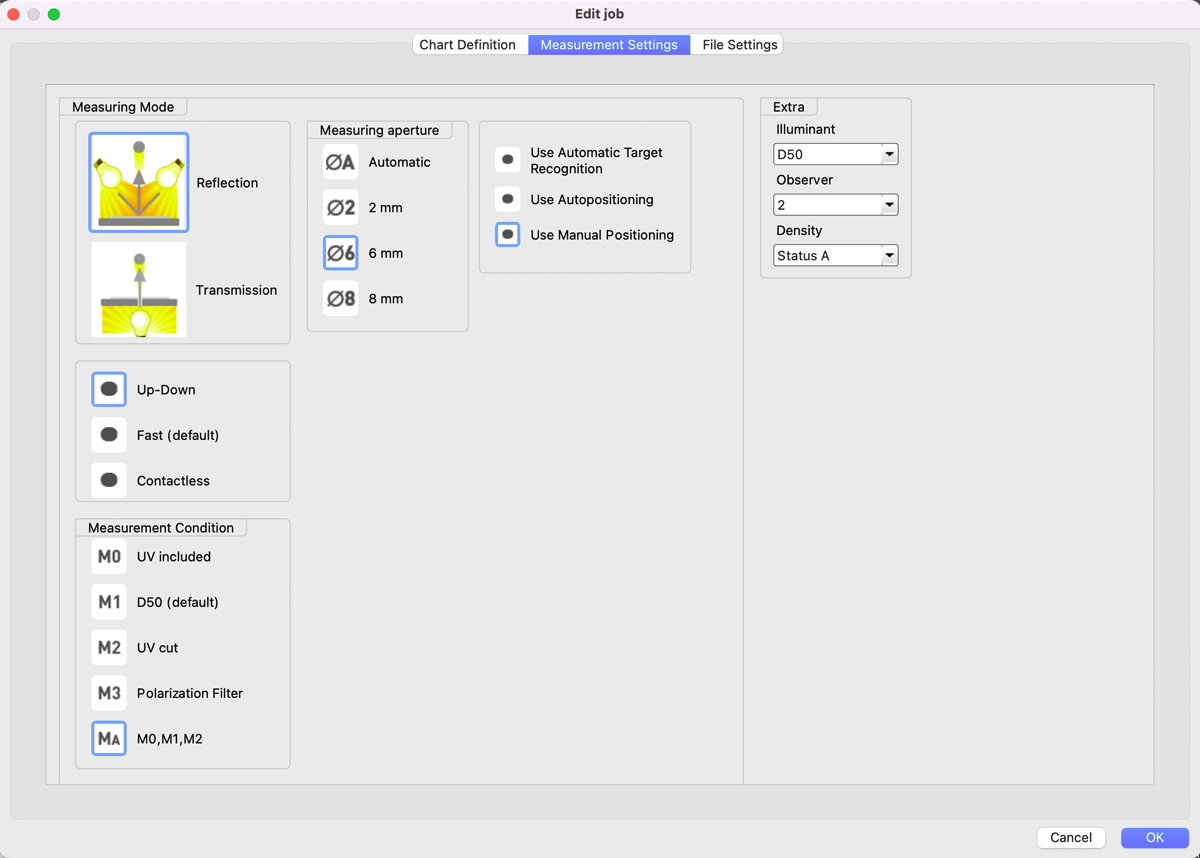
B. Measurement Settings
- Mode: Up-Down (this method is slower but more accurate and prevents the instrument from damaging the target)
- Measurement Conditions: Ma — M0, M1, M2 (preferred otherwise, the target will need to be measured three different times (for each M condition))
- Aperture - we recommend using the same as for normal production, but generally, larger is better.
- Use Automatic Target Recognition (qb) or Manual; no Auto-positioning is supported.
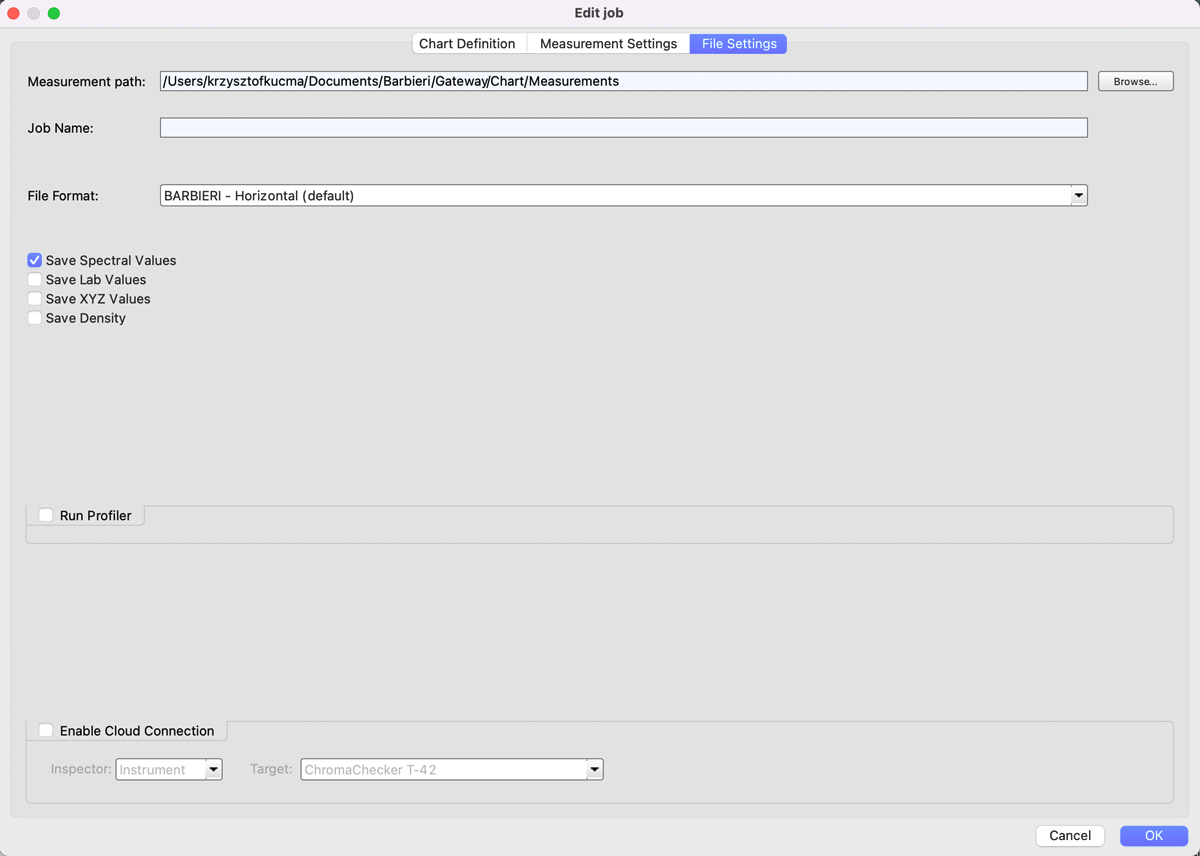
C. File Save
- Select Spectral Values only
- Save the file to your disk to manually upload into your ChromaChecker Instrument Inspector.
- At this moment, Cloud Connection is NOT working properly.
Step 3 — Measure Target for Baseline Creation
- Mount Target - the best way is to use an electrostatic holder. Manual positioning can be finally faster - as an instrument is storing the last position - and if the target is justified to the same edges - you may start after pointing the first corner (laser beam is showing the corner)
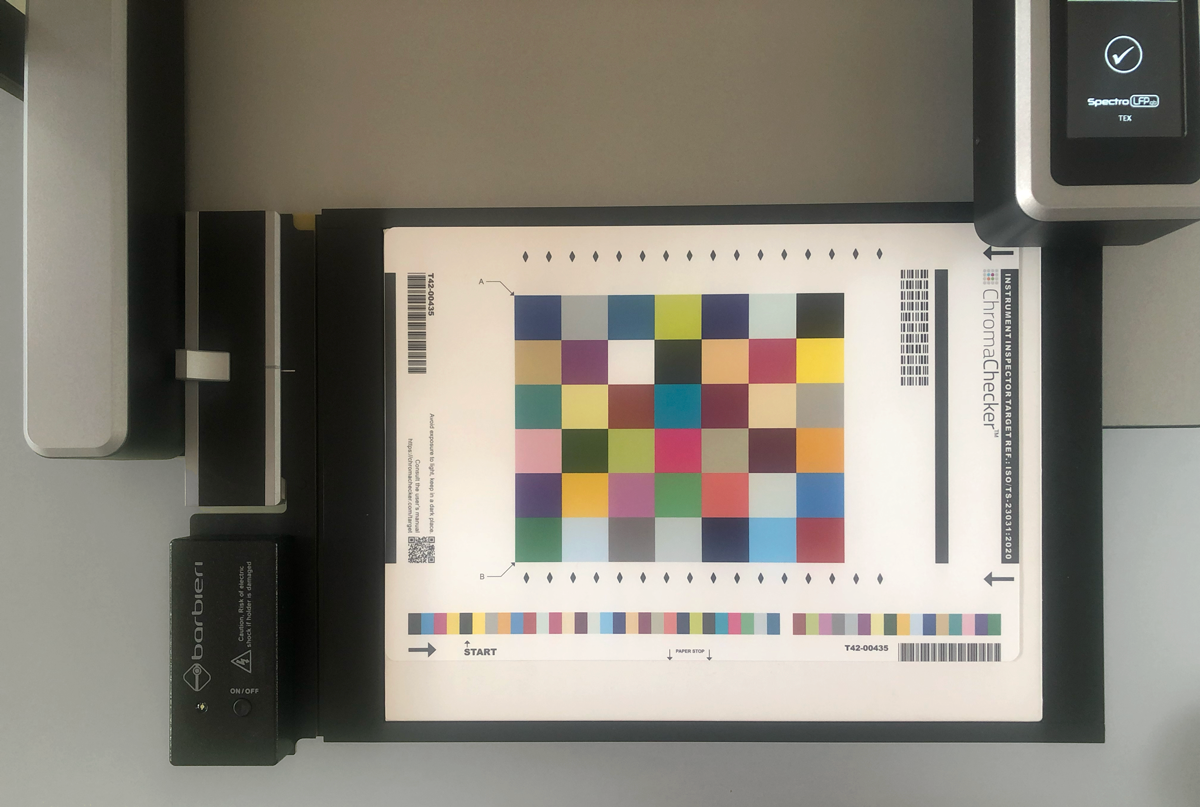
- Measure the Job multiple times (4-10) - it takes time - but it is a one-time operation and should be done with high precision to create a starting baseline for the instrument, which will be used to compare against in the future.
- Save each file using the extension: .cie; then manually upload all the .cie files for the given instrument using the blue cloud icon within the instrument track within Instrument Inspector. Uploading all the measurements the first time allows the system to automatically create the Baseline for the instrument, giving a complete report on the instrument's precision.
Step 4 — Verify Instrument.
Measure the T42 Job again to see how the Instrument matches the baseline. This report will be shown every time you measure the T42 target. Determine your desired schedule for measuring this target (once/week, once/month) and set the operator that will be responsible for doing this and configure in Accountability Inspector under the instrument to ensure they will get email reminders when it is time to check the instrument.
Additional Notes
- You may want to measure in contactless mode - which might be less accurate - take one measurement to see the result. We definitely advise NOT TO USE FAST mode as it will damage (scratch) the Target and eliminate the benefits of tracking the instrument's precision!
- If you use different aperture sizes in production, choose the most common aperture size when baselining the instrument. Different aperture sizes will result in different measurement results. All measurement devices exhibit this behavior; accept it. Barbieri is doing an excellent engineering job with LFP qb!
Contact ChromaChecker Support
Additional information and Support Form is available for logged users.