Virtual Control Strip for Spot Colors
Download the attached PDF file and repeat step by step whole procedure - once you did it creating any custom version should be easy. Additionally adding some barcode automation can make the whole process of QC very fast and errorless.
1. Patch List → Control Strip
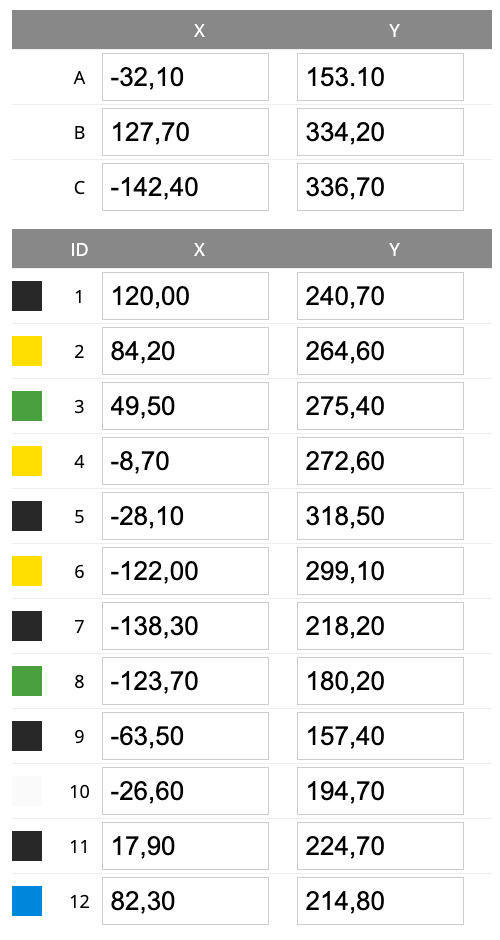
In this example, we have 12 patches selected from different locations on the A4 page
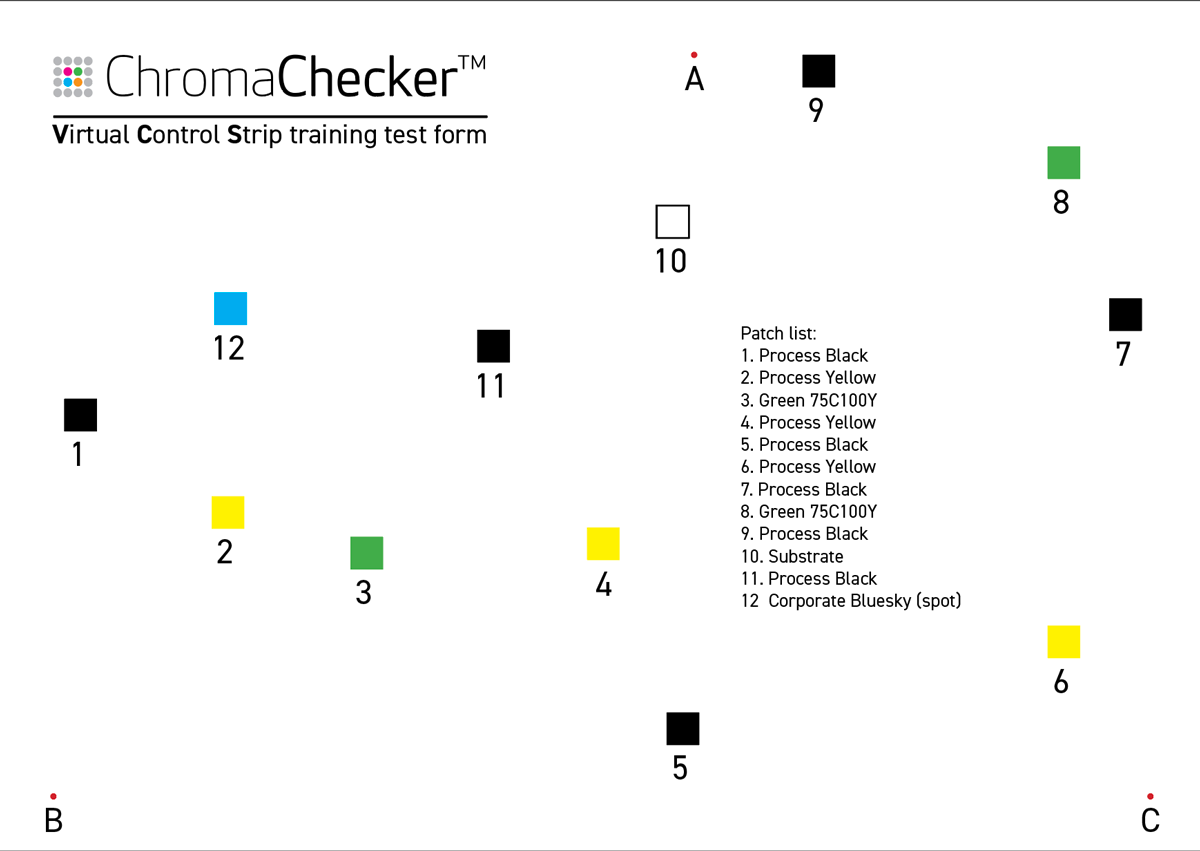 |
Patch list: |
Please remember to add Substrate to the list as it is required for some color calculations. Tracking substrate also makes sense in most cases as an additional quality control evaluation. The order of patches is optimized to minimize instrument arm movement.
At this point, we need to go to Capture Inspector and create a custom control strip with 12 patches
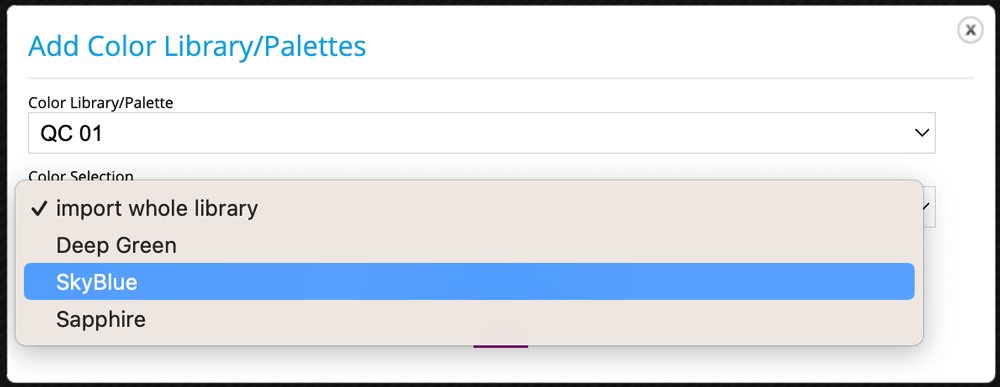
Let's start with the "VSC test" name and "My Library" as a location to save the new control strip. It is better to start creating the patch list from the bottom of the page; starting with this example called BlueSky, a spot reference that is already defined in the "CQ 01" Library (ChromaChecker Assets)
To import: click on the "Add Library" button and find the color
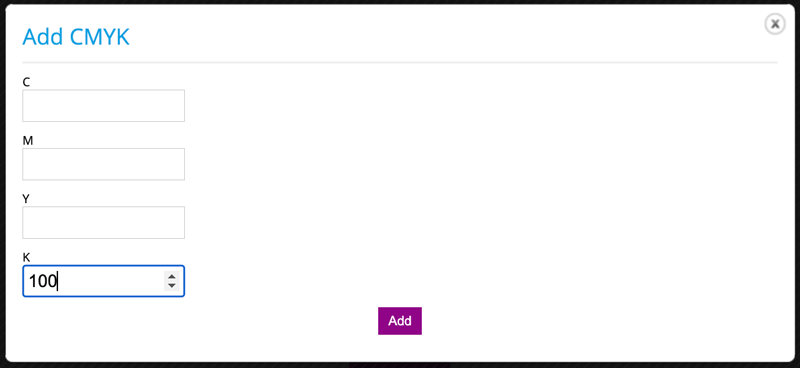
Next, we have to add the Black Process Patch, click on Add CMYK button) and enter 100% K
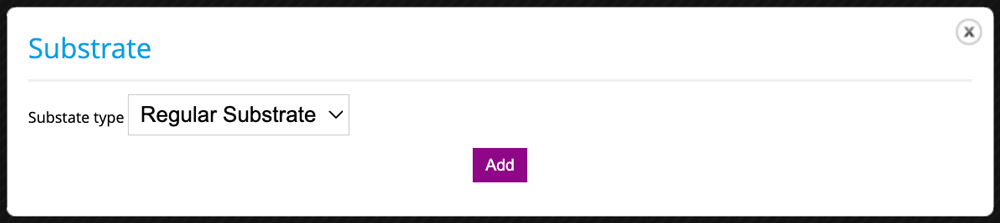
then Substrate - which is very important for density evaluations, predictions, and for tracking the substrate itself.
...
Finally, we should have a complete list:
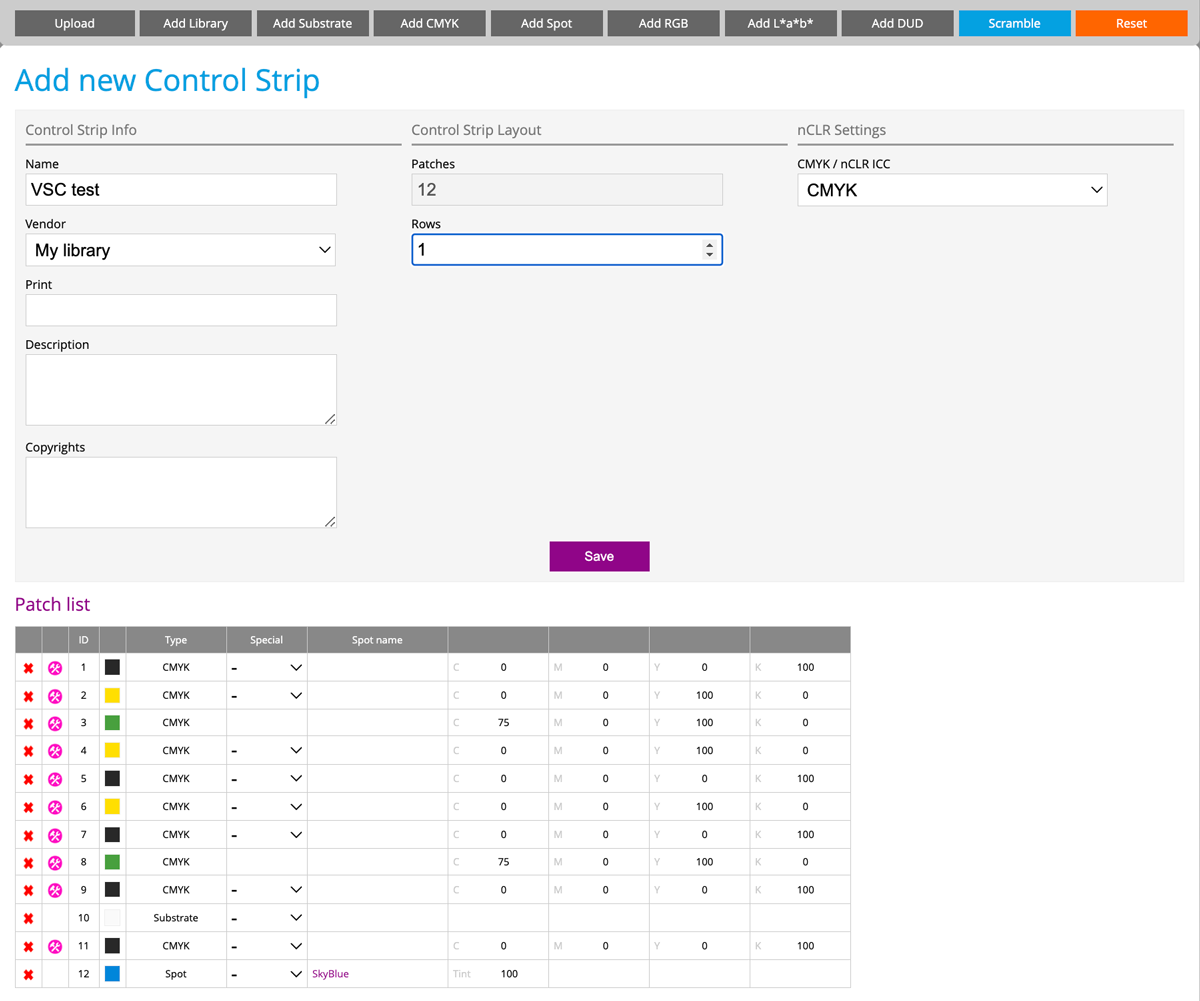
Please note that if any mistake is made - patches can be simply reorganized (drag selected line to proper location) or percentage values edited. When complete save it...
Create Scanning Template from Control Strip.
Go to Scanning Template Tab and click
Select just Created Control Strip, select Instrument type i1iO, and check Virtual Control Strip checkbox
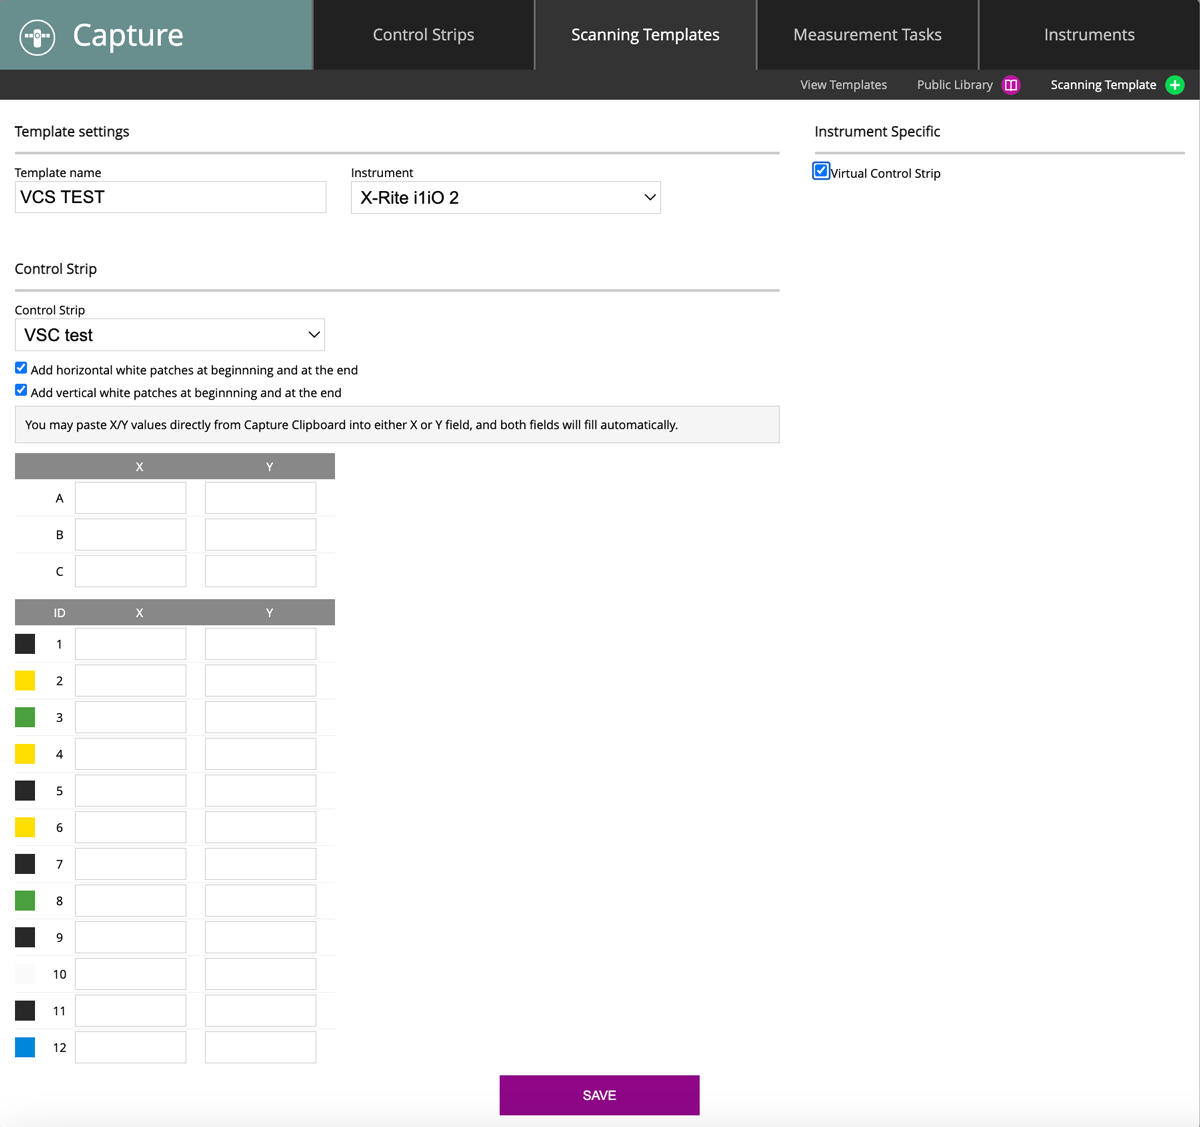
Keep this page open and launch CC Capture with X-Rite i1iO connected
Align the printed page to an outlined rectangle or any repeatable mechanical stops (watch the video to see magnets or make any other, which makes it very fast to precisely locate sheets.
In the top menu find: the "Get Position" option
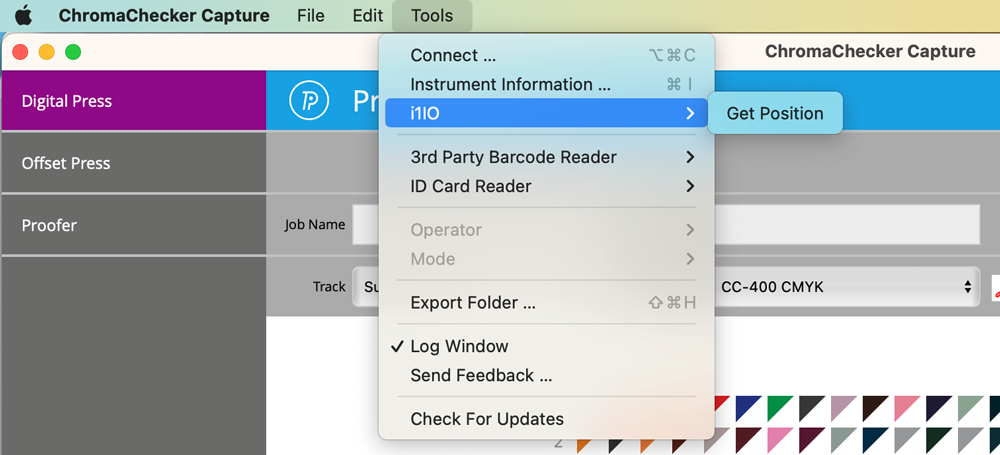
and hit it
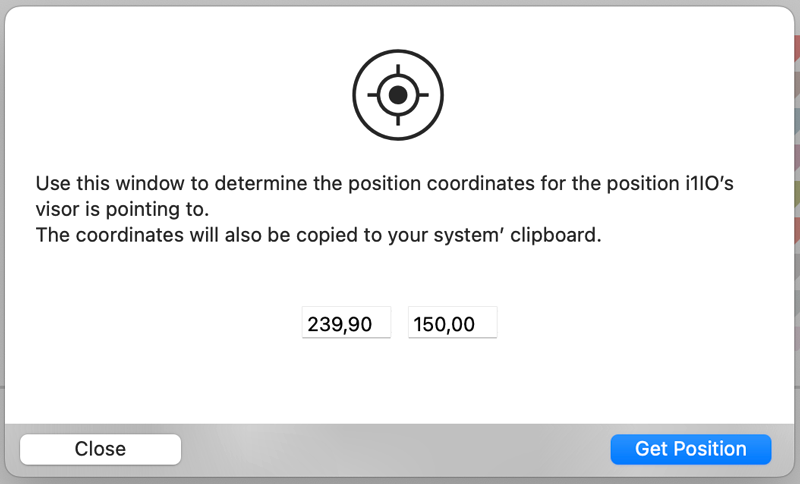
Now you can drag the instrument crosshair to define where is the center of the measurement point.
Hit Get position - copy /paste them to each location
Three additional points A, B, and C are used for fast repositioning - define them too.
In the end, it should look like this
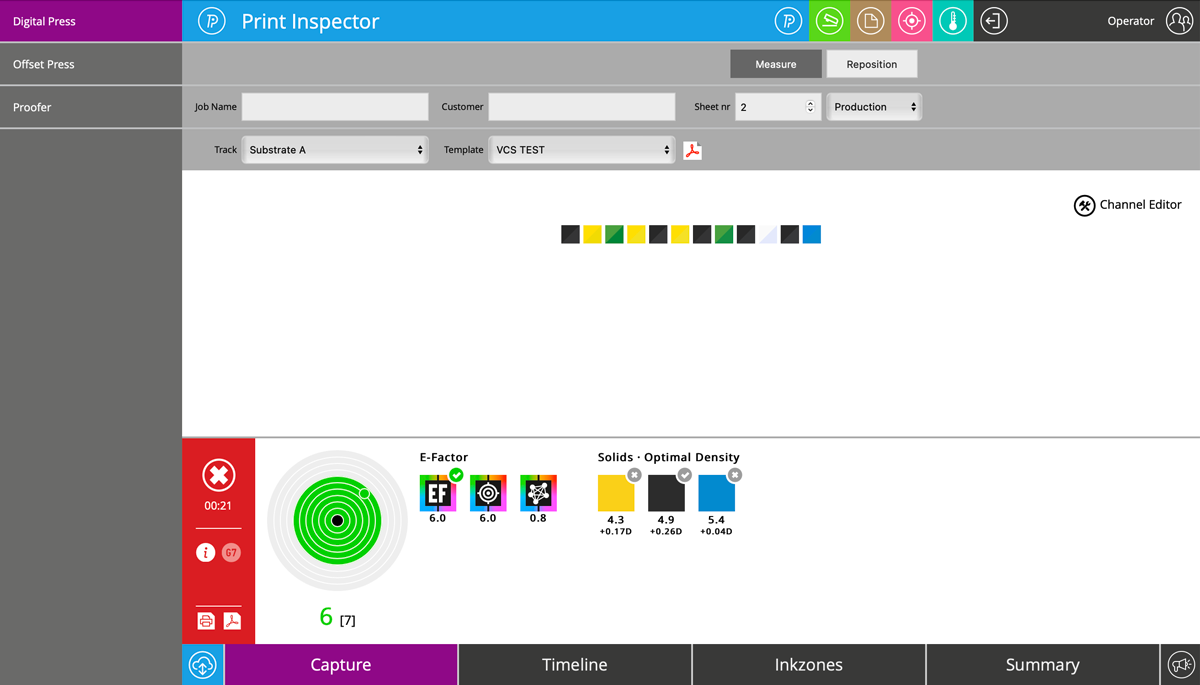
Save the Scanning Template and refresh CC Capture ( Click on Print Inspector Icon)
Now you can check if it is working as expected.
Clicking on the Measure Button iO Table will start measuring immediately. In this example, it takes 30 sec. to collect all measurements and get the report
The summary report provides the Operator with corrective, informative information.
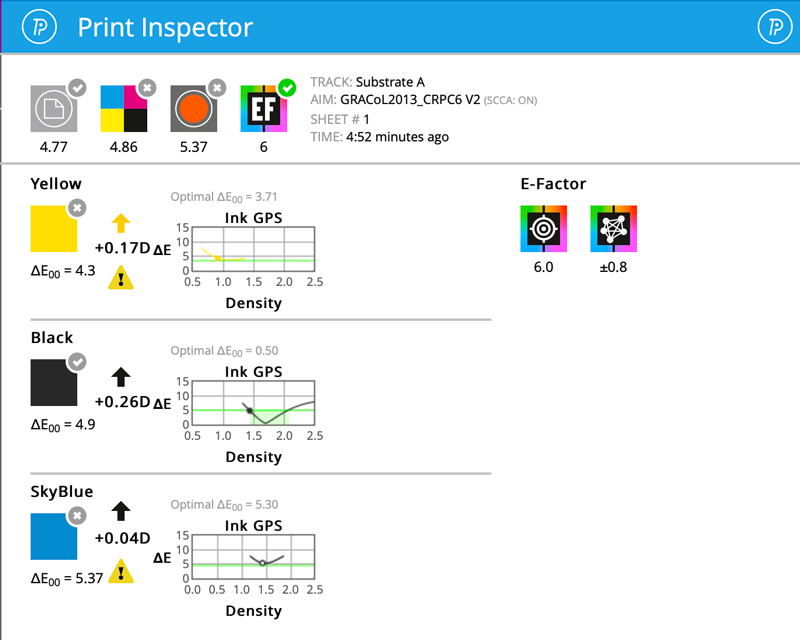
Since ChromaChecker automatically compares identical patch values, ChromaChecker creates a "variation report."
By having a Substrate patch, ChromaChecker can provide density directions.
If an adjustment needs to be made in the positioning of the measurement spot, choose the "Reposition" button which will open the dialog box where the position of three reference points A,B and C can be redefined
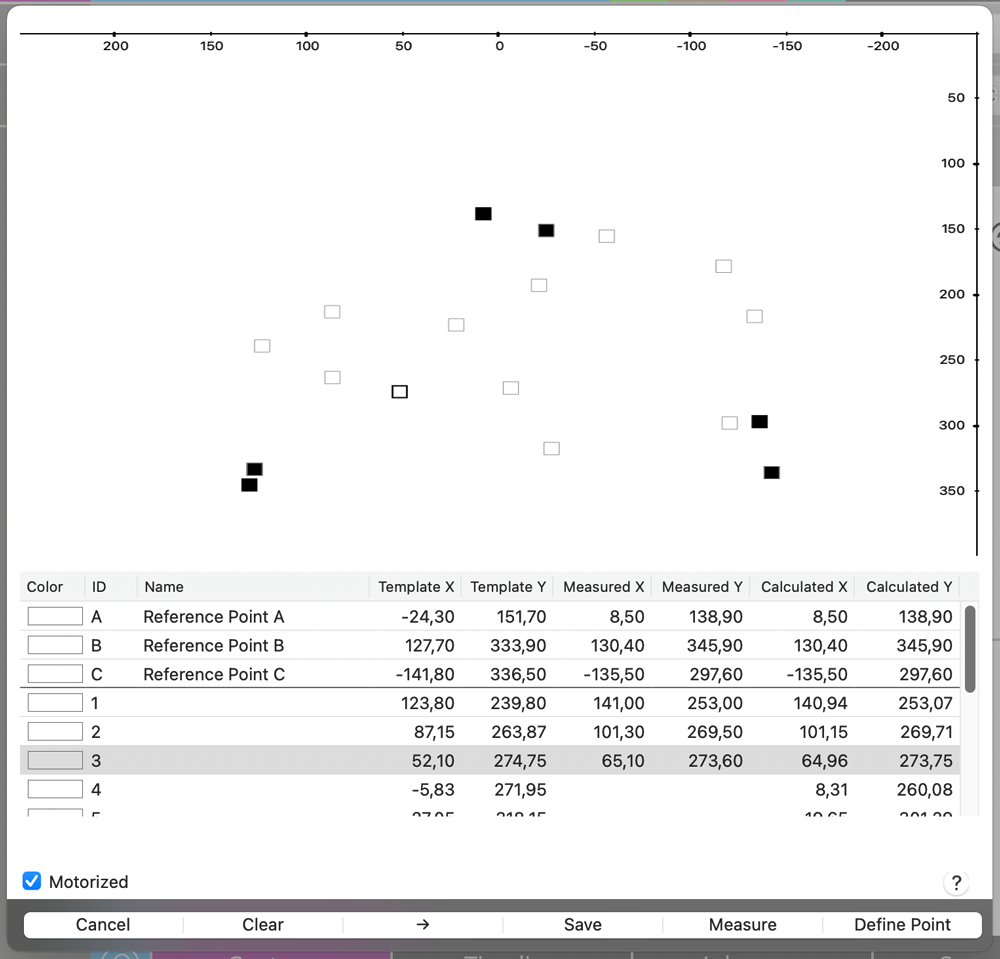
To accept the new relocated position select "Define Point" to check a position; select the "Arrow" button or click on the selected line.
This makes it easy to ensure the Virtual Control Strip is working, and if not, quick correction in Scanning Template can be made.
Saved relocation patch values can be temporarily used during a single session.
PDFs
Video
-
This tutorial shows how to measure spot colors as a virtual control strip using the artwork on the printed sheet.
Contact ChromaChecker Support
Additional information and Support Form is available for logged users.