Refer to Projects
This option is designed for effective QC tracking purposes. The core of the solution is the concept of the Project, which is a kind of template for a repetitive production process. Projects collect information on spot colors applied and substrate used for production. A short list of spot colors makes it possible to use auto-recognition - so the Operator trigger measurement and the system recognize the reference and if enabled - autosave it.
Prerequisite steps
- The operator has to select Project from the list or use BARCODE to enter Project ID automatically!
- The Job ID has to be entered and saved manually - or dedicated BARCODE scanned!
- The substrate has to be measured - the system can check it (if defined in the Project). Until the substrate is unchanged there is no need to remeasure it during the session.
Trigger Single Measurement
Typical QC Check measurement
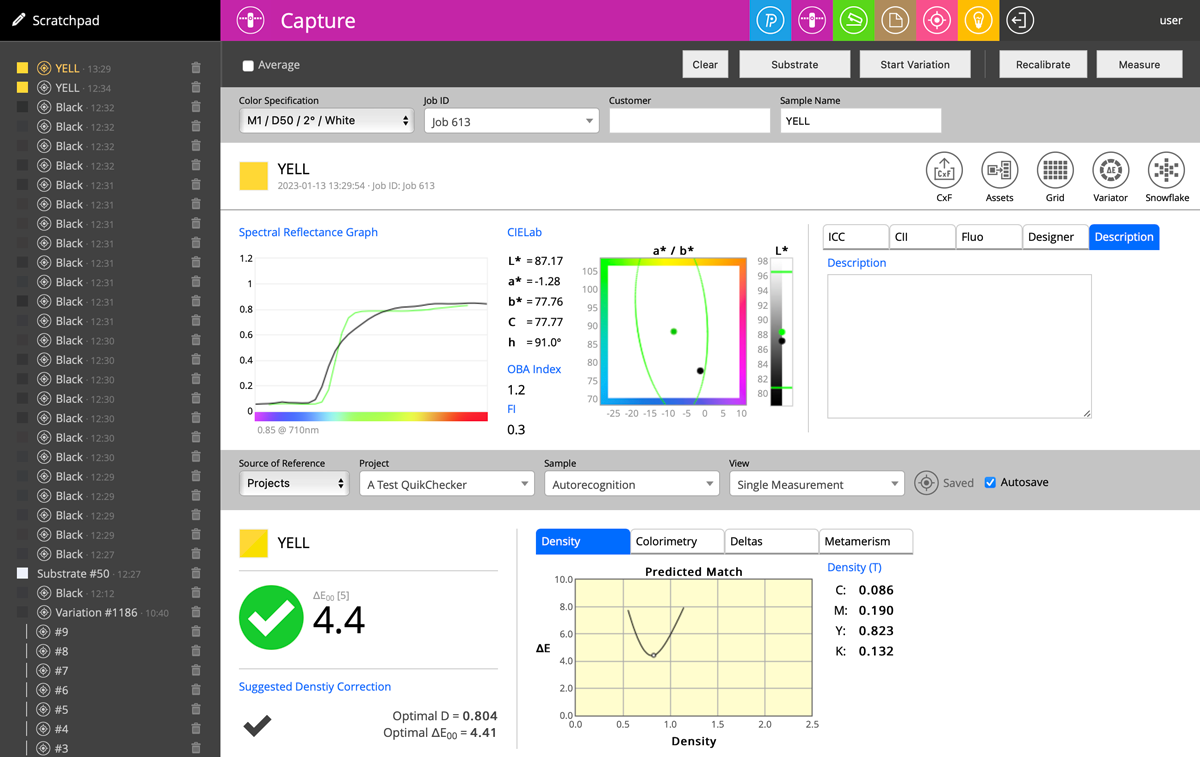
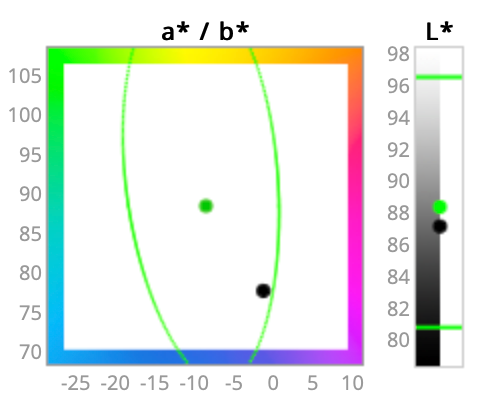
The Operator sees it PASS criteria, and Lab Graph is showing measurement (black point) to tolerance (green lines). T
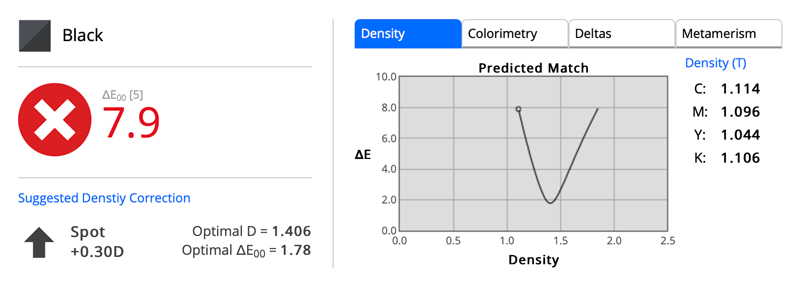
Additionally, thanks to substrate measurement - density prediction can be useful for a potential correction.
The Description tab in Measurement Report enables an optional comment on the measurement.
Auto-save enabled keeps data in the database without additional Operator intervention. But if measurement is made improper - can be deleted (trashcan icon on Scratchpad) - this action deletes measurement from the server and can't be undone.
The Operator may see previous measurements for this project - even made on different printers by another Operator in any range of time. The only limitation is 500 measurements at the time.
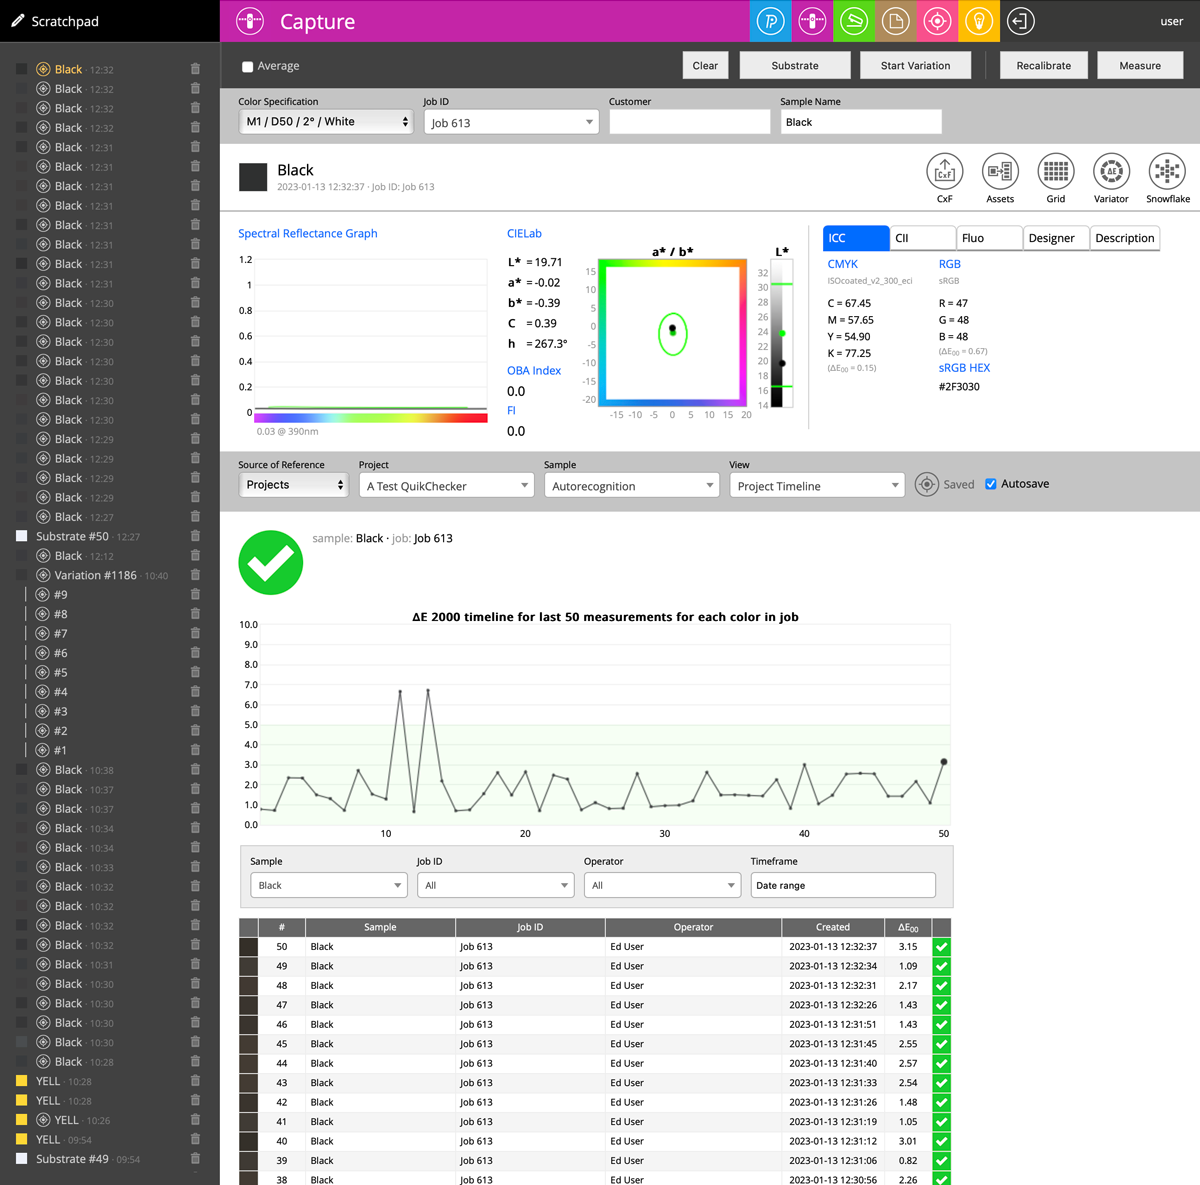
Filters help to adopt a timeline to expectations (multiply colors possible)
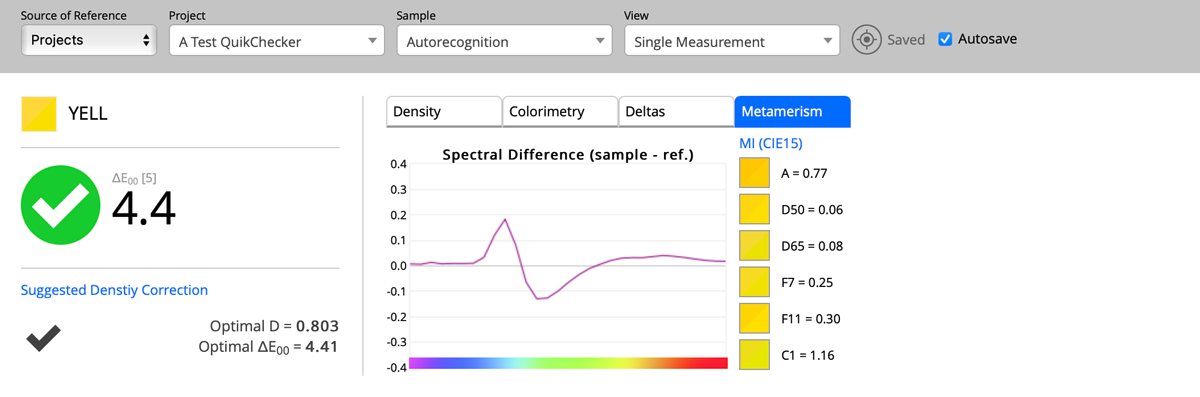
The Operator by changing the tab can see potential Metamerism issue,
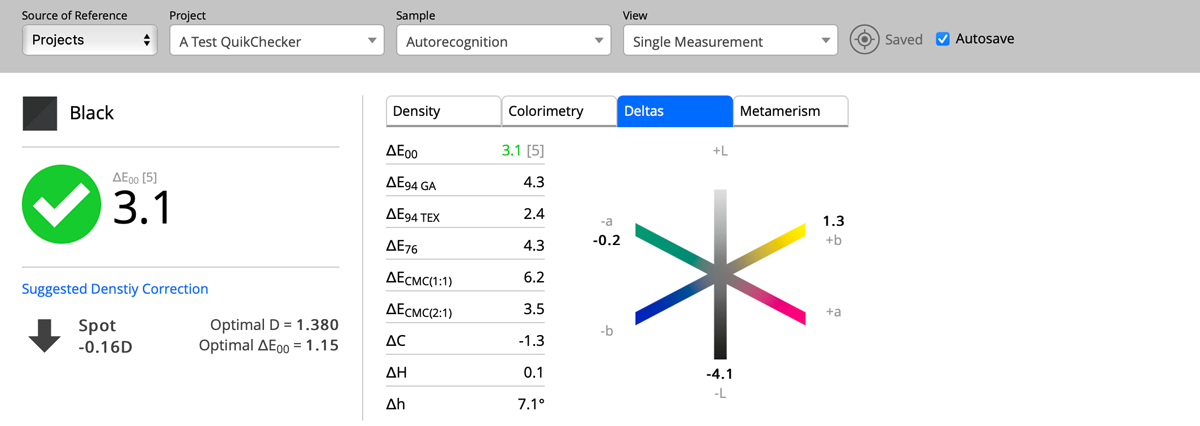
evaluate Deltas:
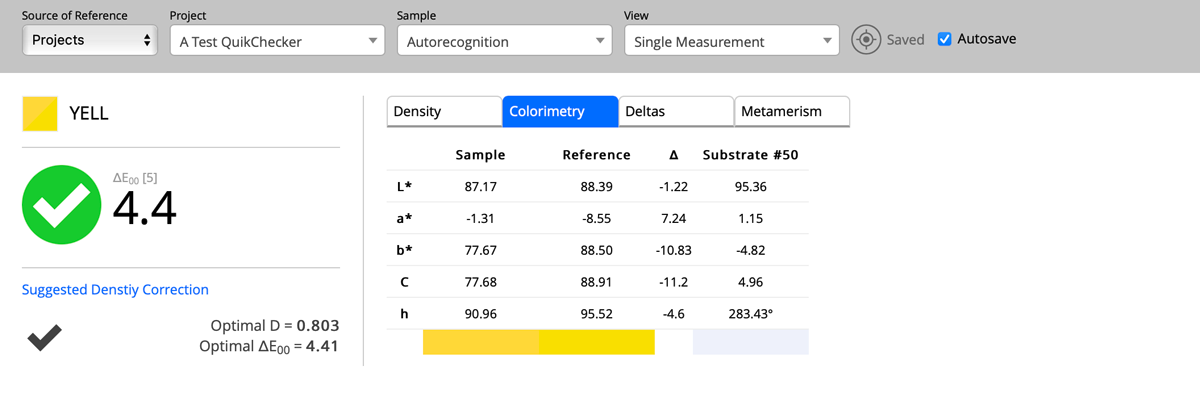
or Colorimetry.
Defining Projects
To use Projects - you need to define them on the server ( Expert account on the website).
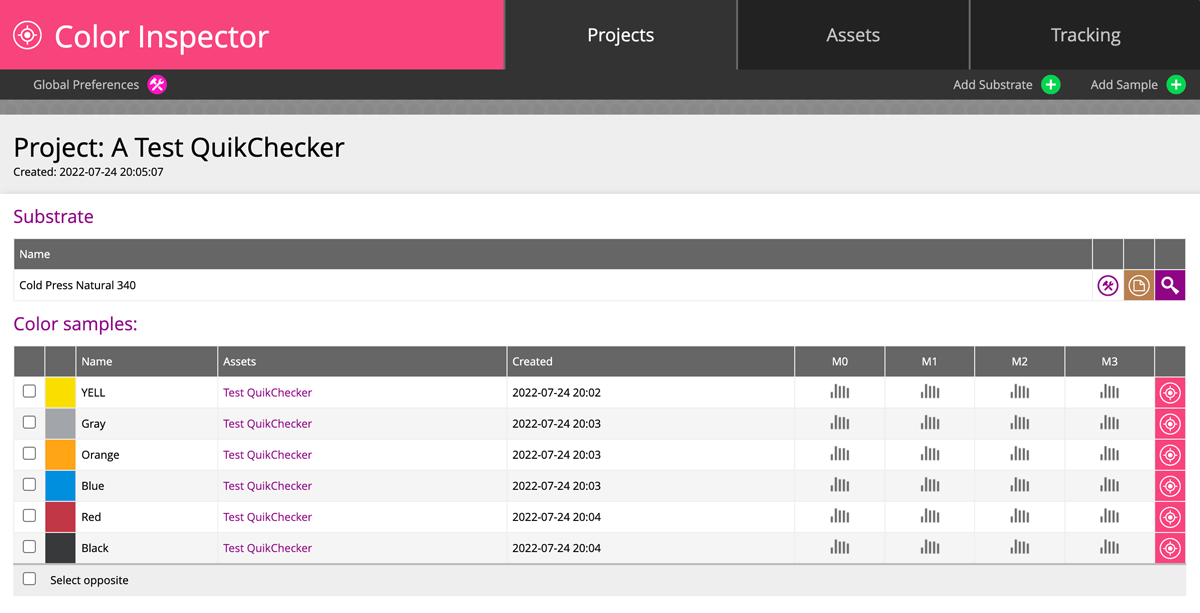
In Color Inspector go to
and create a new one. Finally, it can look like this:
Contact ChromaChecker Support
Additional information and Support Form is available for logged users.