Trial - Getting Started — Benchmark Self-Audit (CC-84)
 |
This QuickStart procedure can be performed without an active ChromaChecker account. This capability is provided for demonstration purposes only and can be terminated at any time. CC Capture is G7® Certified. To use this tool in production requires a subscription. |
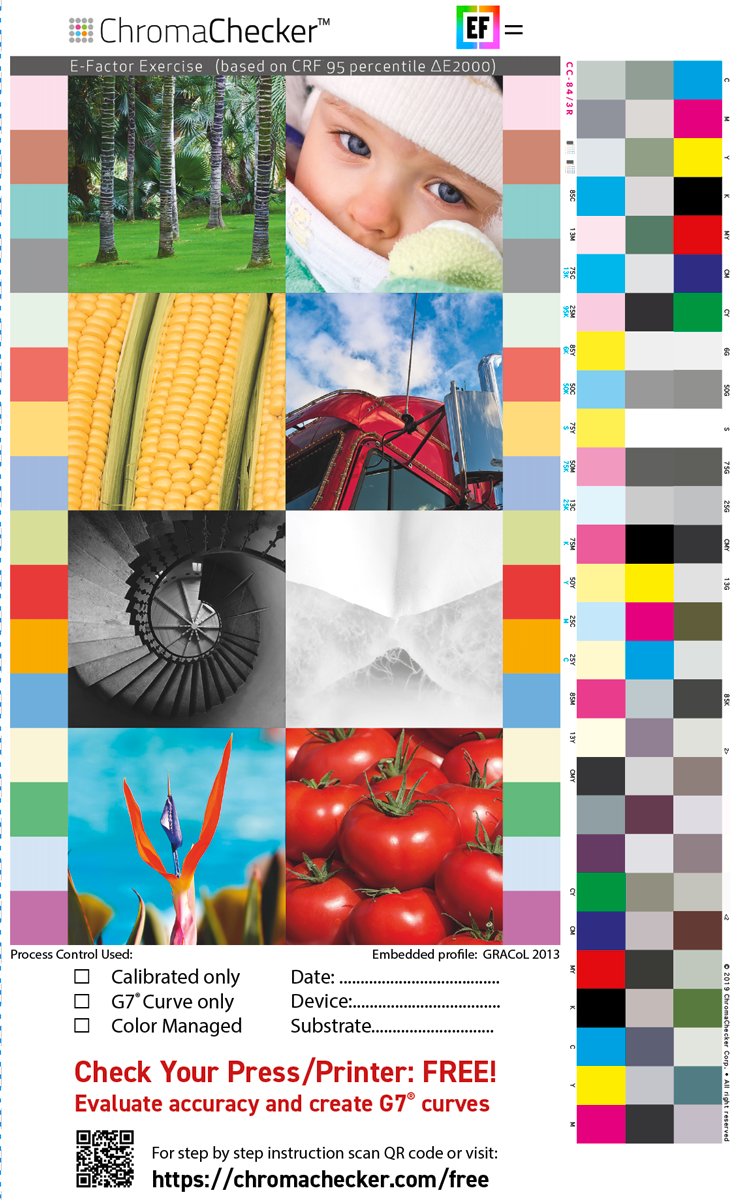
1. Download the PDF and print it on your Printer
(PDF attached on the bottom of this page)
You may print this file using various printer settings and see which setting is most accurate to GRACoL. If so, don't forget to document the settings for each printout. Typical settings are:
- Calibrated only
- G7 Curves
- Color Managed (ICC)
Also, combinations of the above settings are possible. We advise testing all settings that are easily accessible.
2. Download CC Capture, connect a supported Instrument
You may select the Mac or Windows version. If you find any problem, please check the troubleshooting guidelines
3. Launch the CC Capture application
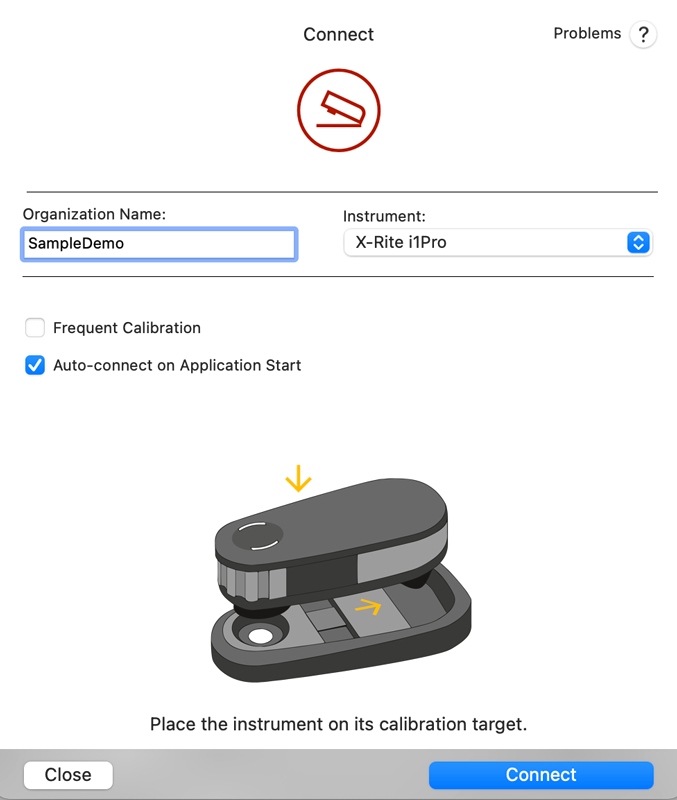
At this stage, enter the Organization Name - the name used when registering for your ChromaChecker account. If you have not registered yet, use the Trial Account by selecting the trial radial button; it will automatically enter: Trial. You can select the instrument type (in the following example, it is X-Rite i1Pro).
Note: If you already have a spectral data file and want to evaluate it, use the trial upload to test the file format and review the results. It's fantastic for comparing existing data files.
4. Log in with the operator's credentials
The application should go to the Operator's login page where credentials have to be entered. If you have registered your own ChromaChecker account, use the operator credentials that you defined within Accountability Inspector; if not, then use Trial credentials DefaultOperator/DefaultOperator.
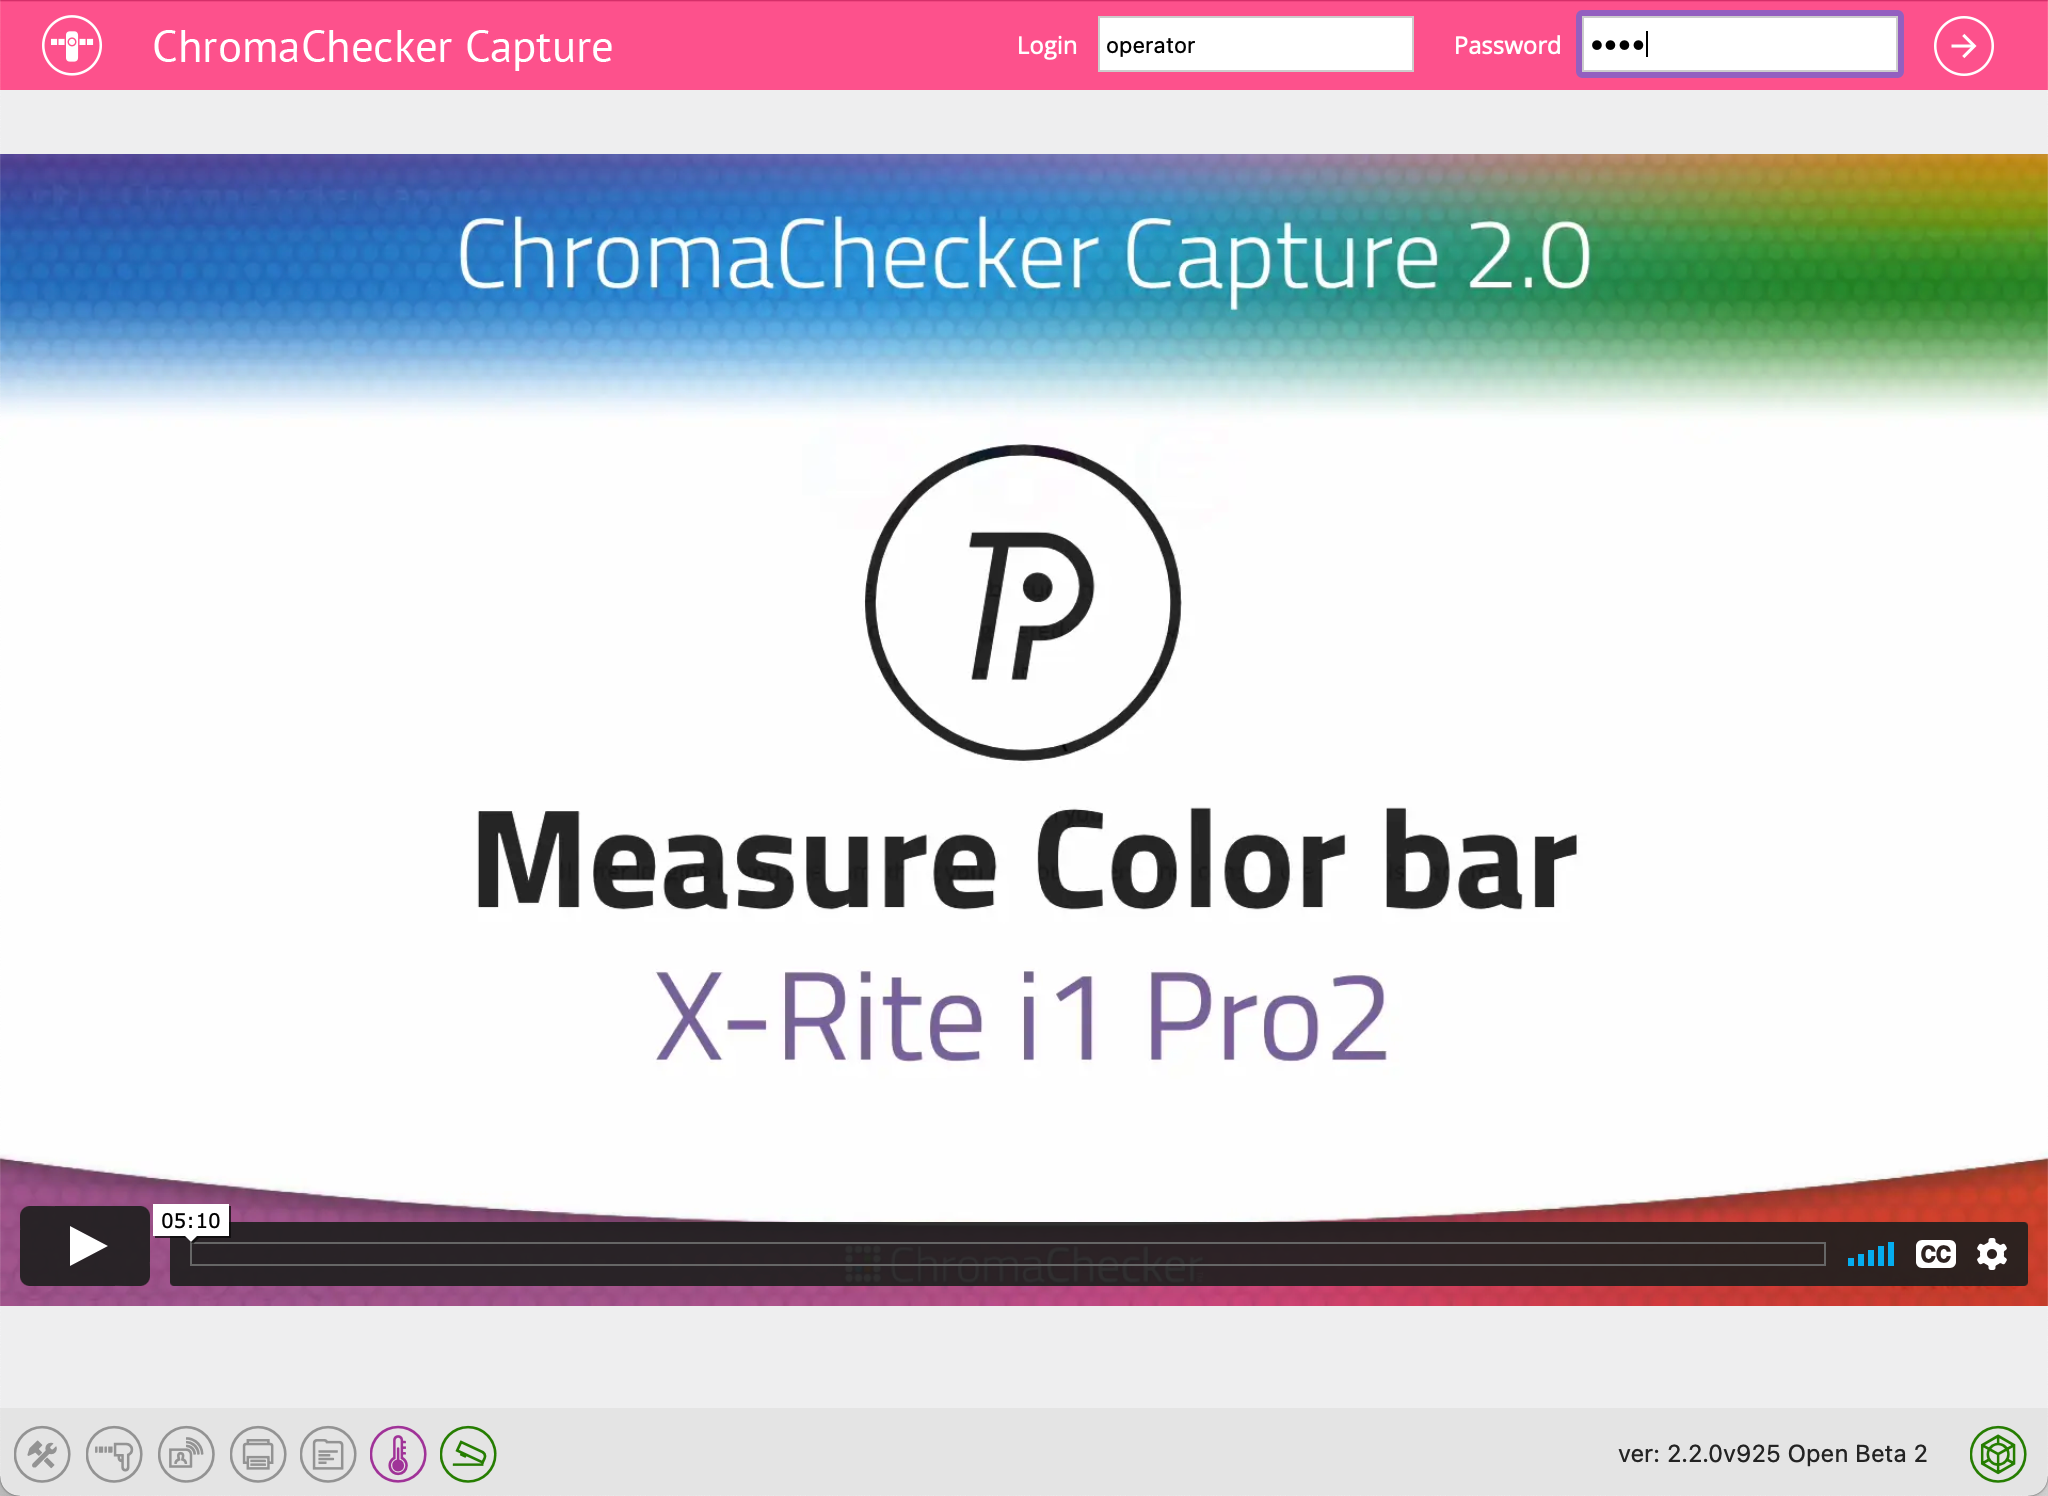
SampleDemo account test credentials:
Login: Operator
Password: user
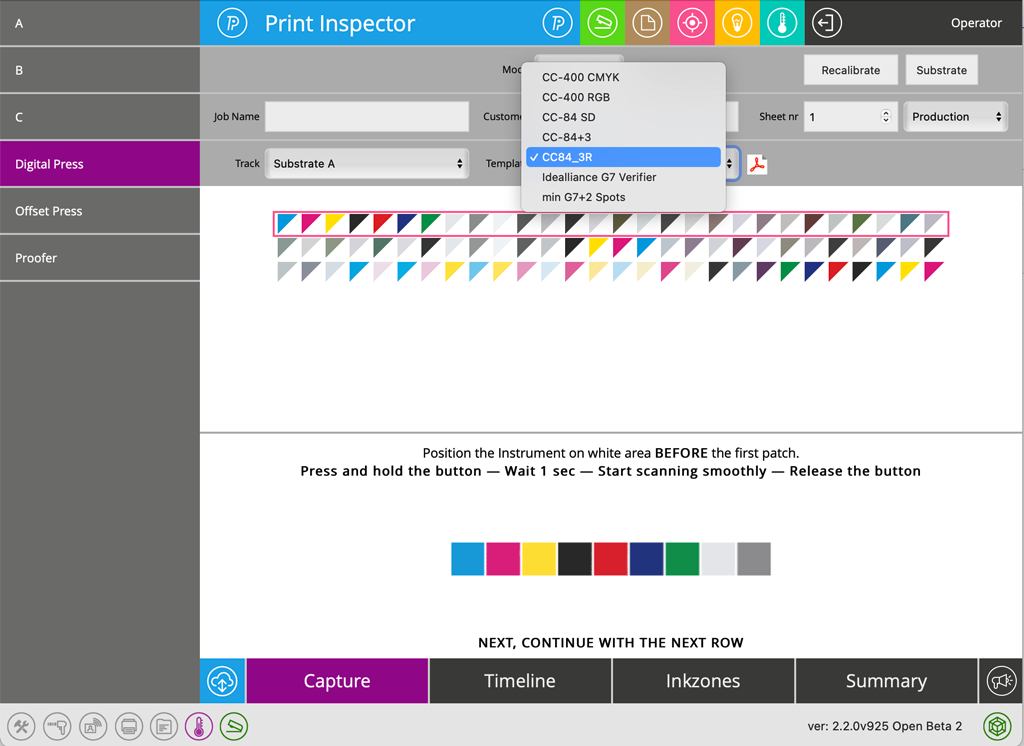
5. Set up the application
The user has to select the following:
- Printer (left column) - in this example selected device is labeled "Digital Press"
- Track - Choose one of three substrates:
- Substrate A will assess to a 5 E-Factor to GRACoL and will generate a G7 Curve in CGATs format
- Substrate B will assess G7 Gray compliance and will generate a G7 Curve in HP LUT format
- Substrate C will not pass or fail measurement, just report accuracy, and will generate a G7 in EFI VCC
- Template - for just printed control strip with the corresponding name on the list is "CC-84_3R"
By selecting a specific printer, the measurement data will populate into that printer allowing for tracking the consistency and accuracy of the printing device.
6. Scan Control Strip
Please watch the attached video (login page) to learn how to operate your instrument and follow on-screen instructions.
7. Read the Report
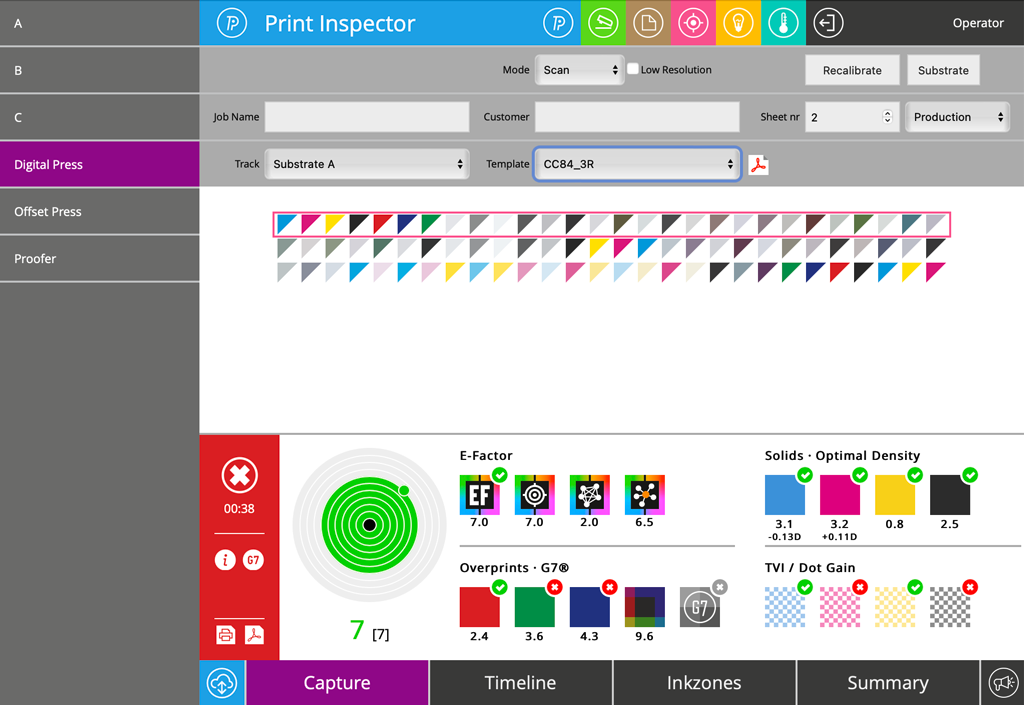
We see that it passes E-Factor criteria but fails some specific detailed requirements (defined by Tolerance Set, which is customizable)
8. Create G7 Curves
By clicking the G7 icon (on the RED background), you can create a G7 Calibration correction curve.
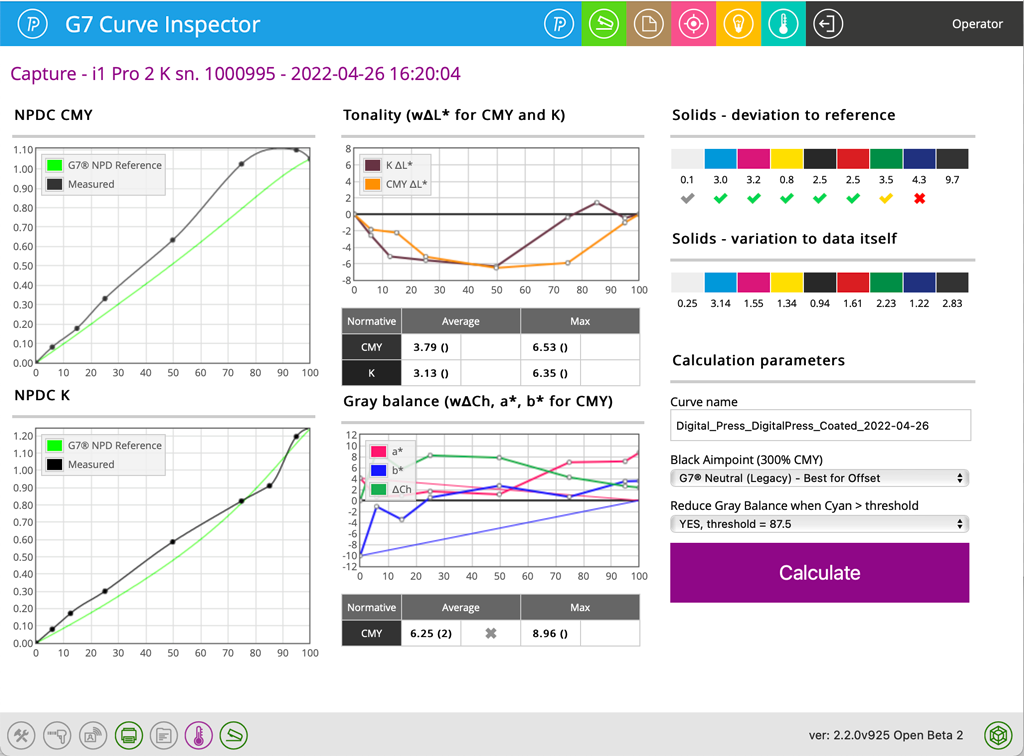
To get the curve file to download, select the download folder icon from the bottom left side of the screen (third icon from the right) to configure where you want your curve correction file downloaded.
9. Judge data quality - qualify for Curve generation
In the above example, the Blue overprint is out of specification, and curves will not fix this; you may consider building an ICC Profile to fix the blue overprint. Additionally, we can see that the cyan solid has a fairly large delta E variation = 3.14, but conditionally, we can accept it and create curves by clicking the "Calculate" button. You may need to perform maintenance to improve within sheet variation of the printer before building a curve or profile.
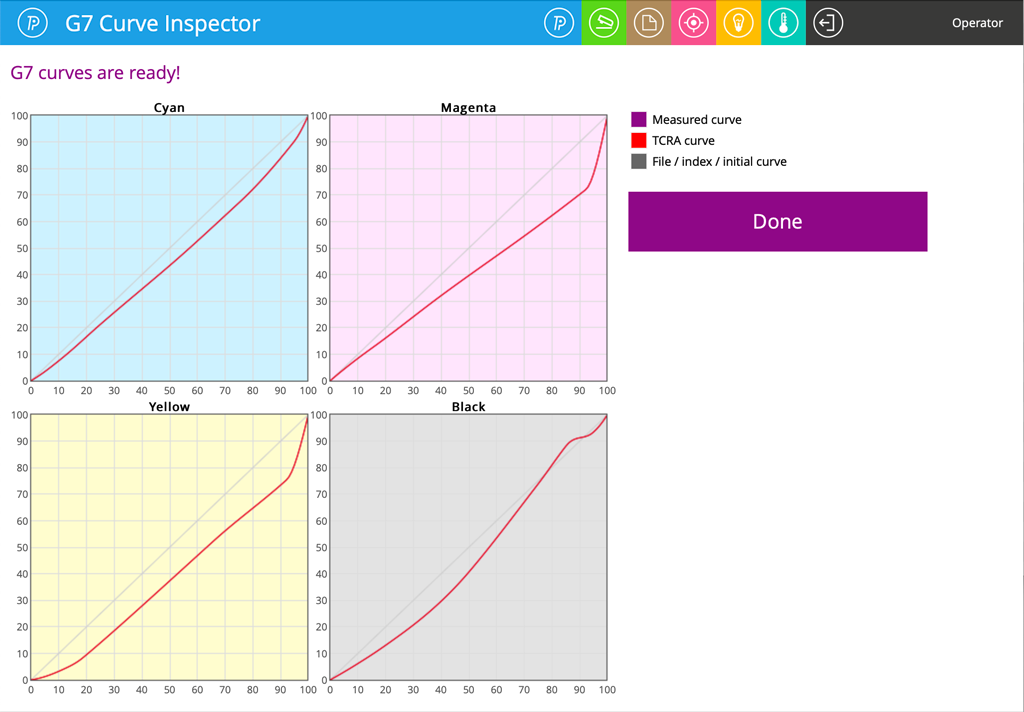
10. Save Calibration curves - install them in your Printing System
Each print track preference can define a different curve file format based on the user's workflow. This ensures that the proper curve will be delivered - the user may specify the default folder where calibration curves are saved.
Apply G7 Calibration, print PDF again, and measure CC-84. Compare before and after!
NOTES
Pocket Instruments users
If you are using NIX Spectro 2, Variable Spectro 1, or i1Pro3 Plus - print the target to be scaled up by at least 150-200%. These instruments require larger patch sizes to be measured properly.
X-Rite iSis users
Please use iSis compatible functional equivalent.
PDFs
Related Topics
Contact ChromaChecker Support
Additional information and Support Form is available for logged users.