Printing with Adobe Photoshop (RGB Printer)
Adobe Photoshop users can use Adobe Color Engine and the advanced print option implemented.
Preparatory activities
1. Create RGB Printer Profile
To take advantage of this feature start with the ICC Profile creation, that characterized your Printer/Substrate configuration. Don't forget to save your printer preset so exactly the same setting can be applied during profiled printing. Any mistake can ruin the final result. Use CC-400 RGB to create it. If you require a more accurate profile - use a chart with more patches.
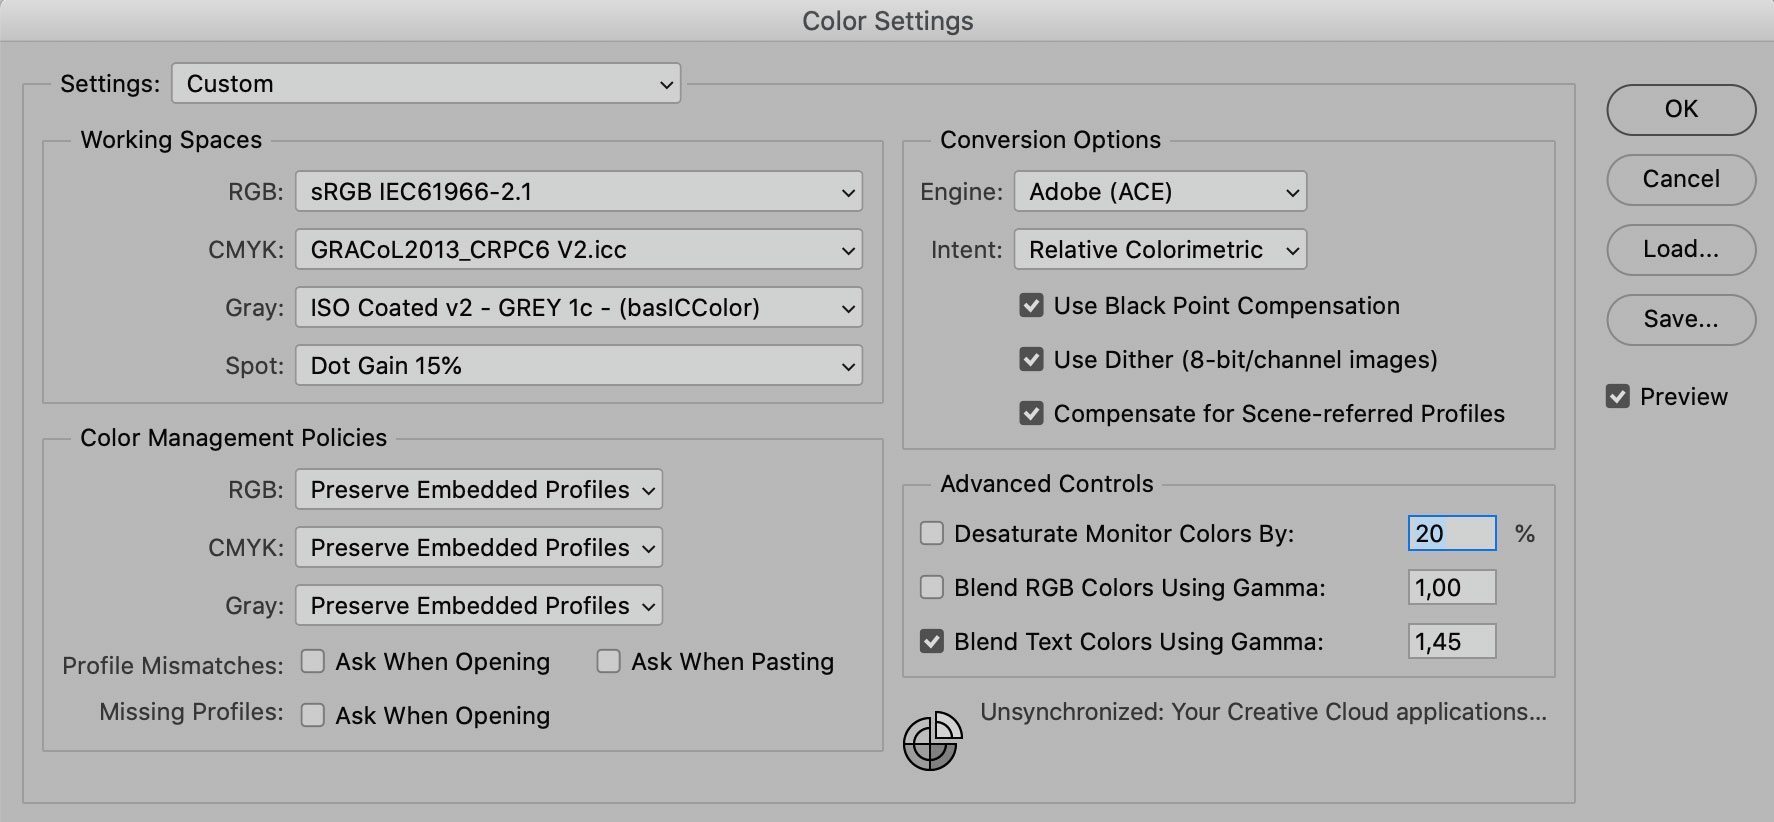
2. Check your Color Settings
Be sure that your working spaces are defined properly. If you are working with a CMYK-based task select the profile that describes final print conditions (ICC Profile). In the following case, for CMYK Working Space a GRACoL2013_CRPC6V2.icc is selected — standard offset printing on coated paper.
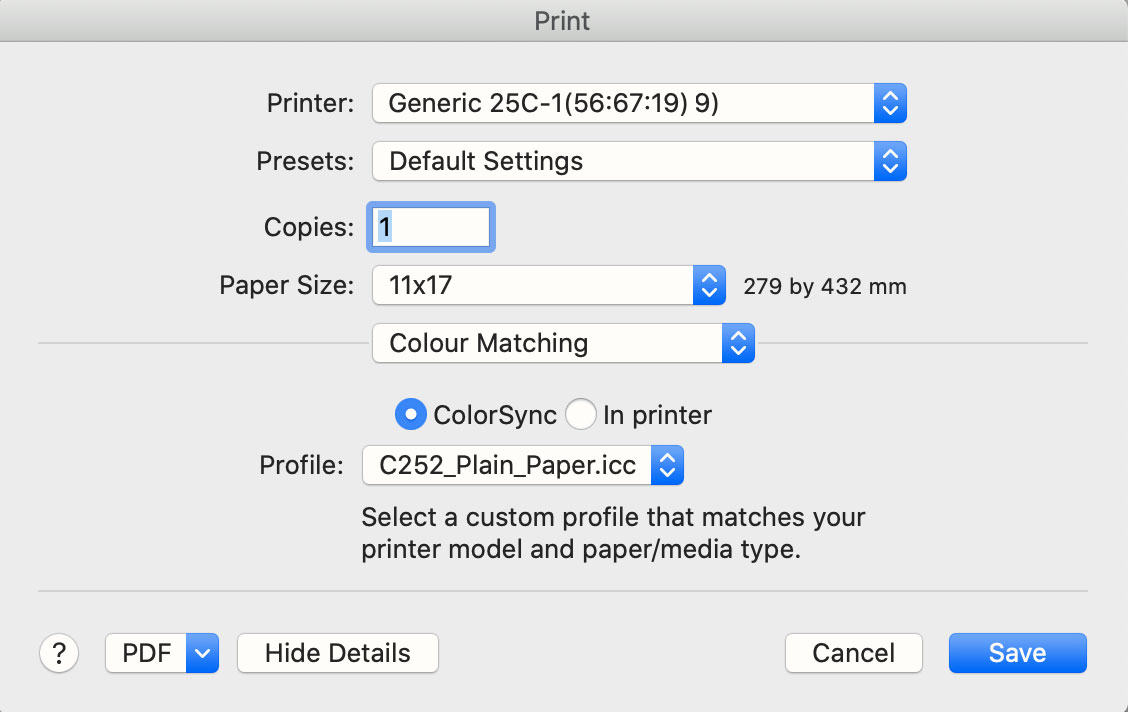
3. Open your job and invoke the "Print" dialog window.
Select your printer, paper size, and all printer-specific properties described by the preset that you saved during profiling.
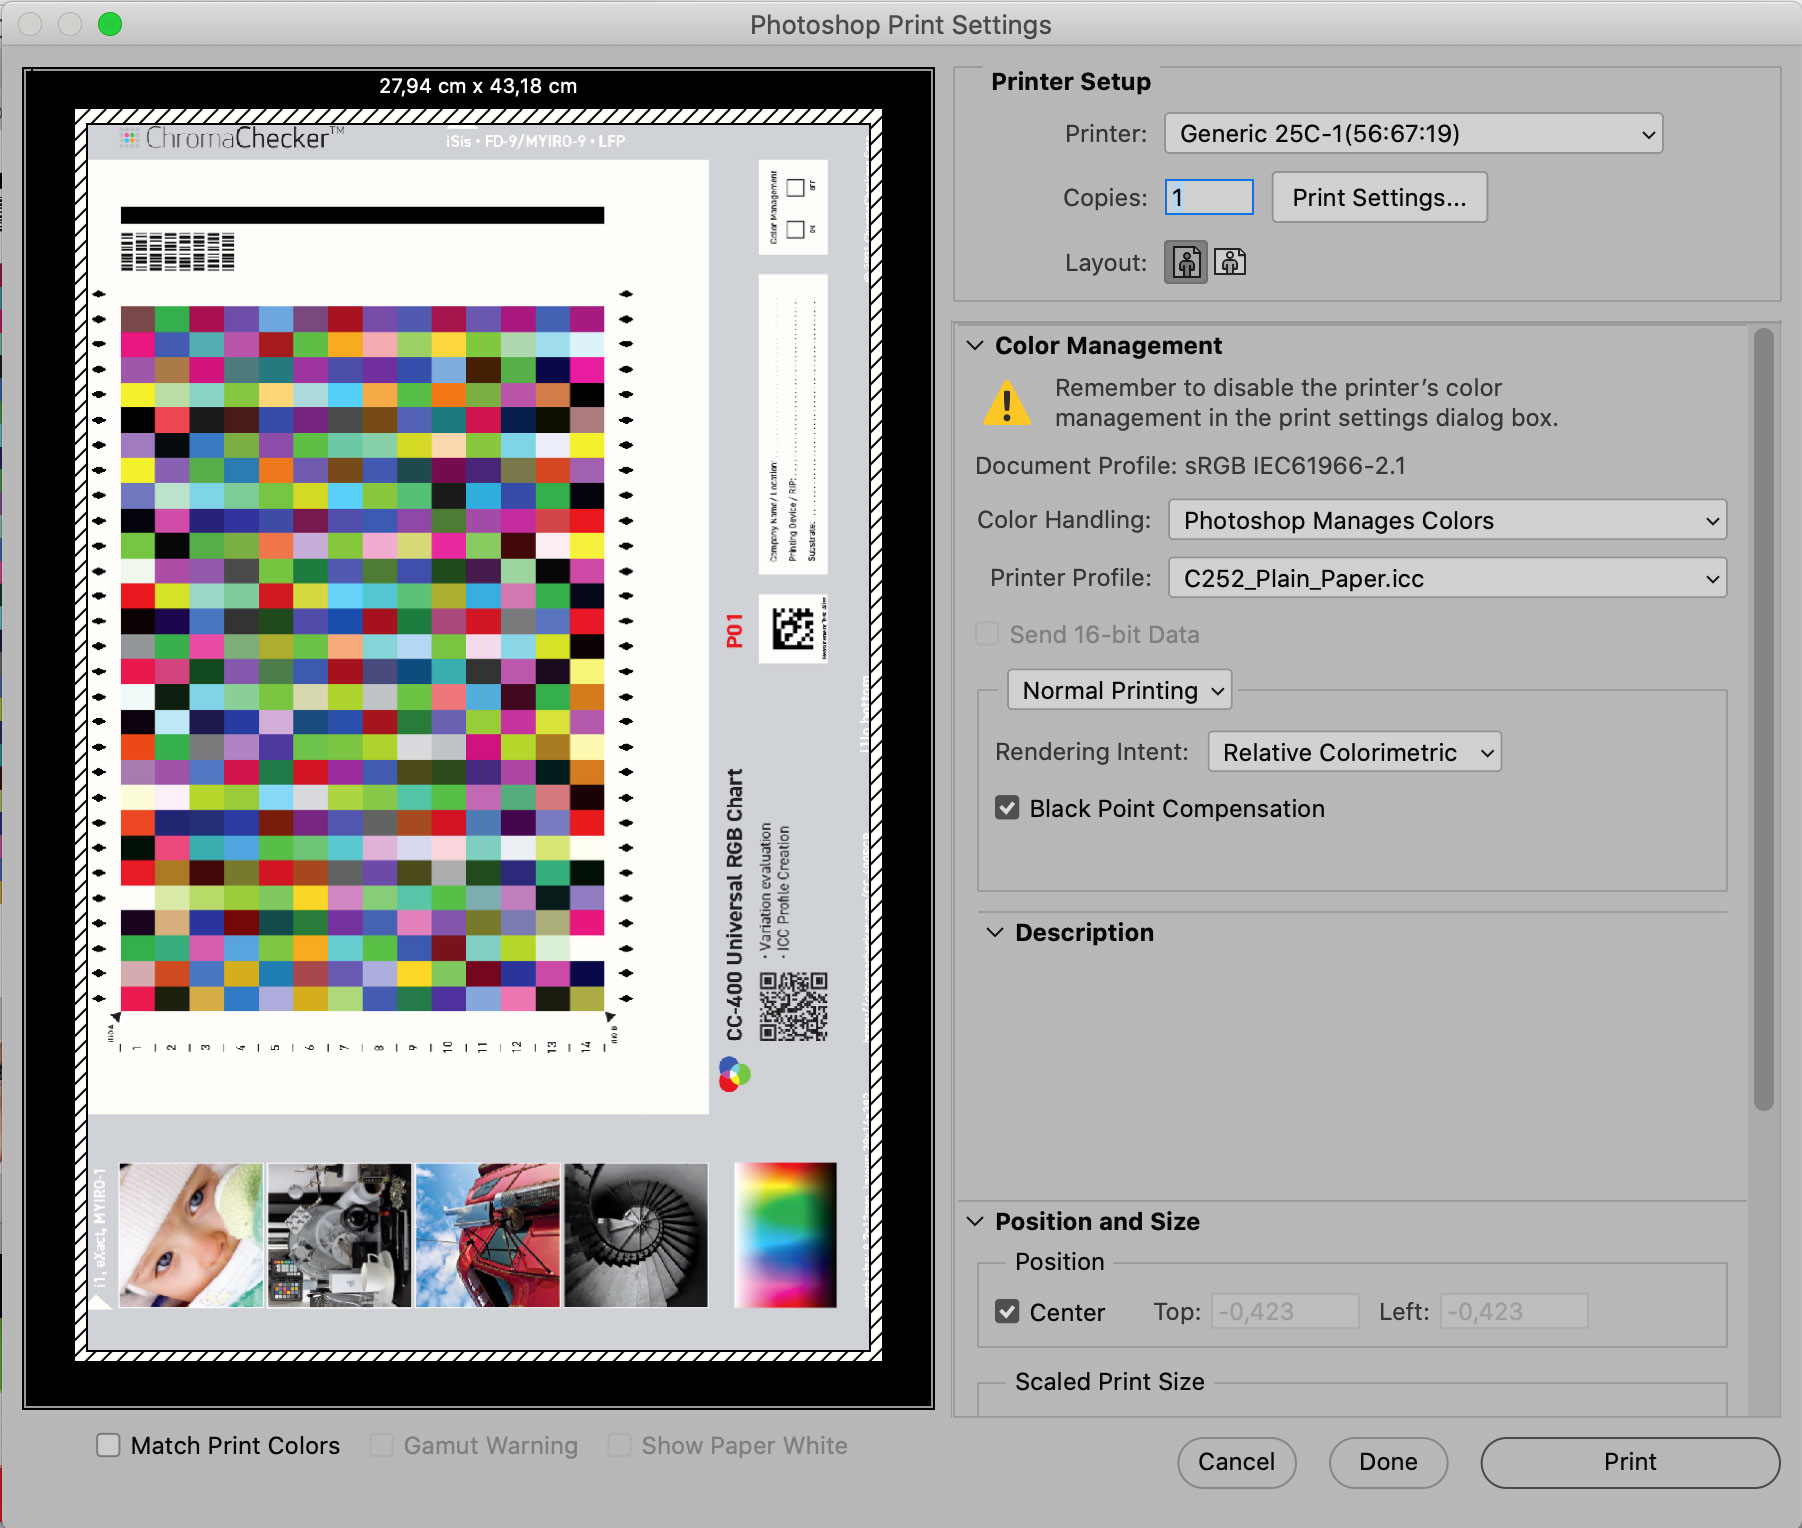
4. In Color Management Window
Set Color Handling: Photoshop Manages Colors, then point your Printer RGB ICC profile - in the following case C252_Plain_Plaper.icc
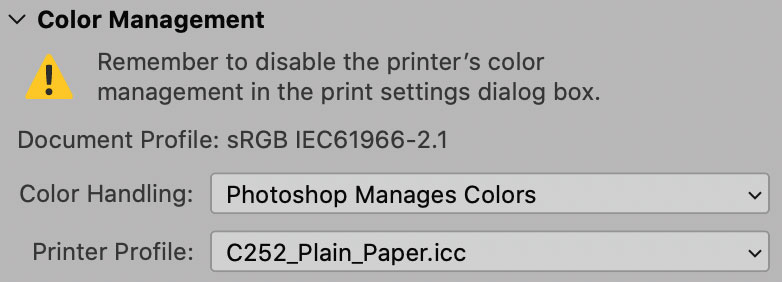
5. Be sure to disable the printer's color in the print settings dialog box
Adobe Print Settings
This is a moment when the user has to determine the goal. This is critical to understand a few terms that have an influence on the final result.
- Relative Colorimetric Rendering Intent
- Absolute Colorimetric Rendering Intent
- Perceptual Rendering Intent
- Saturation Rendering Intent
- Black Point Compensation
- Simulate Paper Color
- Simulate Black Ink
Photoshop offers some basic explanations - place cursor over and read comment displayed in a "Description" window
To make printing easier Photoshop offers two presets: Normal Printing and Hard Proofing
Printing Photographs - Normal Printing
Relative Rendering Intent.
If the gamut of the picture is not extremely larger than the printer gamut the user may want to select Relative Rendering Intent. Most of the colors will try to match colorimetrical coordinates, but the paper will not. For paper and highlights white point will be adopted to the shade of substrate used for the printing. It brings the best color match from a practical point of view - the white is adopted but it looks very natural and most colors are as close as possible
Perceptual Rendering Intent.
If your printer/substrate gamut is visibly smaller than your picture or you are not taking care of colorimetrical coordinates a Percutual Rendering Intent may produce nice-looking prints focused on internal color relationships.
Hard Proofs
To print proof according to ISO12647-2 it is important to find substrate that in the best way represents simulated print conditions. Substrate Inspector offers functionality that helps this. If you need to certify your proof we recommend adding to the page a dedicated control strip - e.g. Idealliance Color Wedge.

If your simulation space (Proofing Profile) is the same as Photoshop Working Space :
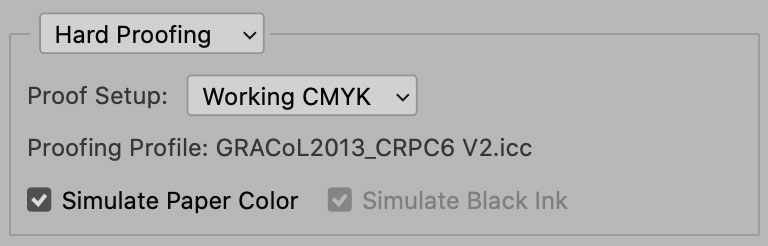
if not, select another profile in the Proof Setup dialog box
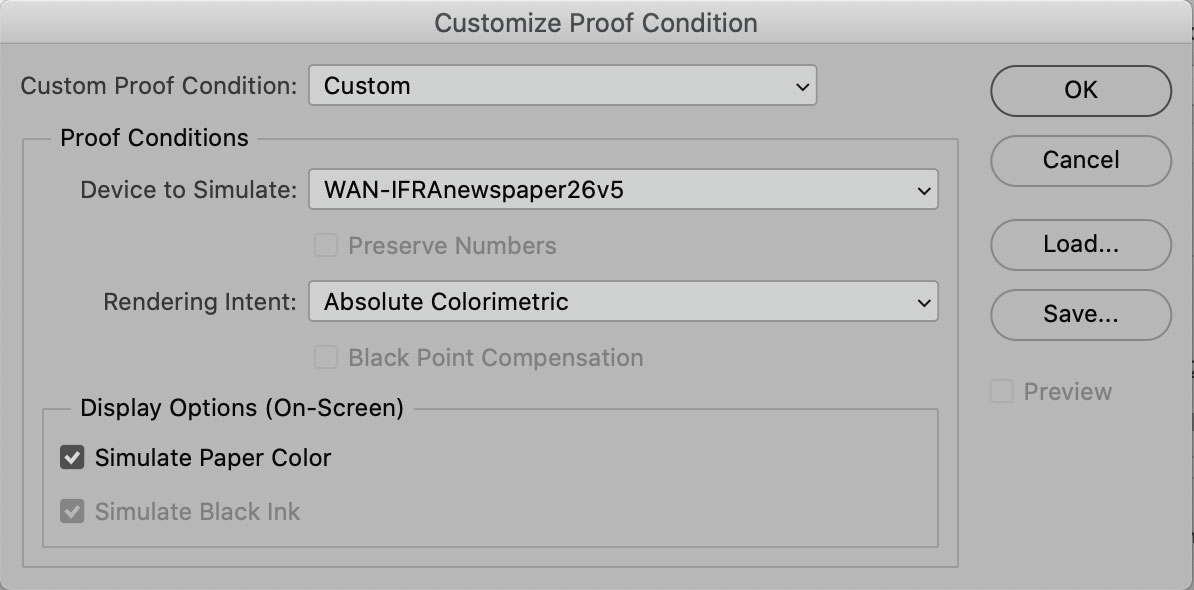
It is important to set Absolute Colorimetric Rendering Intent and check Simulate Paper color option.
Please note
To efficiently Simulate Paper Color proofing substrate has to be brighter than the simulated one. Simulation means printing "white" and understanding this is a key to hard-proofing.
Contact ChromaChecker Support
Additional information and Support Form is available for logged users.