Basic CC Uploader configuration
1. Launch CC Uploader (download if required)

After installation of CC Uploader software, you will want to identify the folder where measurement data is stored. To connect to the ChromaChecker cloud we use SOAP credentials that are configured in the administration area of Chromachecker.
Click here for the SOAP Account (You have to be logged in)
2. Click on Preferences to open the Admin Window.
In the SOAP Connection section enter your SOAP Credentials and click the "Check and Connect" button. That should check your Subscription Status (on the top).
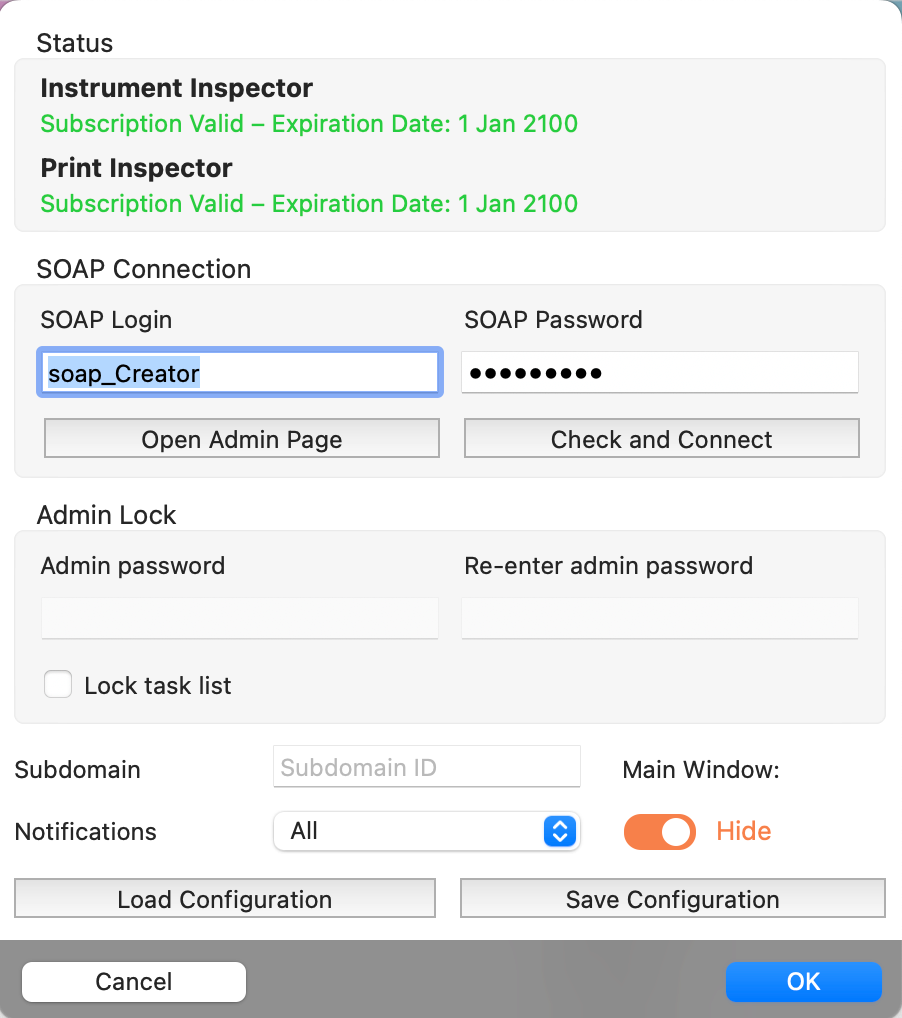
- Please notice that in this Window it is also possible to Lock Admin Window with the password - so no changes can be made without authorization.
- Another useful option is to Save Configuration to the file that can be used for the potential need for the "Load Configuration" feature - this file will keep all tasks and other settings for archive purposes).
- Main Window can be hidden if not required.
3. Click on the "plus" button to add a new task (top-right corner)
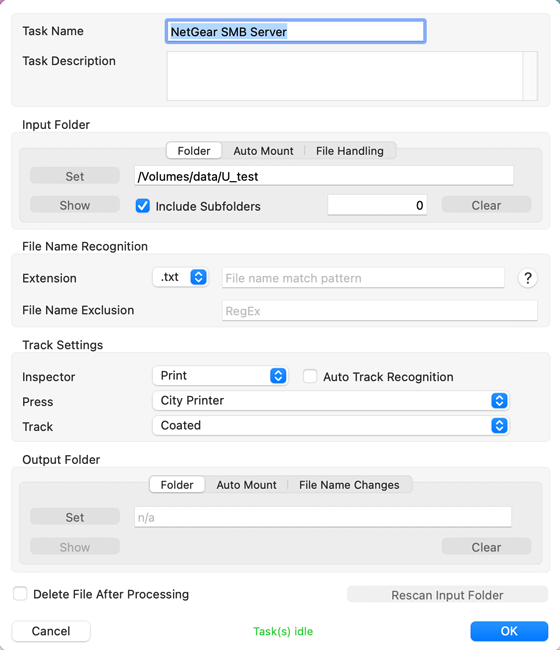
This is the most complex procedure — task configuration. The user has to define at least
- Where files to upload are located - select Input Folder
- What kind of files application should search for (file extension, how-to filter file name)
- What is the destination ( Inspector, Device, Track...)
Additionally,
- After upload file can be deleted or copied into the selected Output Folder and renamed.
- Folders located in the local network can be Auto-Mounted to make the system able to relaunch after accidental disconnections.
- Each task has its name but also some optional description if required
In this example, a remote SMB Server is connected - but of course, the localhost folder can be used also.
In the local network, on the remote server create a user account, set the password for this user, create a Sharepoint, and assign privileges (consult your server documentation).
In this example:
Server Input Folder: /Volumes/data/U_test
and in Auto-Mount Tab: smb://White._smb._tcp.local/data/U_test + server user name + password
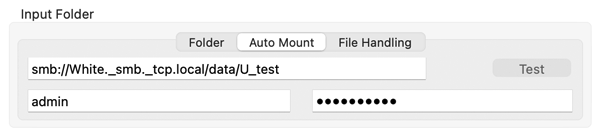
Use the "Test" button to confirm that all components of the server connection are properly defined.
Decide how you want to split data into different tracks. You have to create tracks in your Print Inspector that corresponds to different print condition. By default, CC creates two different tracks called "Coated" and "Uncoated" for two basic substrates.
Now you have to find the method that will filter data. If we are saving measurements created by third-party applications we can create two separate folders and call them Coated and Uncoated. In this scenario, we need to create two tasks in CC Uploader - one that will send all measurements from Coated subfolder to Coated track in Print Inspector and repeat a similar link for Uncoated.
If measurements are stored by the measurement system in one fodder -we need to involve a more sophisticated solution based on wildcard selection. This scenario is described here.
4. Optionally configure the additional task.
Please note that for every single file filtering rule a separate task is required (e.g. one for Coated, one for Uncoated). All tasks are visible in the main application window. One Instance of uploader may cover more than one device, and search for files in the entire local network.
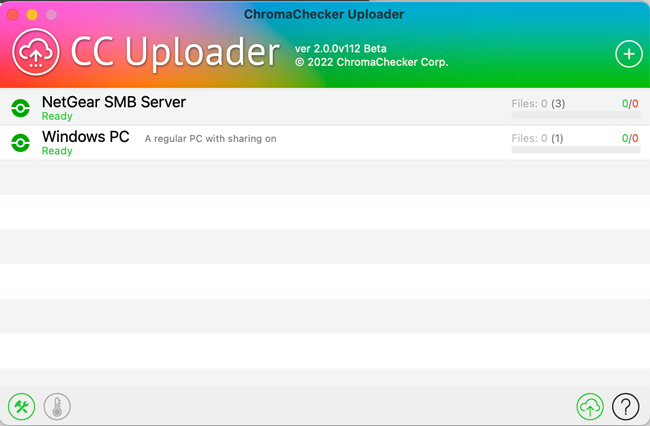
Each line represents a single task - a green Icon is showing connection Status.
The Left Status Icon shows the Folder connection, on the right-side number of files to upload/successfully uploaded are listed.
5. "System Log" Window can show all uploads history.
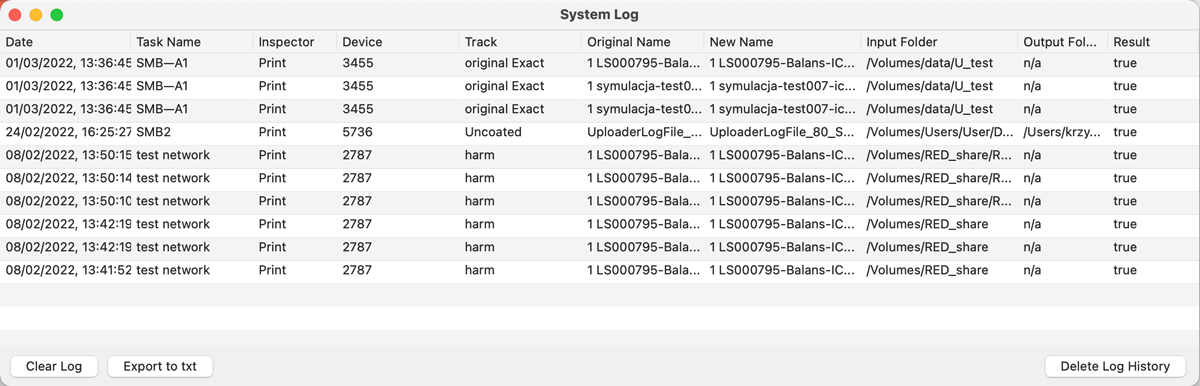
The list can be exported to the TXT file.
An Issue? — check Uploader troubleshooting
Contact ChromaChecker Support
Additional information and Support Form is available for logged users.