i1 Pro 2
![]() Launch X-Rite™ i1Profiler software. This software can be used in demo mode for data capture.
Launch X-Rite™ i1Profiler software. This software can be used in demo mode for data capture.
Download this software free from X-Rite web site: www.xrite.com
Switch software from Basic to Advanced mode.
![]() Connect your instrument to the computer.
Connect your instrument to the computer.
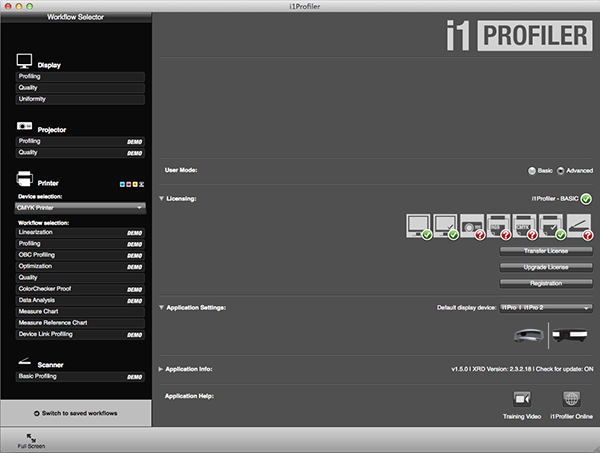
![]() Under the "Printer" section, make sure "CMYK Printer" is selected in pop up menu. Then select "Measure Chart" in CMYK Printer section.
Under the "Printer" section, make sure "CMYK Printer" is selected in pop up menu. Then select "Measure Chart" in CMYK Printer section.
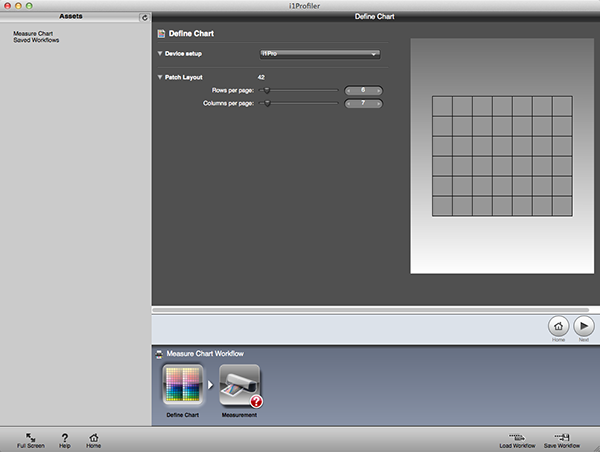
![]() Select your instrument (Device setup)
Select your instrument (Device setup)
![]() Define Patch Layout as follows:
Define Patch Layout as follows:
Rows per page: 6
Columns per page: 7
![]() Set measurement Mode to Dual scan (M0, M1, M2 and OBC)
Set measurement Mode to Dual scan (M0, M1, M2 and OBC)
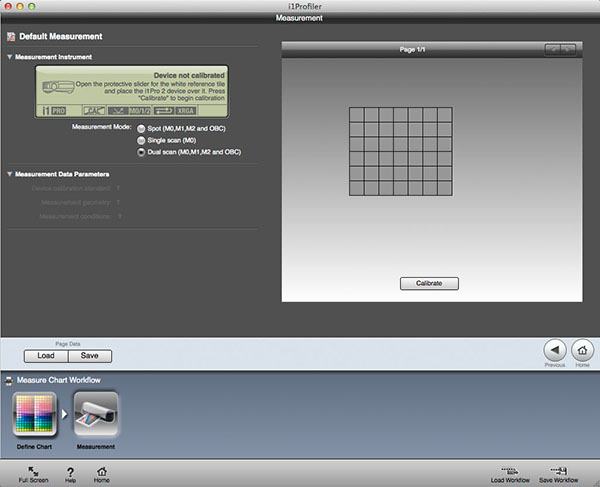
![]() Place instrument on the calibration plate and calibrate it (press "Calibrate" button).
Place instrument on the calibration plate and calibrate it (press "Calibrate" button).
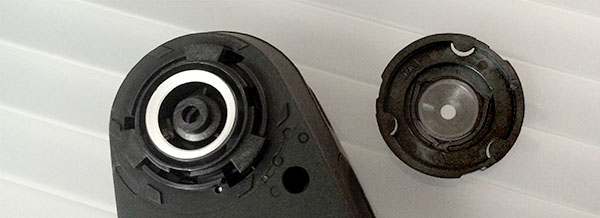
![]() Remember to clean calibration plate (ceramic tile) before calibration. Be sure that instrument is not very cold or hot (store it in its recommended temperature). Check if optical patch is free of artifacts and dust. Carefully clean glass if necessary:
Remember to clean calibration plate (ceramic tile) before calibration. Be sure that instrument is not very cold or hot (store it in its recommended temperature). Check if optical patch is free of artifacts and dust. Carefully clean glass if necessary:
Proper calibration procedure has a very strong influence on the measurement results.
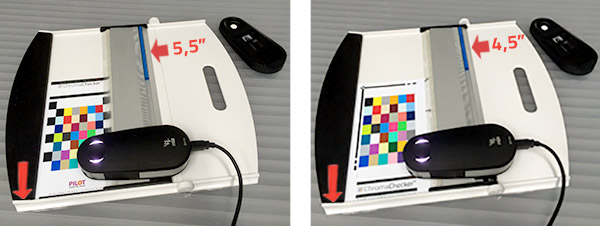
![]() Place Target on instrument ruler.
Place Target on instrument ruler.
Depending which target you are going to use follow instructions bellow:
X-42 B-42
Red arrows show recommended alignment of target and placement of stop sticks. BothTargets should be placed on the bottom but recommended stop stick length is different.
![]() We recommend using a stop stick (blue element placed on the ruler). Made of plastic tube or any other material to help limit movement of spectrophotometer. For i1 Pro and X-42 target length of this stop should be around 5.5" (140 mm). Make the stop stick yourself as it is not delivered with target.
We recommend using a stop stick (blue element placed on the ruler). Made of plastic tube or any other material to help limit movement of spectrophotometer. For i1 Pro and X-42 target length of this stop should be around 5.5" (140 mm). Make the stop stick yourself as it is not delivered with target.
Recommend stop stick for B-42 target has a length of 4.5" (114 mm).
![]() Scan first line - start from BLUE patch on the bottom - to capture M0, M1 and M2 data (recommended). Scan each line twice according to on-screen instructions.
Scan first line - start from BLUE patch on the bottom - to capture M0, M1 and M2 data (recommended). Scan each line twice according to on-screen instructions.
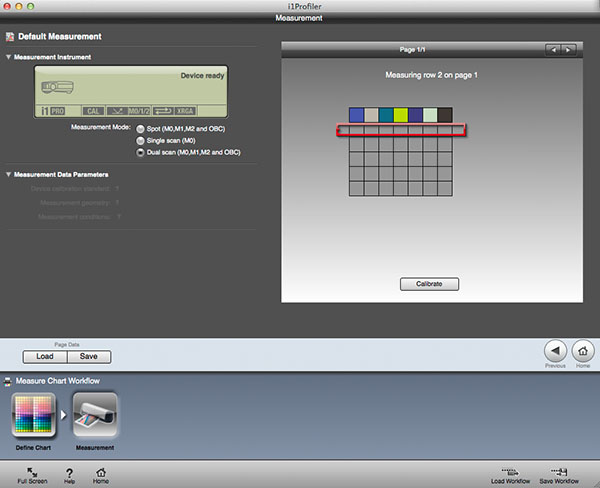
![]() Continue with second line and all following lines until done.
Continue with second line and all following lines until done.
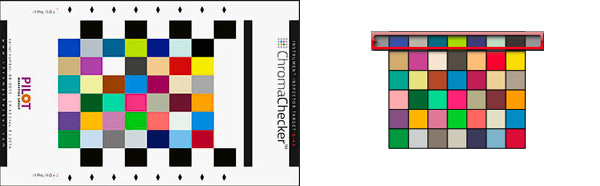
Displayed on screen patch layout shows ChromaChecker Target rotated 90° clockwise.
![]() During scanning slide your instrument slowly, hold it firmly to avoid shaking:
During scanning slide your instrument slowly, hold it firmly to avoid shaking:
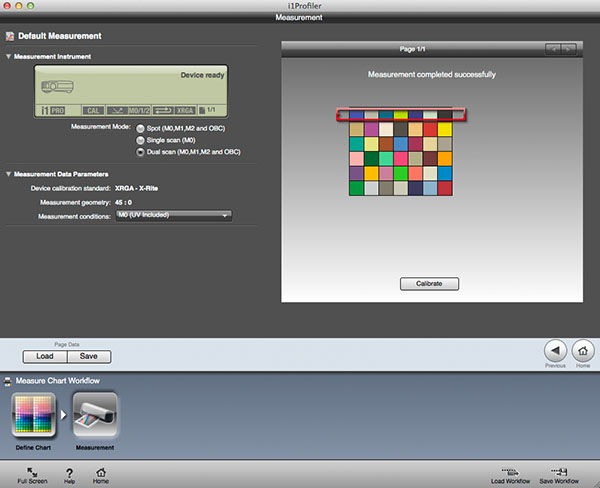
![]() When measurement is completed successfully save CxF file on your hard drive. Your data is ready for upload.
When measurement is completed successfully save CxF file on your hard drive. Your data is ready for upload.
.png)
![]() Upload data to your ChromaChecker account.
Upload data to your ChromaChecker account.
![]() TIPS:
TIPS:
- We recommend warming-up instrument before – simply measure the first line two or three times in a row before continuing to the second line.
- Scanning has to start from white area and stop on white area - using recommended stop stick and suggested positioning on the ruler makes this process easy.
- For multiple measurements, always start by performing a new calibration.
- Check if instruments scratches target - if so clean the bottom on the instrument and if necessary use paper bar to lift ruler slightly up - be careful not to lift it too much.
Instrument Inspector Manual
To use Instrument Inspector one of ChromaChecker™ Instrument Inspector
Targets is required. To buy visit to IDEAlliance
![]()
Instrument Inspector – How does it work?
Why use Instrument Inspector?
Instrument Inspector Target
Baselines and data averaging
How to start-up?
Instrument Inspector menus - how to navigate?
Easy mode / Expert mode
Data sharing
Instrument's comparison
Instrument’s compatibility list
General rules
FAQ
Tricks and Tips
![]()
Supported Instruments – manuals
X-Rite i1 Pro 1
X-Ritei1 Pro 2
X-Rite i1iO
X-Rite iSis
X-Rite DTP-70
X-Rite Intelitrax
X-Rite eXact – manual mode
X-Rite eXact – scan mode
X-Rite 530
X-Rite 939
X-Rite SpectroEye & other from X-Rite
Techkon Instruments
Barbieri instruments