X-Rite DTP-70
![]() To work with X-Rite DTP-70 ChromaChecker™ Instrument Inspector Target X-42 has to be modified first!
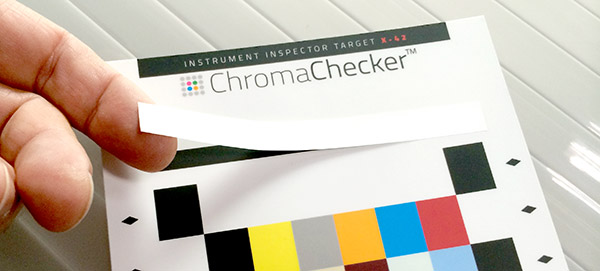
To work with X-Rite DTP-70 ChromaChecker™ Instrument Inspector Target X-42 has to be modified first!
Small rectangle cut of white PVC film (recommended matt) has to be stick to cover black iSis control bar before use. (This piece of film is not provided with target).

![]() To drive instrument X-Rite Color Port 2.0.5
To drive instrument X-Rite Color Port 2.0.5 ![]() has to be installed first and dedicated .xml
has to be installed first and dedicated .xml ![]() file imported by Target Manager or copied manually to:
file imported by Target Manager or copied manually to:
ColorPort_Resources/Refs/RGB Folder in your ColorPort Directory
![]() Before data capturing don't forget to clean built-in calibration standard and set properly measuring condition (instruments knob).
Before data capturing don't forget to clean built-in calibration standard and set properly measuring condition (instruments knob).
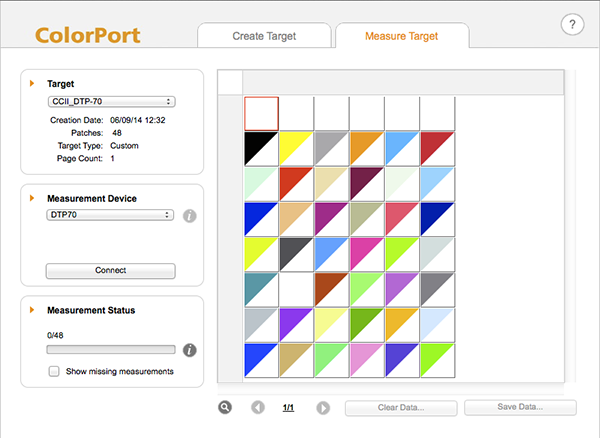
![]() Launch ColorPort, on the Measure Targe tab at top menu.
Launch ColorPort, on the Measure Targe tab at top menu.
![]() Choose the pop up menu under the word: Target and choose the Chromachecker Target
Choose the pop up menu under the word: Target and choose the Chromachecker Target
![]() Make sure the DTP70 is selected under the "Measurement Device" pop up menu, and click on the "Connect" button to establish a connection with instrument
Make sure the DTP70 is selected under the "Measurement Device" pop up menu, and click on the "Connect" button to establish a connection with instrument

![]() Green Light on Instrument should be illuminated, insert target in middle of paper guide and push green button
Green Light on Instrument should be illuminated, insert target in middle of paper guide and push green button
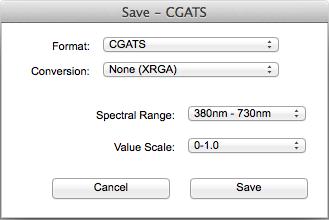
![]() After measurement, Click on Save and Save as XRGA CGATs format as shown bellow:
After measurement, Click on Save and Save as XRGA CGATs format as shown bellow:

Your data are ready for upload. Use naming convention with target serial number.
![]() Upload data to your ChromaChecker account.
Upload data to your ChromaChecker account.
Instrument Inspector Manual
To use Instrument Inspector one of ChromaChecker™ Instrument Inspector
Targets is required. To buy visit to IDEAlliance
![]()
Instrument Inspector – How does it work?
Why use Instrument Inspector?
Instrument Inspector Target
Baselines and data averaging
How to start-up?
Instrument Inspector menus - how to navigate?
Easy mode / Expert mode
Data sharing
Instrument's comparison
Instrument’s compatibility list
General rules
FAQ
Tricks and Tips
![]()
Supported Instruments – manuals
X-Rite i1 Pro 1
X-Ritei1 Pro 2
X-Rite i1iO
X-Rite iSis
X-Rite DTP-70
X-Rite Intelitrax
X-Rite eXact – manual mode
X-Rite eXact – scan mode
X-Rite 530
X-Rite 939
X-Rite SpectroEye & other from X-Rite
Techkon Instruments
Barbieri instruments


